


Kevin K
-
Posts
887 -
Joined
-
Last visited
Content Type
Profiles
Forums
Events
Articles
Marionette
Store
Everything posted by Kevin K
-
@Gal Bart is correct. Really helps us help YOU if you upload the file, or part of it so we can resolve ( or try to) your issues. Too many options to try to explain in text.
-
It can definitely be done….and then some. If you get into trouble, you can always come back and we will have your back 🙂 Most days….that is the beauty of the Forum.
-
@MGuilfoile that is a good point. Perhaps that will help @apswoodwork. Where you can get into trouble if you are not careful, is adjusting the path object. The path object is directly tied to the original position of the profile in relation to the path object, if that makes sense, so adjusting or resizing the path object can be tricky 🙂
-
 This is precisely why I stopped being a Contractor...I got so friggin tired of paying for the Sub's mistakes that I had to pay for. To me, Contracting became an absolutely thankless job. I am MUCH happier just being a residential designer, full stop.
 -
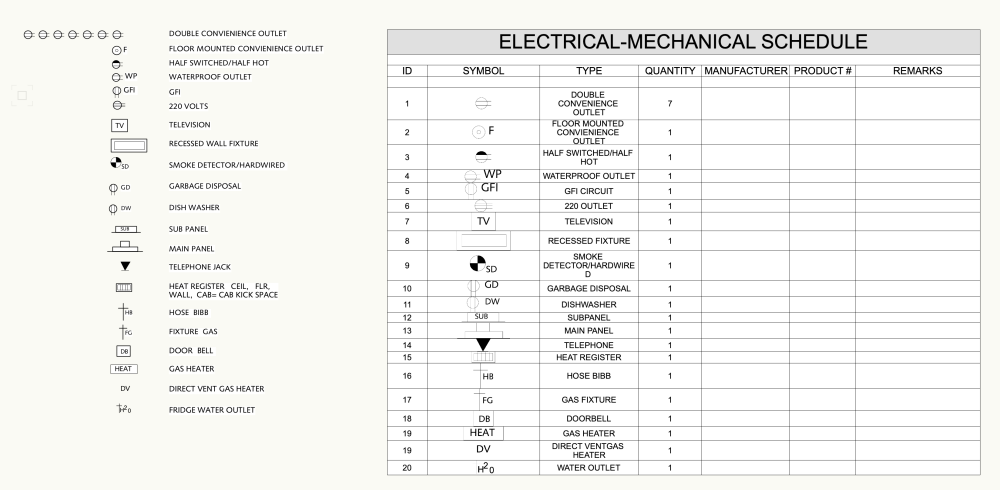
@E|FA I believe I was saying that the Electrician sub-contractor could create his BID from that data, that's all 🙂 Plus...I am not a real architect 🙂
-
To take the Elec / Mech schedule a bit further, I have found it convenient to add a formula in the worksheet which will count how many of each item you have. The electrician on the job loves this, so he /she doesnt have to take the time to count all the items from the drawings, etc 🙂
-
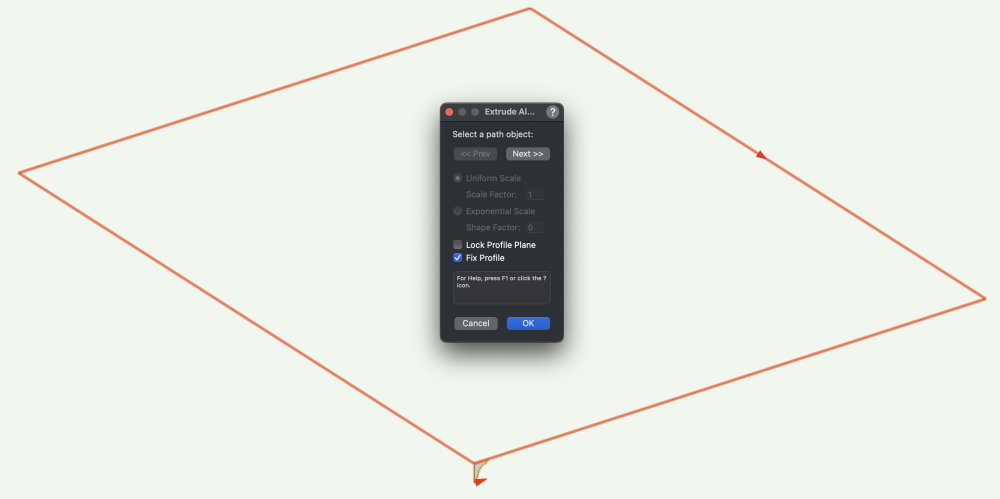
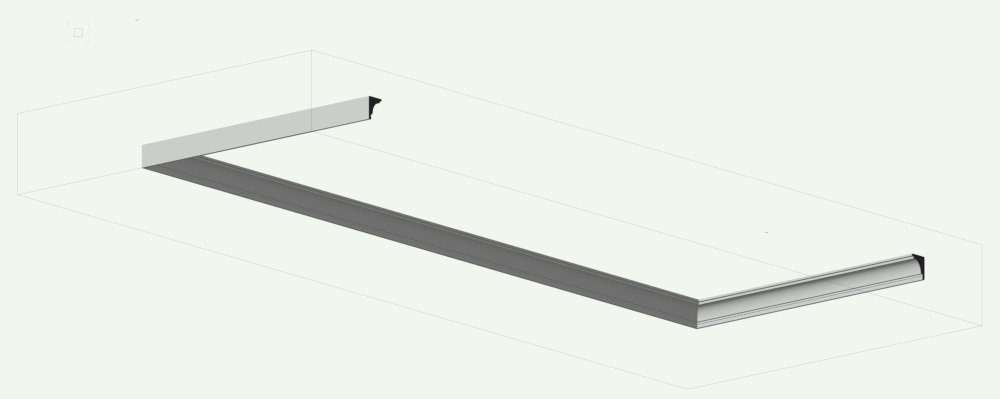
A few additional general thoughts regarding extrude along path, especially for beginners....I used to struggle with EAP's not working! 🙂 1) Be mindful of placing the item to be extruded exactly where you want it to be, if you want accuracy relating to the path object. IF they are NOT connected correctly and the profile object is just out in space it will perform the EAP with the profile object centered on the path object, etc. 2) Also be mindful of the 'direction' (noted by the red arrow) If you have it going the wrong way. You will get an error message saying the operation could not be completed. Also note the 'fix profile and lock profile plane items and configure correctly. Extruded crown moulding utilizing clip cube for clarity
-
My pleasure. 🙂
-
The other option, now that I think about it, is to place the barn door IN the wall, next to the overhead door and show it 90 degrees open that works as well.

-
Well, it seems pretty easy. You can’t have two doors in the same opening so if you put the sectional overhead door in the wall and just placed the barn door on it’s own slightly in front of the wall, seems like thst should work.?
-
Bart a few moving parts, but looks good!:-)
-
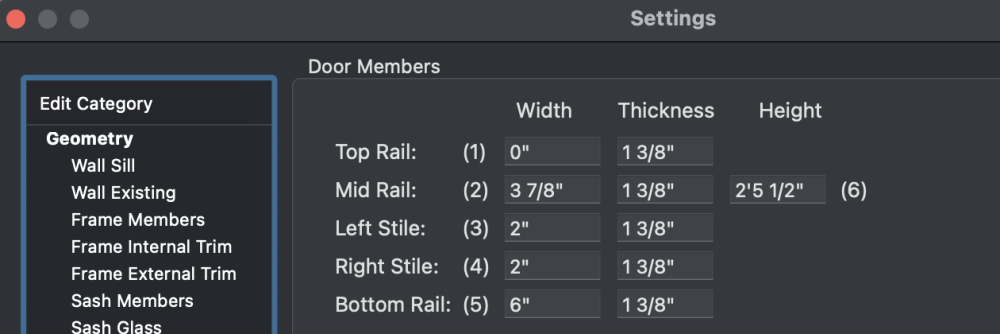
hahaha ...I know, right!!! lots of settings...:-) Take a close look at the settings in the OIP....the door is 'paneled'..that way you can control all the rails, styles, blah, blah...I set the top rail to zero... ...and the 'transom' setting (which is a bit misleading!) to 4" to have the width ( as more or less close to your screenshot) which allows the bottom of the top windows to be wider...I know...confusing, huh? 🙂
-
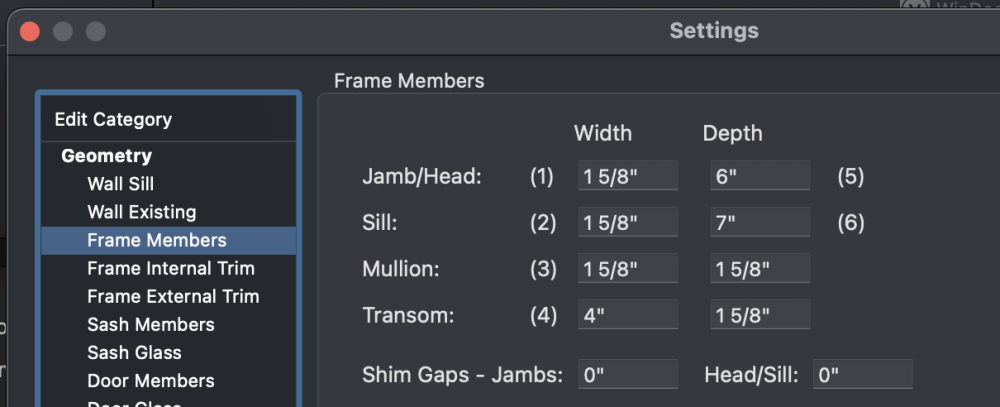
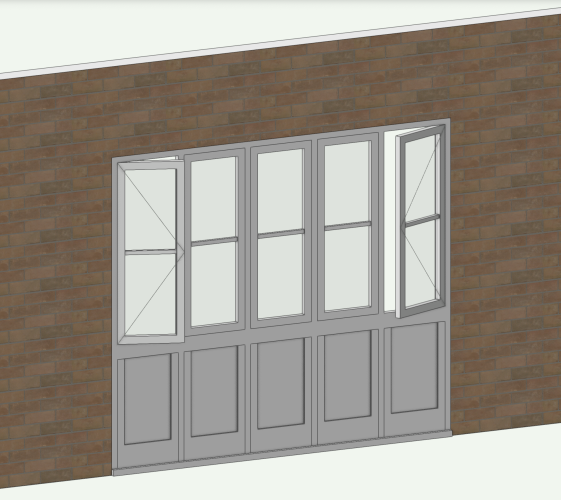
Tom Ok, here is Windoor configured close to what you wanted, best I could tell from your screenshot. The main takeaway is to use a 'fixed door' option for the lower openings in the Windoor config choices....even though they are not doors 🙂 I am sure I have some of it wrong relating to the various widths, etc of the Windoor components, but I attached the file for you to play around with. Tom.vwx
-
Tom Ok, thanks for the info...and clarifying the infill opening data. I will report back in a few...
-
Tom, while VW is loading...is your door an 'overhead' sectional garage door? Or just an opening infilled as you note it??
-
Hey! do I look like a Windoor spokesperson!? 🙂 Not sure, but let me check it out for ya. ...and while I do so, Tom, have you waded in to the new VW AI options? Any thoughts
-
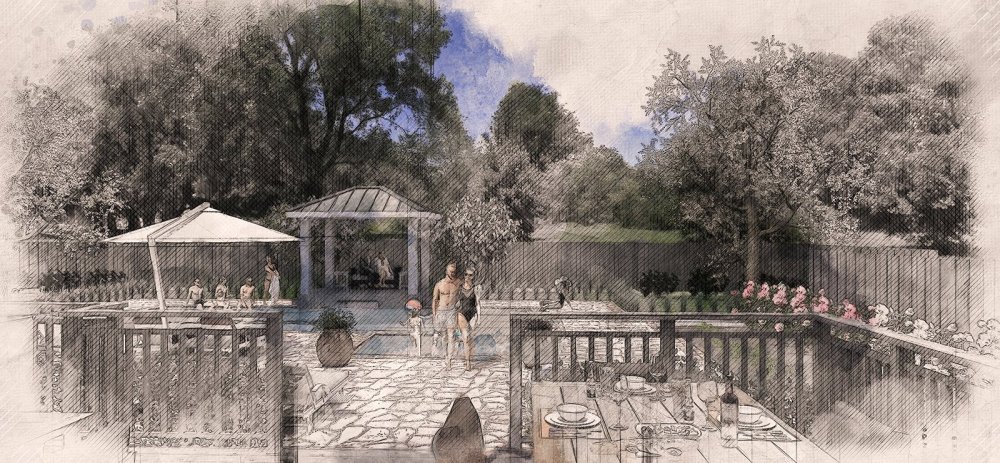
@Don SeidelAre you wanting this for a Client presentation, or just for your own use? Just curious. I do primarily Photo Realistic Rendering but occasionally it is nice to be able to produce something a bit more "painterly". I found this Photoshop 'Action' item online, Was very inexpensive...like $7.00 as I recall. This particular one was geared towards architecture, and yes, you do need Photoshop to make it all work, but it happens in seconds, and there are many tweakable options to choose from. Here is a link to the one pertaining more to 'watercolor'. Disclaimer:I have no idea what it would do to your 2d graphics,,,,you would just need to give it a try I suspect. But for something under $10.00 bucks seems worth a go. 🙂 https://graphicriver.net/item/watercolor-photoshop-action/17015483 Here is an example of how the architecturally oriented one I purchased was applied to a rendering I created, just to give you an idea:: Original Rendering: 'Sketchy' version applied to my original Rendering:

-
Lainy, yes that helps a lot 🙂 I see the look you are after. Maybe add to the mix what Andy mentioned, as he seems to be very up tp speed with Spotlight stuff.
-
I do a lot of rendering.....sort of my thing, and I will say interior lighting in VW can be a challenge to get it to look correct. Not impossible at all. but you need to mess with the lighting a bit. Is your intent to have sort of a dark interior look?? But still have things more or less be visible? Or do you want a fairy bright interior look?
-
Let's try. this again....first, I am NOT a spotlight person and you seem to be, so can't really help you there. are the walls supposed to be black? are the curtains supposed to be black?? You need to try to convey exactly how you want those items to appear so you intend to have interior views and renderings? seems like that is where you are headed.??
-
Lainy, you mentioned what was wrong, but can you be a bit more specific as to how you DO want those items to appear?? I downloaded the file and will have a look...
-
Ability to angle vertical sides of a wall
Kevin K replied to Kevin K's question in Wishlist - Feature and Content Requests
Now that box has been ticked….we just need to be able to angle walls other than the usual 90 degrees vertically! -
Ability to angle vertical sides of a wall
Kevin K replied to Kevin K's question in Wishlist - Feature and Content Requests
Tom I guess I was missing something! I thought I had tried that, but apparently not as successful as you did! good to know…I will revisit Thanks! -
Ability to angle vertical sides of a wall
Kevin K posted a question in Wishlist - Feature and Content Requests
This has probably been discussed previously, but you know the old saying..."the squeeky wheel gets the grease'. 🙂 I realize 'sloped' walls have long been on the wishlist, but it would also be desirable to be able to angle the left and/or right sides of a wall in elevation. You can add peaks, etc but splaying a wall where the top is wider than the bottom doesn't seem possible...unless I am just totally missing something. Case in point, check the screenshot and note the splayed wall next to the yellow arrow. I did some workaround tricks to facilitate this, but it would sure be nice if the wall tool could create walls like this....top wider than the bottom.
-
I get it 🙂 I sort of thought that may be your response. Whatever works, right?


