

.jpg.3776b4299d3cc626db6bdb79aec2aa12.jpg)

Gabriel Chan
-
Posts
114 -
Joined
-
Last visited
Content Type
Profiles
Forums
Events
Articles
Marionette
Store
Posts posted by Gabriel Chan
-
-
Hi folks,
Vectorworks 2022 is bugging out on me with the latest service pack update.
So I've copied some existing "Wall" objects from a previous Vectorworks file (2017) and pasted into my new 2022 file. Creating a class with hierarchal order automatically creates a separate class that does not display in hierarchal order as well. In the video, I demonstrate the actual steps to recreating this problem.
Are there new preference settings that I'm unaware of causing this problem, or is this possibly a new bug discovered?
Gabriel
iMac 2017 5k Retina
4.2 GHz Quad-Core Intel Core i7
40 GB 2400 MHz DDR4
Radeon Pro 580 8 GB
Vectorworks 2022 SP4
-
Just upgraded to 2021, and I'm looking at the new accessories function, in particular the clamps accessories (base parts) work flow.
I think I have wrapped my head around how the following works:
On 9/18/2020 at 3:33 PM, markdd said:When you run the Accessory tool, what should happen is the Clamp is added to the insertion point of the lighting device and the lighting device geometry is displaced downwards by the depth of the clamp symbol from insertion point and below.
My question is what if the lighting symbols includes the rubber studs that moving lights usually sit on?
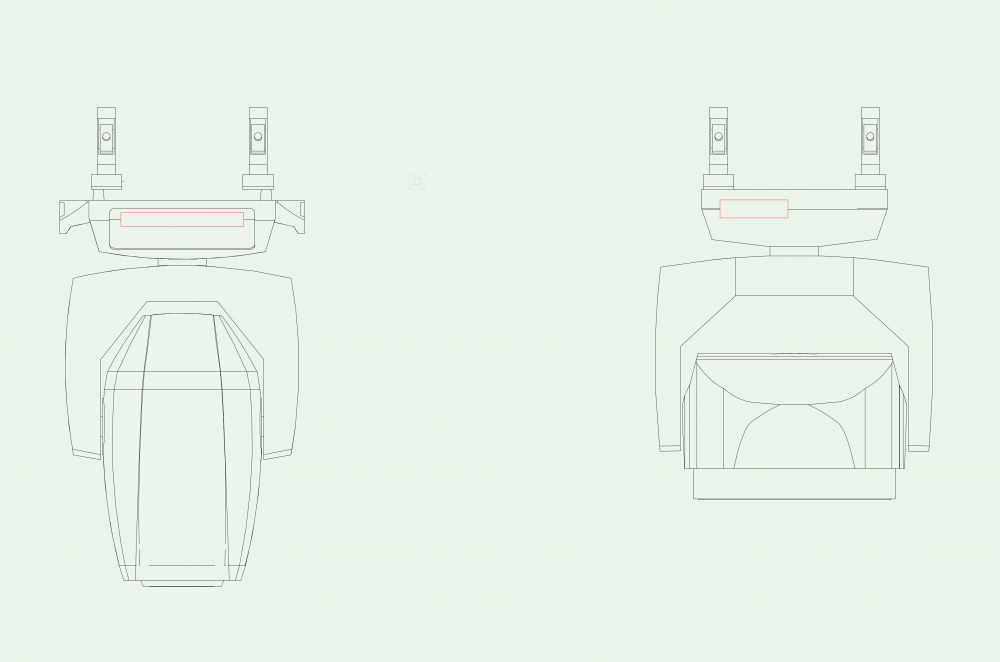
If we look at the screen shot attached, we have on the left, a Clay Paky 800 Spot QWO and a K20 B-Eye on the right. Upon editing the left symbol, we will find that the base is a generic solid, and hence not editable (unless we do solid subtraction). Because the base has studs, when inserting clamps, the clamp symbol takes reference from the base of the studs as the attachment point, when in fact it should be taking reference from the base of the lighting fixture. The end result is that the clamp is floating and not physically attached to the fixture.
The right fixture does not have these studs so no issues with this.
There are quite a number of spotlight fixtures that comes shipped with Vectorworks that have these studs, and this seems quite counterintuitive if we had to manually edit away these studs for the clamps attachment to work. Has anybody come up with work arounds?
Gabriel
-
 1
1
-
-
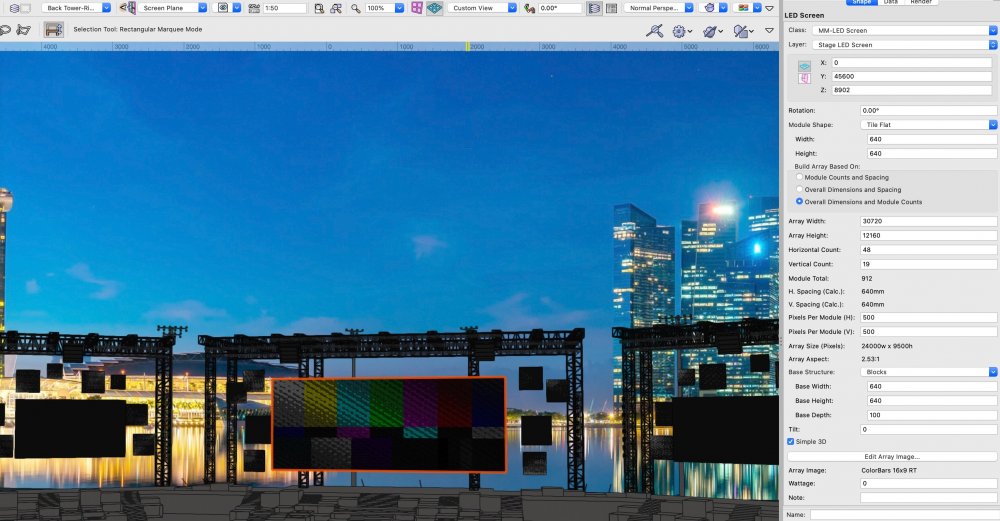
Hi all,
Trying to remove the moire effect on the LED screen without much success. Apart from creating an extrude and then slapping a Renderworks on it, is there any way I can remove that moire effect shown? So far, I have tried OpenGL at highest setting to get Anti Aliasing to High. My drawing 0,0 is right smacked on stage, and
Been scrawling the forums for a bit but can't seem to find anything useful.
Vectorworks 2020
Gabriel
-
Hi Klinzey,
I found a work around to it by just copying everything and pasting it onto a new file. The OIP fields then lined up.
I checked my OIP Spotlight Preferences and indeed there were some customisations, probably over the course of 10 years of use. Before setting it to default, I wanted to keep whatever might have been customised so I saved a custom settings for lighting device parameter, and upon saving it the OIP fields lined up.
I suspect somewhere along the lines these settings might not have refreshed when importing an older file, so all is good now, although this would definitely not be very intuitive to the average user. If there is any SP update for 2020 remaining perhaps this bug should be squashed.
Great to know a solution for it though! Thanks!
Gabriel
-
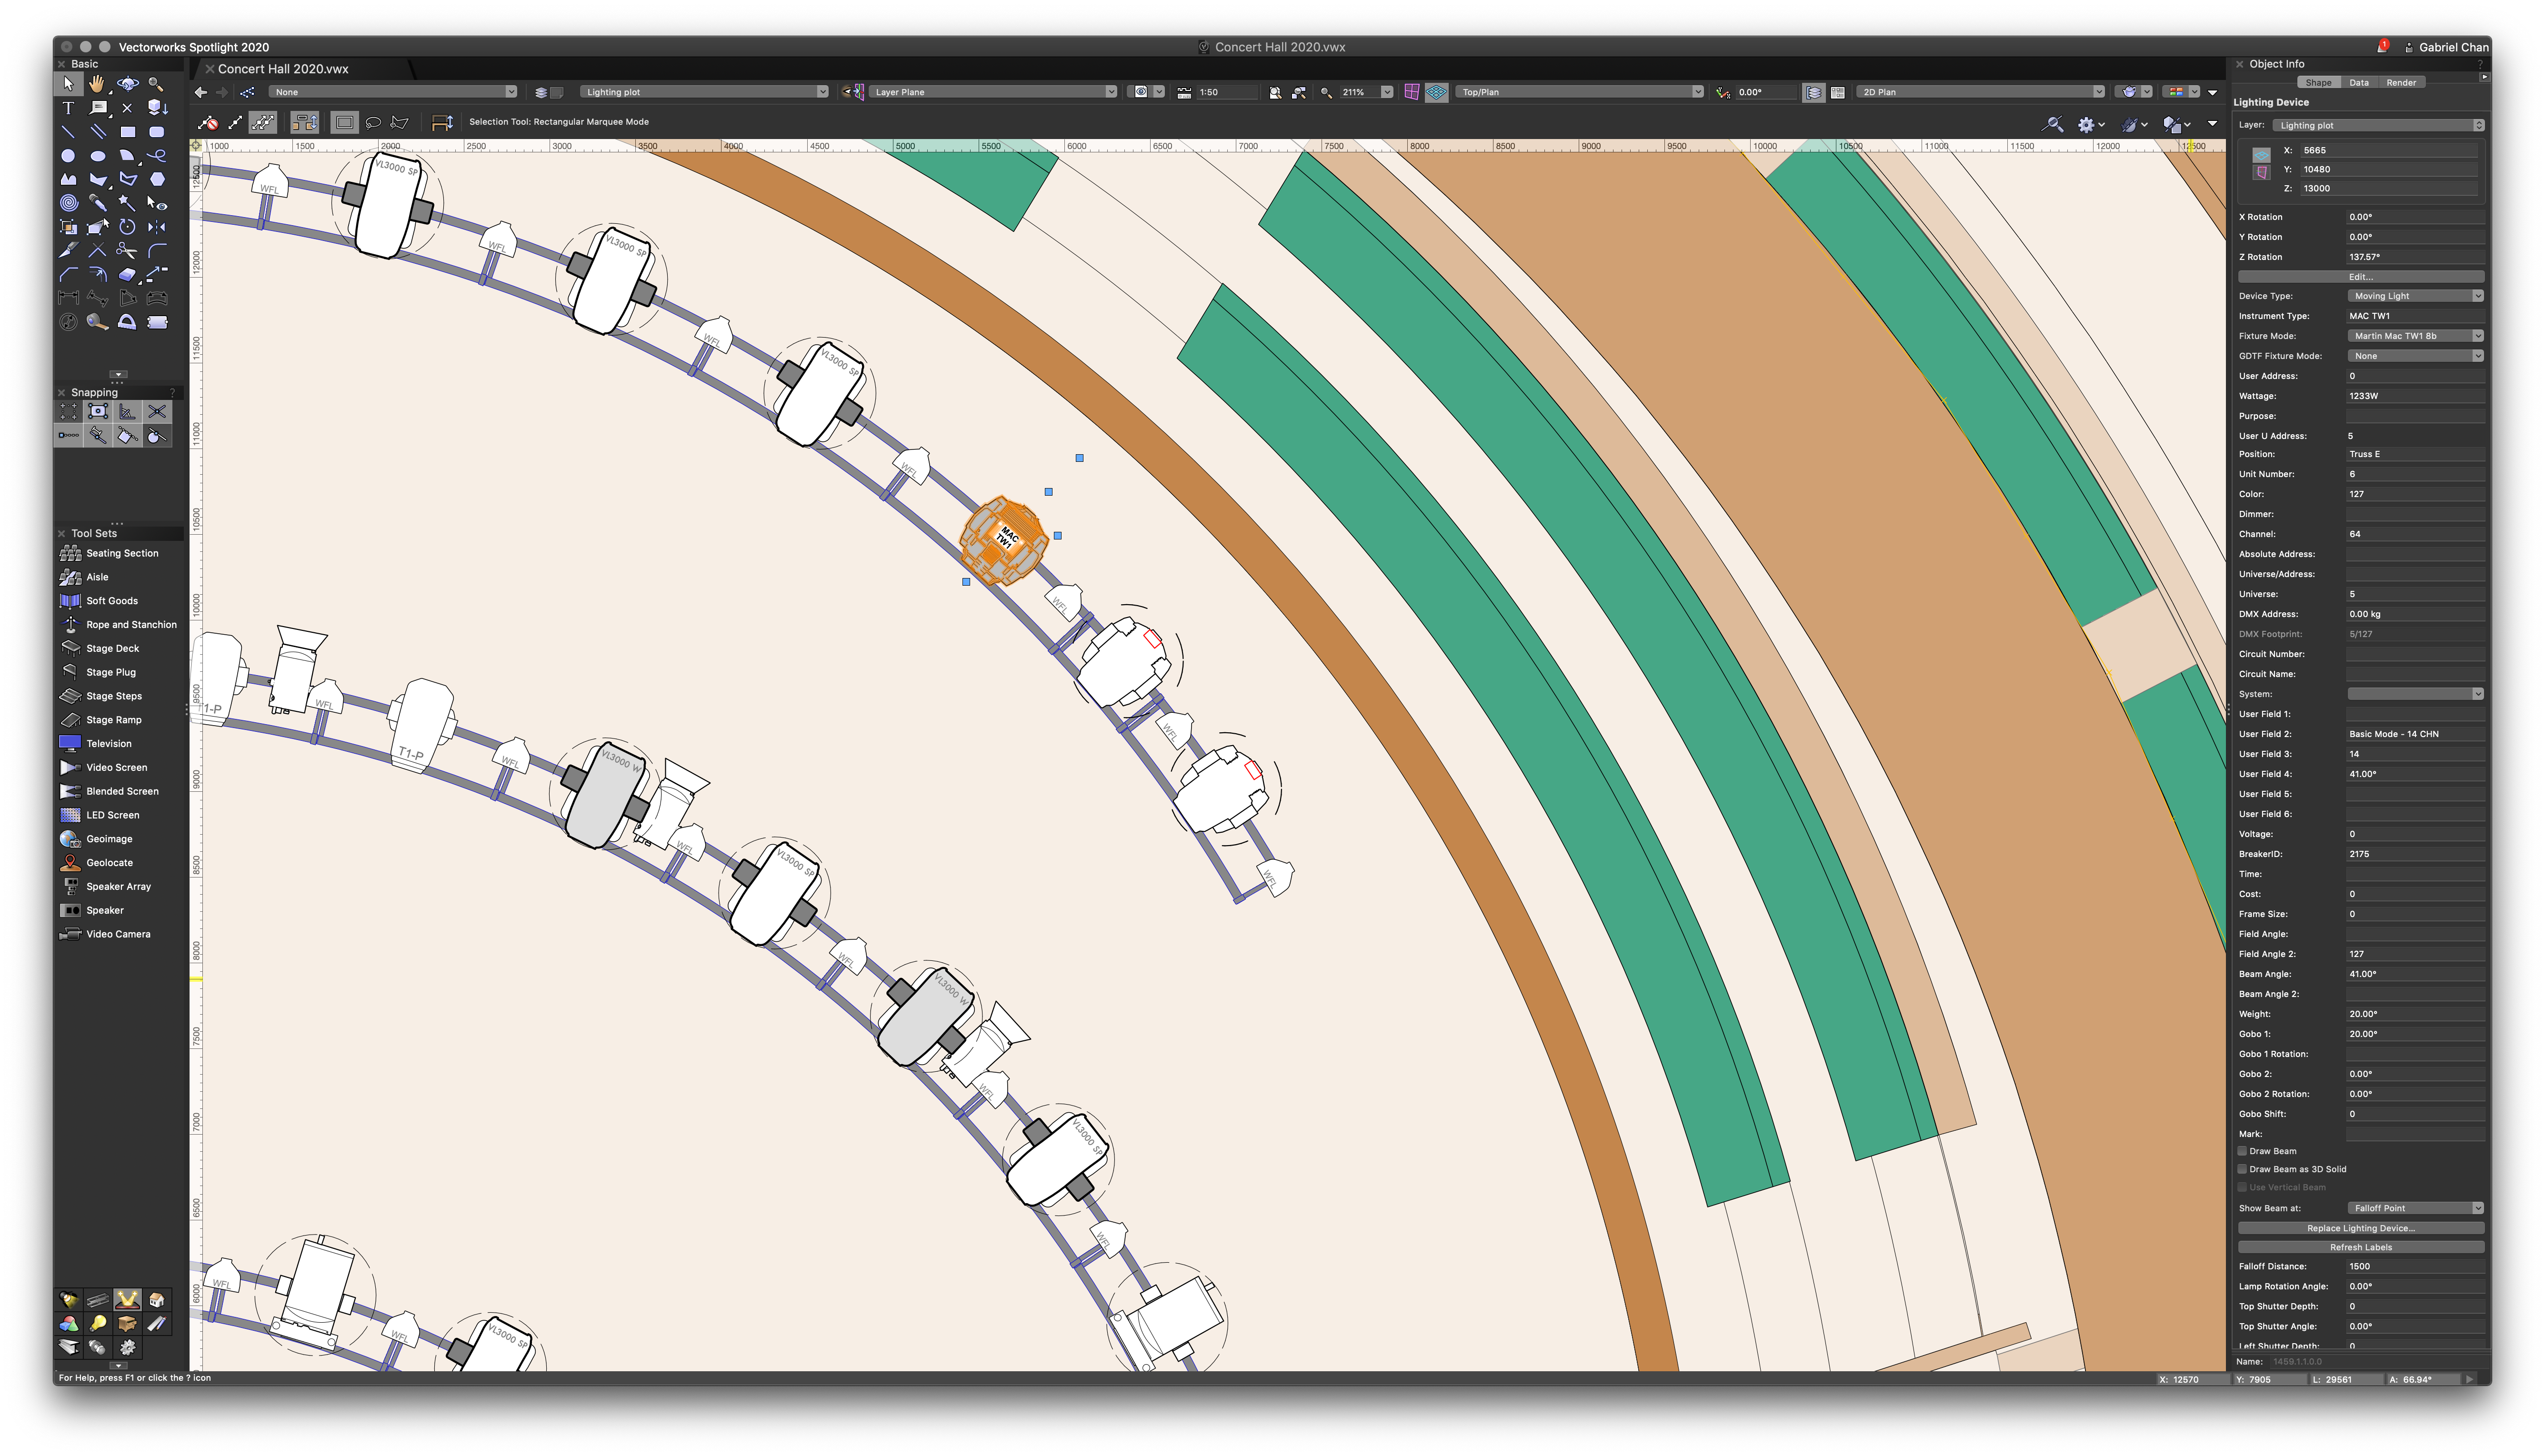
Looking at the screenshots attached, we see that the data in the OIP does not make sense: DMX Address: 27.40kg
I have already replaced the fixtures with lighting symbols from the 2020 library. The 2 screenshots are both of MAC TW1. One from the old file and 1 from the new library.
Is there any quick solution to resolve this, or am I looking at manually replacing 200 over fixtures?
Gabriel

-
Cheers Kevin!
I realised haven't given much thought to whether this would be a daytime scene or not. I suppose that means I will have to expand my experiment parameters and do both!
-
40 minutes ago, Kevin K said:
Gabriel
As Grant pointed out, messing with the various settings is really good practice, to be sure.
Since I do a LOT of rendering, you gotta let go of trying to use the Low modified settings :-). Make life wayyy to complicated.
Question: is this supposed to be an interior daytime rendering? Point being, normally in a daytime condition you dont have a bunch of interior lights casting shadows all over the place. Unless of course you want that look.
I dont think you used my suggestion of setting up the various directional lights to be able to quickly and easily get some decent lighting for your rendering.
Is the file huge? IF there is a way you could post it, perhaps through a dropbox link or WE Send I would love to get your file and. demonstrate some lighting options to get the rendering looking really nice.
You call on that.
Hi Kevin, Grant,
Thanks for all the input. This is definitely still a work in progress. It was as much as I'd give my weekend to do all the tests so far. I'm likening these tests to a marathon that I will execute over a few weeks instead of a short sprint. Hoping this will be a LONG post eventually.
Low settings are not the way to go, but it is a great way to understand what settings affect the which aspects of the render, without having to wait half an hour between each render.
I have yet to experiment with the various directional lights - will do that in the next series of tests. I will probably compare what these directional lights do VS Ambient lighting. The ambient occlusion could definitely come down slightly.
@Kevin K PMed you
-
.thumb.jpg.9431196e8b44a31beffba4cad93d353d.jpg)
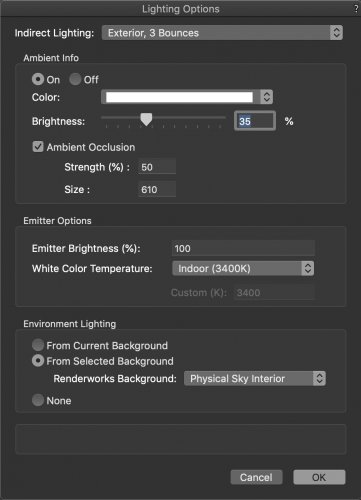
Test 8: Ambient On at 25% | Anti Aliasing High | Physical Sky Interior Renderworks Background | 01 x Line Light | 03 x Spot Light | Render time: 12m14s
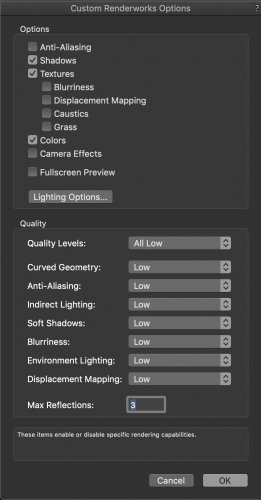
Options
Anti-Aliasing, Shadows, Textures and Colours checked. Additional options under textures were all left unselected.
Quality
All Low except Indirect Lighting and Anti Aliasing👈, set to High.
Max Reflections: 3
Lighting Options
Indirect Lighting: Interior 16 bounces
Ambient Info: On
Brightness: 25%
Ambient Occlusion strength 50% / Size 100
Environment Lighting: Physical Sky Interior
Additional Light source in the scene
01 x Line Light at 5000 lumens with Cast Shadows and Soft Shadows checked
03 x Spot Light over kitchen counter at 4000 lumens with Cast Shadows and Soft Shadows checked. Distance Falloff set to Realistic
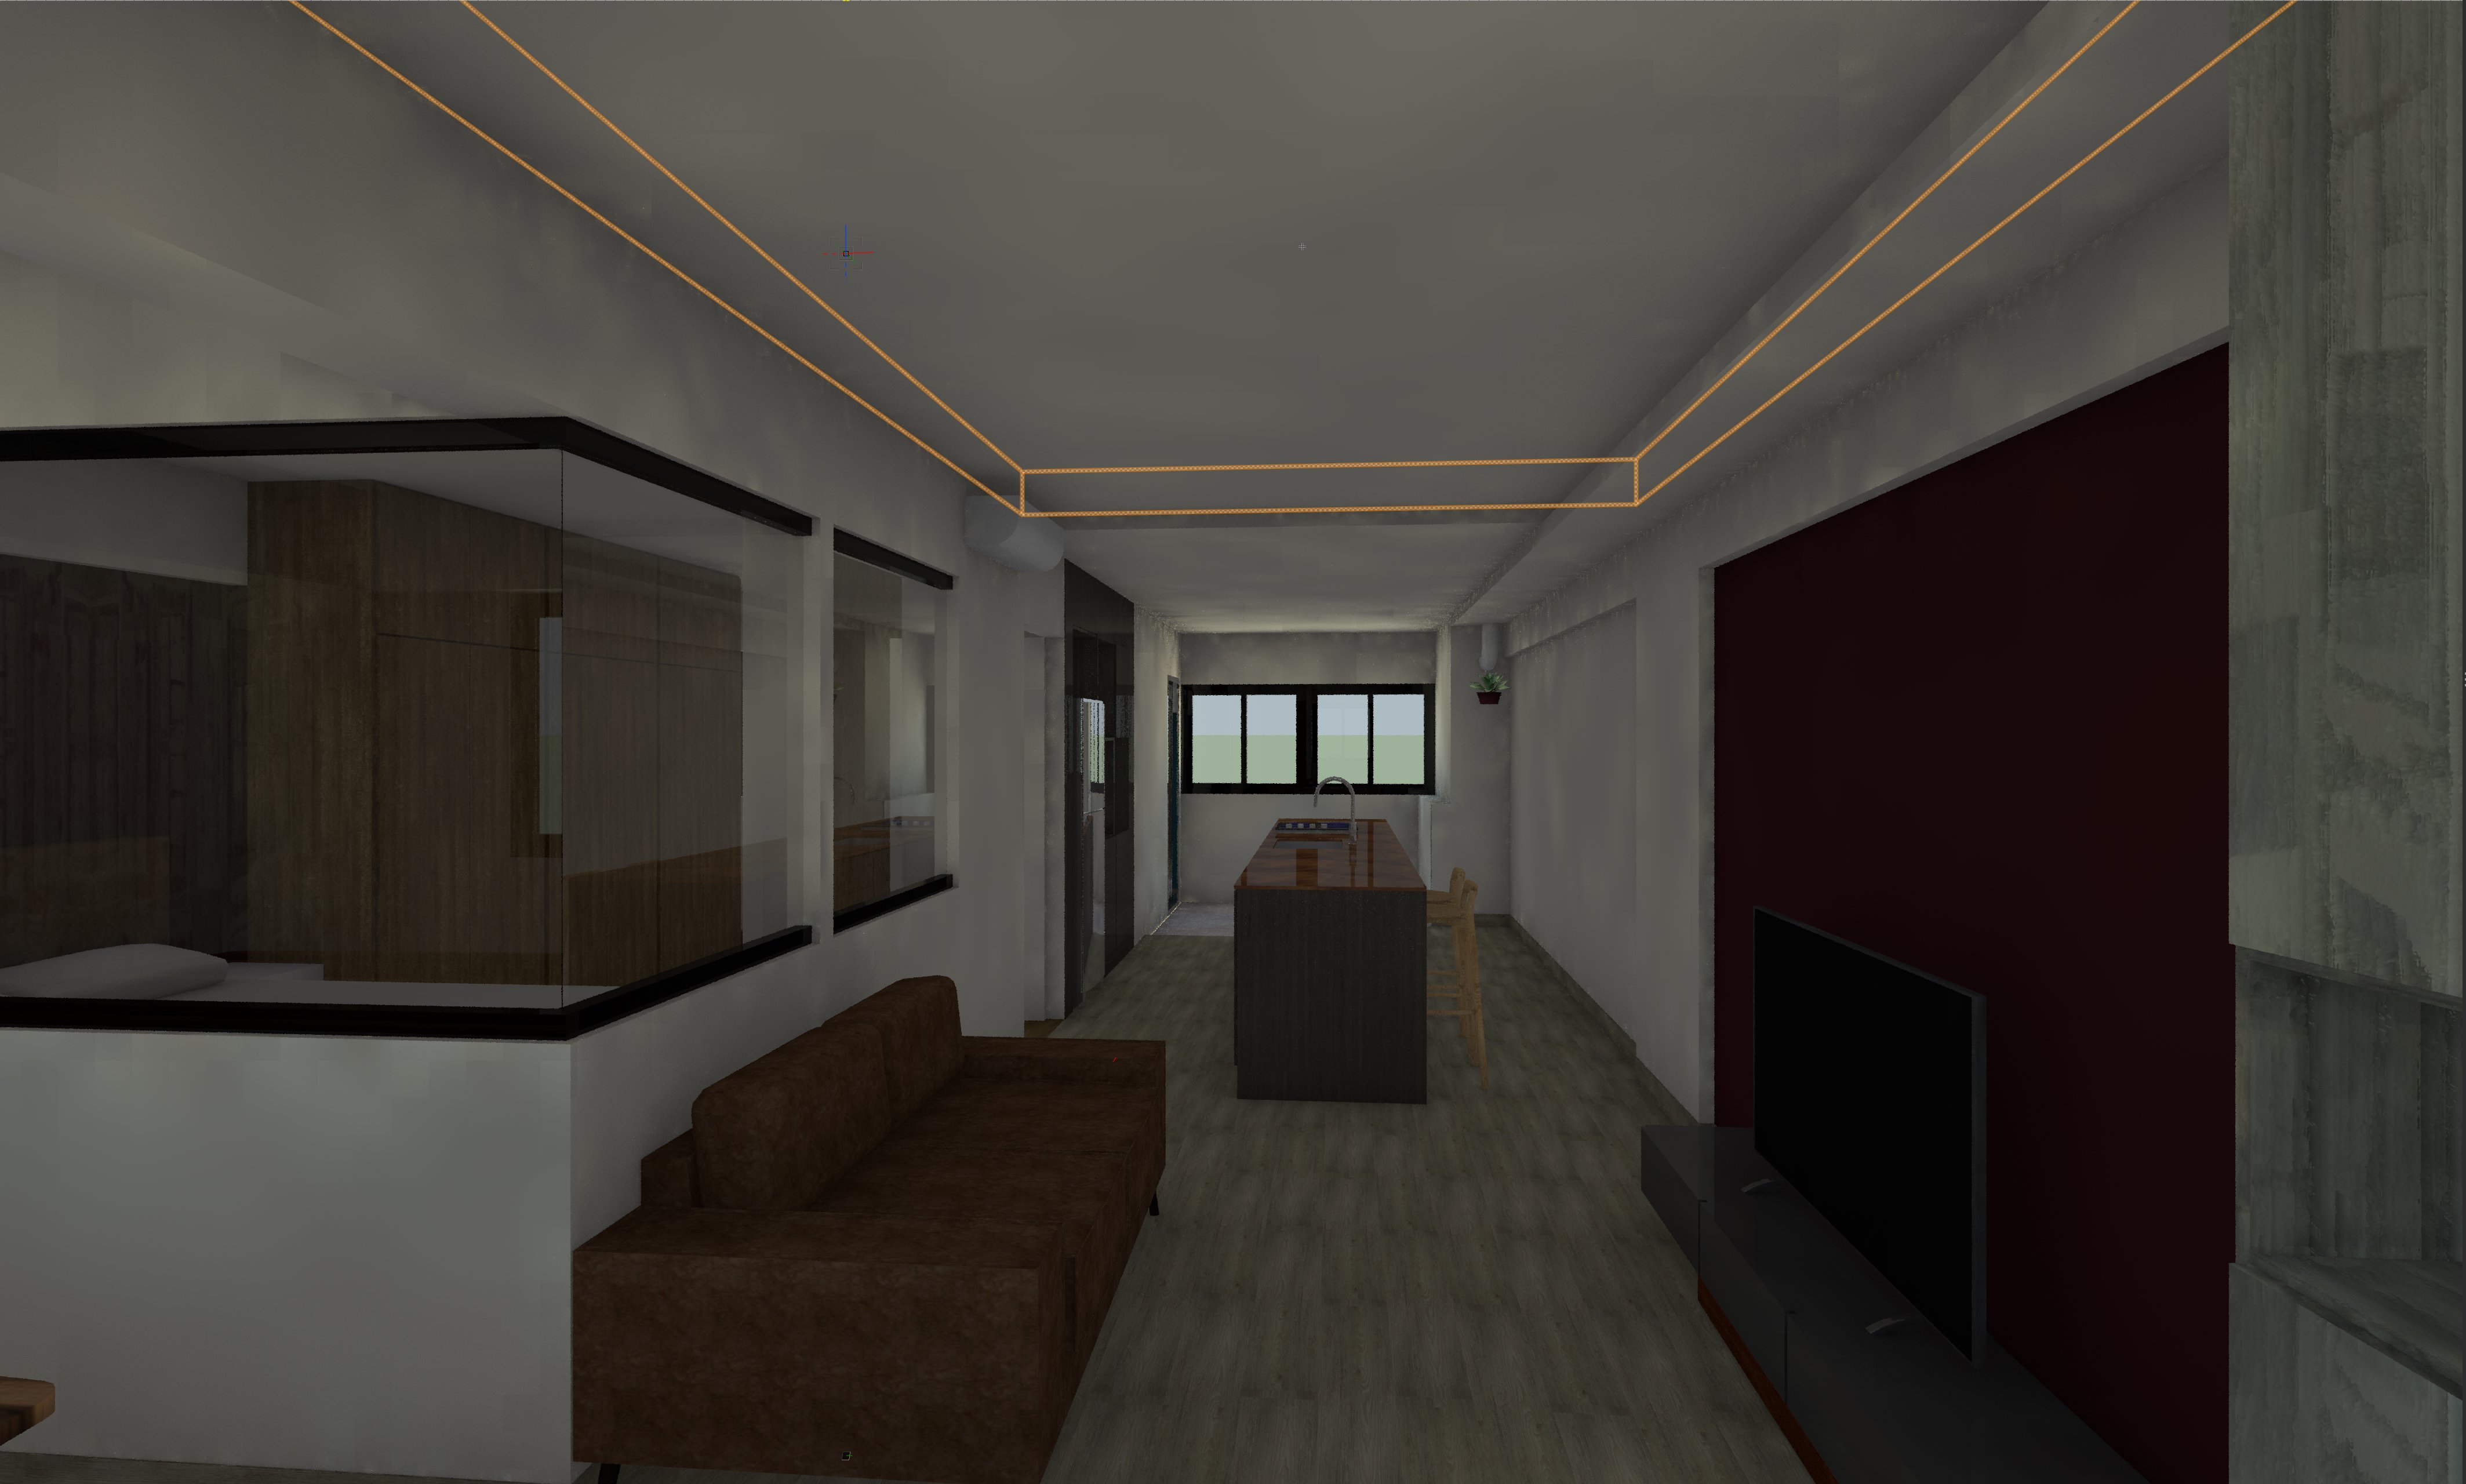
Remarks: Where in Test 7, the contrast between shadows and light would be too harsh to be considered realistic, Anti Aliasing seems to smoothen that out into something acceptable for presentation. I suspect the round and curve elements for Spot Lights and the pendant lamp shades may have benefited from a higher Anti Alias setting. Render time take a big hit at 12m14s however, which is almost 3 times the render time for Test 7. Perhaps there is a need to weigh the options between render times and quality when there are round/spherical elements in the scene.
-
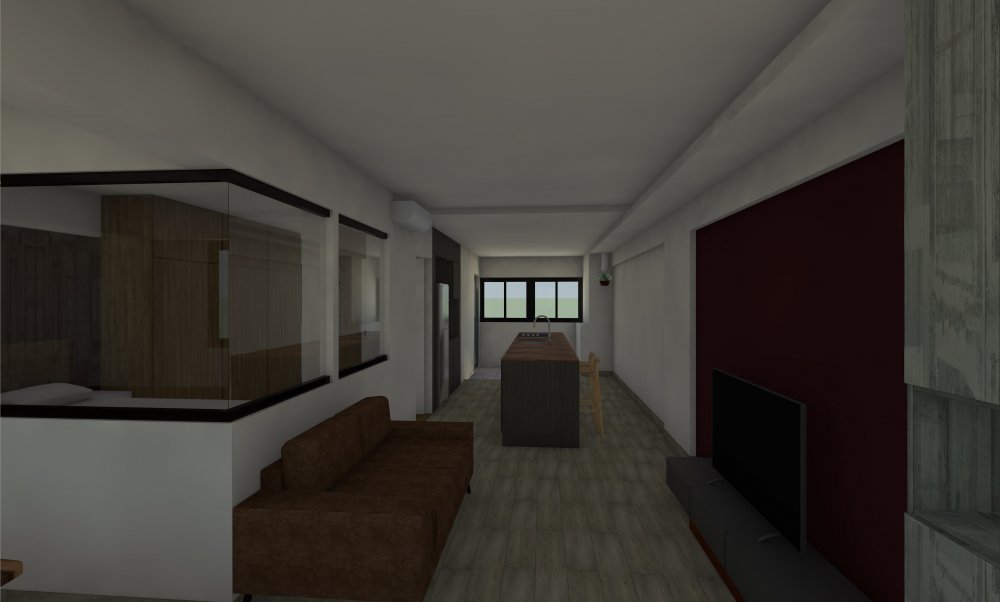
It's the weekend! And I finally got down to doing some tests. Compiling results over here that hopefully might become a useful resource.
What I've done is start from zero lighting sources, and progressively added them, taking note of the rendering times. Then with each permutation, one variable is altered so that I get to see the difference in quality and render times based on that variable. I place an emoji 👈 so that it's easier to pick out what the permutation is from the previous test.
As a reference, I am using an iMac Retina 5K, 27 inch, 2017 workstation, 4.2Ghz Core i7, with 24MB DDR4 RAM and Radeon Pro 580 8 Gb Graphics.
.thumb.jpg.e9a027baf91af18a8800ab4e652c878f.jpg)
Test 1: No Ambient | No Environment Lighting | Render time: 2m28s
Options
Anti-Aliasing, Shadows, Textures and Colours checked. Additional options under textures were all left unselected.
Quality
All Low except Indirect Lighting, set to High.
Max Reflections: 3
Lighting Options
Indirect Lighting: Interior 16 bounces
Ambient Info: Off
Environment Lighting: None
Remarks: Scene is full dark with zero sources of lighting. Interesting that reflective surfaces do render reflection even without light sources present. Also note the image prop of a hanging plant is self illuminating, perhaps suggesting it does not interact with lighting?
-----
.thumb.jpg.7755a43059b205c70301d3f77c3a189e.jpg)
Test 2: No Ambient | Physical Sky Interior Renderworks Background | Render time: 3m06s
Options
Anti-Aliasing, Shadows, Textures and Colours checked. Additional options under textures were all left unselected.
Quality
All Low except Indirect Lighting, set to High.
Max Reflections: 3
Lighting Options
Indirect Lighting: Interior 16 bounces
Ambient Info: Off
Environment Lighting: Physical Sky Interior👈
Remarks: Adding Environment Lighting immediately adds a lot of information to the scene. The slight glow at the end of the room adds some depth to the scene and suggests that's where most of the light is filtering in from. Indirect Lighting Texture Options under Glass RT set to enable portal. Minimal impact to render times.
-----
.thumb.jpg.a116b36ebabacca1e4fb75504ca8f194.jpg)
Test 3: Ambient On at 25% | No Environment Lighting | Render time: 2m33s
Options
Anti-Aliasing, Shadows, Textures and Colours checked. Additional options under textures were all left unselected.
Quality
All Low except Indirect Lighting, set to High.
Max Reflections: 3
Lighting Options
Indirect Lighting: Interior 16 bounces
Ambient Info: On 👈
Brightness: 25%
Ambient Occlusion strength 50% / Size 100
Environment Lighting: None👈
Remarks: Comparing this with Test 1, the only change will be turning on Ambient lighting at 25%. Compared with Test 1, again a lot more information in the scene, but noticeable a lack of depth when compared to Test 2. Notice the False ceiling on the right blending directly into the main ceiling itself. Additional rendering time (5 secs) is actually negligible when compared to Test 1, and it is in fact faster than Test 2. May consider this as a more detailed render with all light sources as opposed to OpenGL (which has a limit of 8 lights).
-----
.thumb.jpg.bfa776e1c6e5aeab3b72c8c634aaa69c.jpg)
Test 4: Ambient On at 25% | Physical Sky Interior Renderworks Background | Render time: 3m11s
Options
Anti-Aliasing, Shadows, Textures and Colours checked. Additional options under textures were all left unselected.
Quality
All Low except Indirect Lighting, set to High.
Max Reflections: 3
Lighting Options
Indirect Lighting: Interior 16 bounces
Ambient Info: On 👈
Brightness: 25%
Ambient Occlusion strength 50% / Size 100
Environment Lighting: Physical Sky Interior👈
Remarks: Now we start combining two lighting sources, Ambient and Environment lighting, and the scene again looks better than Test 2 or 3 where only one light source was defined, as we get more information and depth as well. Render time is excellent at 3m11s.
-----
.thumb.jpg.6b4aa8ed1233a61ddcb1eb953578ac40.jpg)
Test 5: Ambient On at 25% | Physical Sky Interior Renderworks Background | 01 x Line Light | Render time: 4m19s
Options
Anti-Aliasing, Shadows, Textures and Colours checked. Additional options under textures were all left unselected.
Quality
All Low except Indirect Lighting, set to High.
Max Reflections: 3
Lighting Options
Indirect Lighting: Interior 16 bounces
Ambient Info: On
Brightness: 25%
Ambient Occlusion strength 50% / Size 100
Environment Lighting: Physical Sky Interior
Additional Light source in the scene
01 x Line Light at 5000 lumens with Cast Shadows and Soft Shadows checked👈
Remarks: Adding a third light source into the scene, we get more depth information of the false ceiling with respect to the main ceiling. Overall the scene looks slightly better lit than Test 4. Additional render time of 1min for 1 light source suggests that the light sources do start making renders more complicated. There is some splotchiness where the line light grazes the ceiling.
-----
.thumb.jpg.0f23521ff056642e3a7cb5606dbb194d.jpg)
Test 6: Ambient On at 25% | Physical Sky Interior Renderworks Background | 01 x Line Light | 03 x Spot Light | Render time: 4m28s
Options
Anti-Aliasing, Shadows, Textures and Colours checked. Additional options under textures were all left unselected.
Quality
All Low except Indirect Lighting, set to High.
Max Reflections: 3
Lighting Options
Indirect Lighting: Interior 16 bounces
Ambient Info: On
Brightness: 25%
Ambient Occlusion strength 50% / Size 100
Environment Lighting: Physical Sky Interior
Additional Light source in the scene
01 x Line Light at 5000 lumens with Cast Shadows and Soft Shadows checked
03 x Spot Light over kitchen counter at 4000 lumens with Cast Shadows and Soft Shadows checked 👈
Remarks: Adding three additional spot lights into the scene, the scene looks better lit than Test 5, with the pendant lights defining a nicely lit space around the kitchen counter. Interestingly, the additional render time of 9s for these 3 spot lights suggests that not that much computational resources are required as compared to a Line Light source. This 9s also is for computing the additional geometry of the lamp shades, so really not much load added on to the renderer. Notice also that the hemispherical shape of the lamp shades have a jagged edge to it, which likely suggests a higher Anti-Aliasing Quality is required (currently set to low). Also note the underside of the lamp shade is dull, and is missing a quality of a glow usually present. There is some scalloping of the lights on the wall on the right where the 2 bar stools are, and the contrast between light and shadows seem a bit too harsh.
-----
.thumb.jpg.e1dfd1cb31e5cc81173f3771448fce84.jpg)
Test 7: Ambient On at 25% | Physical Sky Interior Renderworks Background | 01 x Line Light | 03 x Spot Light | Render time: 4m31s
Options
Anti-Aliasing, Shadows, Textures and Colours checked. Additional options under textures were all left unselected.
Quality
All Low except Indirect Lighting, set to High.
Max Reflections: 3
Lighting Options
Indirect Lighting: Interior 16 bounces
Ambient Info: On
Brightness: 25%
Ambient Occlusion strength 50% / Size 100
Environment Lighting: Physical Sky Interior
Additional Light source in the scene
01 x Line Light at 5000 lumens with Cast Shadows and Soft Shadows checked
03 x Spot Light over kitchen counter at 4000 lumens with Cast Shadows and Soft Shadows checked. Distance Falloff set to Realistic 👈 (previously set to None)
Remarks: Compared to Test 6, we now see a nice glow on the underside of the pendant lamp shade. The scalloping of lights on the wall on the right is still present. It is an improvement from the previous test, where the contrast between light and shadows are now a little more subdued, although I would still consider it unrealistic. Starting to notice some leakage of lights from the Line Light source which does not look ideal.
-
17 hours ago, Dave Donley said:
Hello Gabriel Chan:
Is the only source of light the windows at the end of the room?
Since this is an interior the indirect lighting should be set to Interior. Exterior is assuming an exterior scene and will not work well for this situation.
Also, by default the glass textures in VW have their indirect lighting options set to "Use Portal". This is a technique that helps the renderer shoot rays at the windows where the only light is coming from. If it is not on for your glazing texture already you can try that and it improves quality.
Indirect lighting quality will also help smooth this out, as well as adding more light than just the light finding its way through the windows.
Hi Dave,
Currently there is only a Heliodon which I have set for Singapore, 6pm +8hrs GMT, where I am currently based.
I did not know there was a "Use Portal" option under textures. You do learn something new everyday with VWX, even after using it for 10 years!
Will definitely give that a go.
-
18 hours ago, Kevin K said:
something that will also really help is to set up, on a design layer, 6 directional lights, with no shadows. One that points at the ceiling, one directly to the floor and one light each (4 total) with an elevation of 0, coming from each basic north, south east, west direction.
Thanks Kevin!
That's a fabulous suggestion which I can see for sort of the finer controls . Will try that out over the weekend. Hoping to post some improved renderings.
-
Hi Mark,
Thanks for the tips. On to experimenting!
Cheers,
Gabriel
-
Hi all,
Taking a deeper dive into this rabbit hole of Renderworks.
Trying to figure out what causes the patchiness on Custom RW. Looking at the Custom RW render along the orange selection of the ceiling object, on top of the ambient occlusion effects, there are patches of white that make the whole ceiling look like mould is growing. I have included the Custom RW settings and lighting options as well. Nothing out of the ordinary here.
The Walls and Ceiling objects are basically using a White Paint RT, using Color for Color Shader and Plastic for Reflectivity Shader.
And just for reference, I have attached a Final Quality RW, that undesired effect is still there, though not as pronounced.
What gives?
Gabriel
Vectorworks 2020 Spotlight

-
Hi Mark,
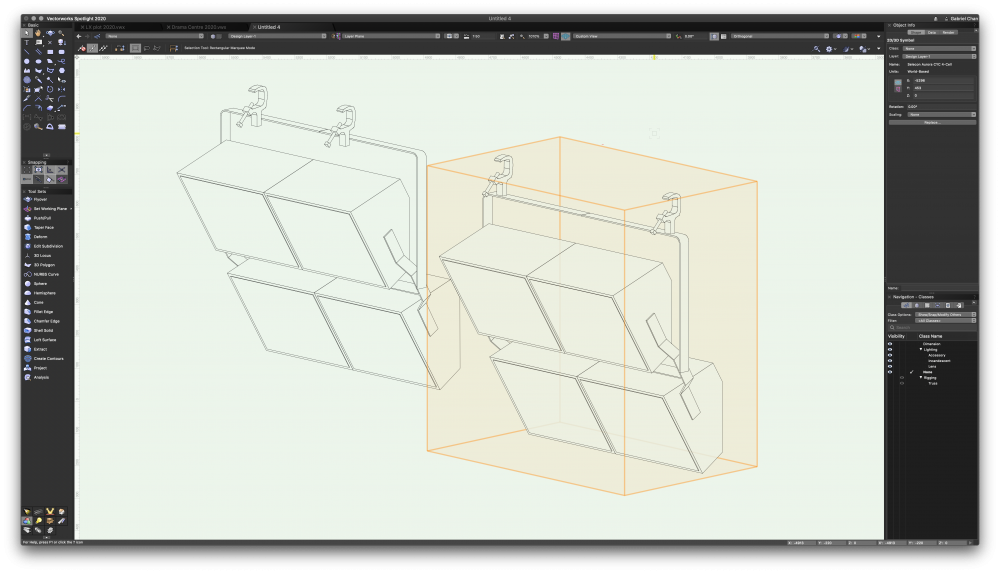
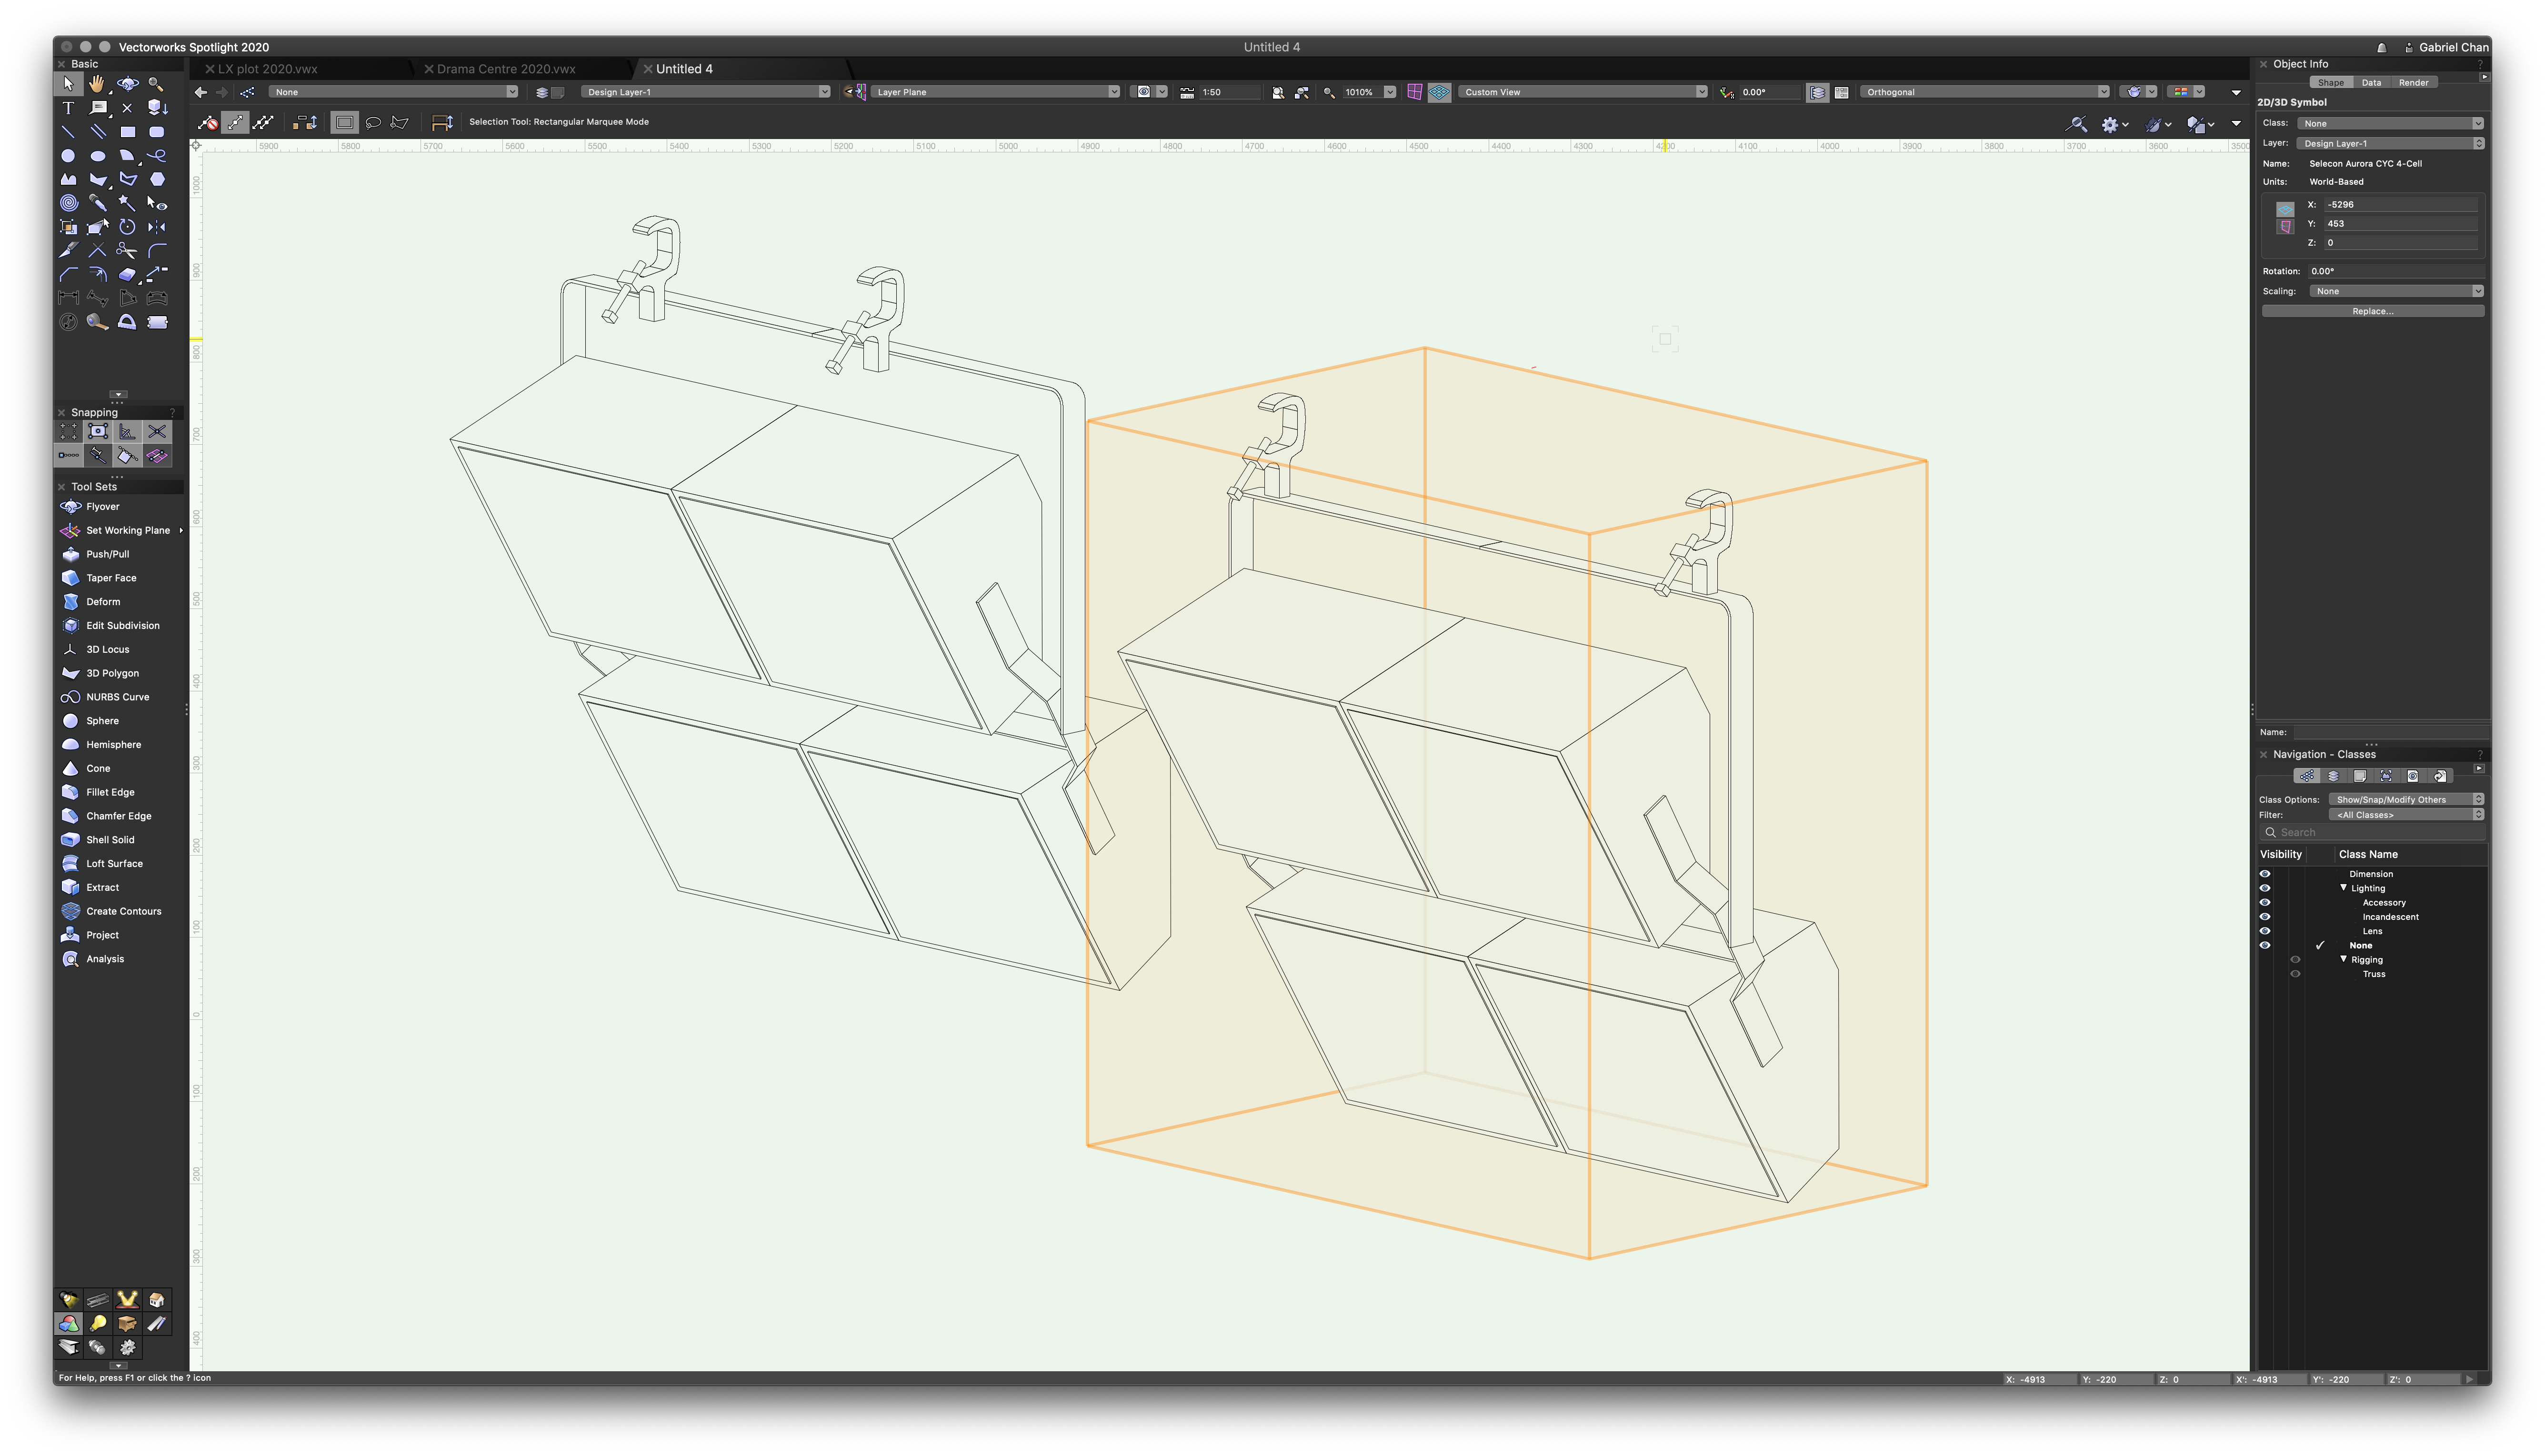
Incidentally, I attended your webinar just yesterday. Thoroughly enjoyed it. I was the one asking the question on whether to place the NURBs curve for better snapping on the same class as the truss geometry or not. Will definitely be looking out for that video when it is made available.
Anyway, I'm looking at the modified file, and it seems that you've shifted the 3D loci to all coincide on the same x-axis, and the geometry seems to line up pretty well. The only issue is that the beams now originate from this new 3D loci position. Which I suppose is alright if I am not rendering the look for a client.
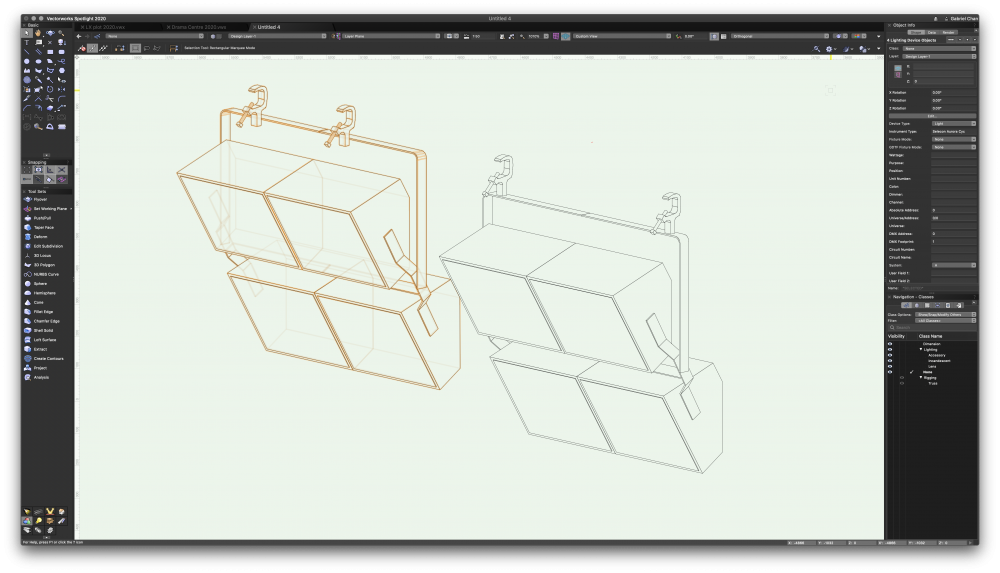
I was planning to give up on the lights focusing to a proper focus point and just have it "pre-focused" in my symbol orientation. After a bit of fiddling, I did find a workaround by replacing the nested 3D symbol of the clamps with just the 3D geometry of the clamps affixed to the geometry of the yoke. This helps to retain the beam originating from the centre of each cell.
Thanks for the help!
Gabriel
-
1
-
-
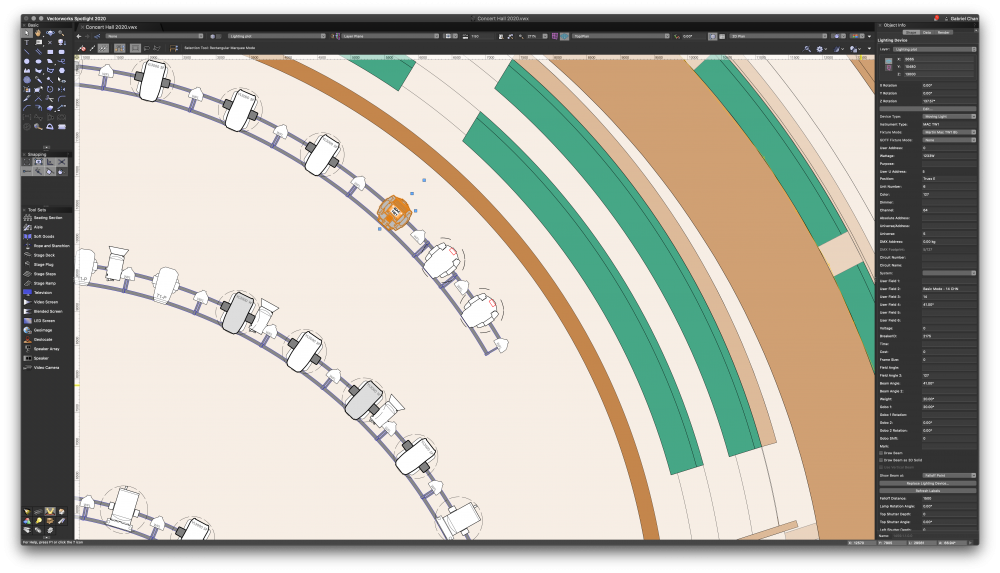
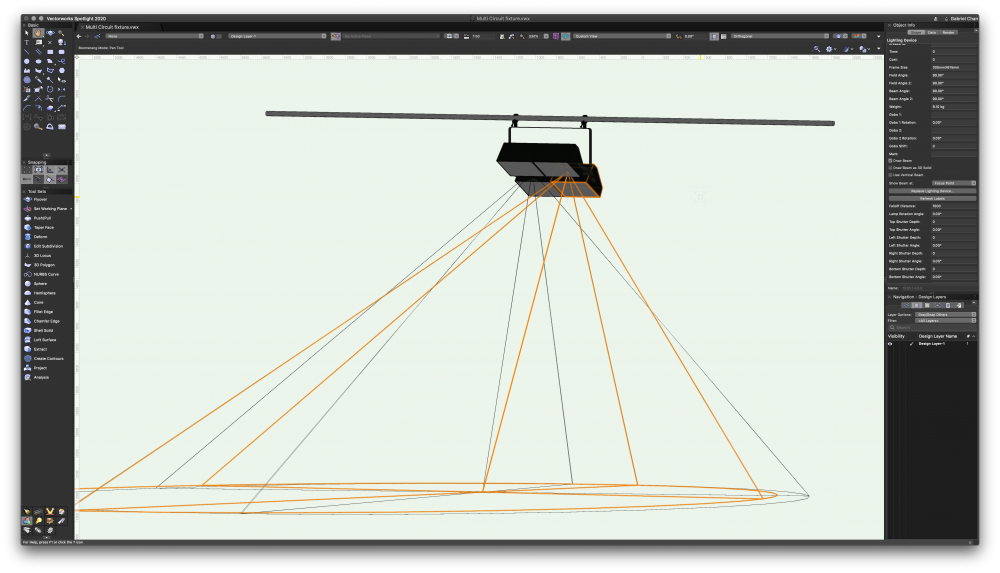
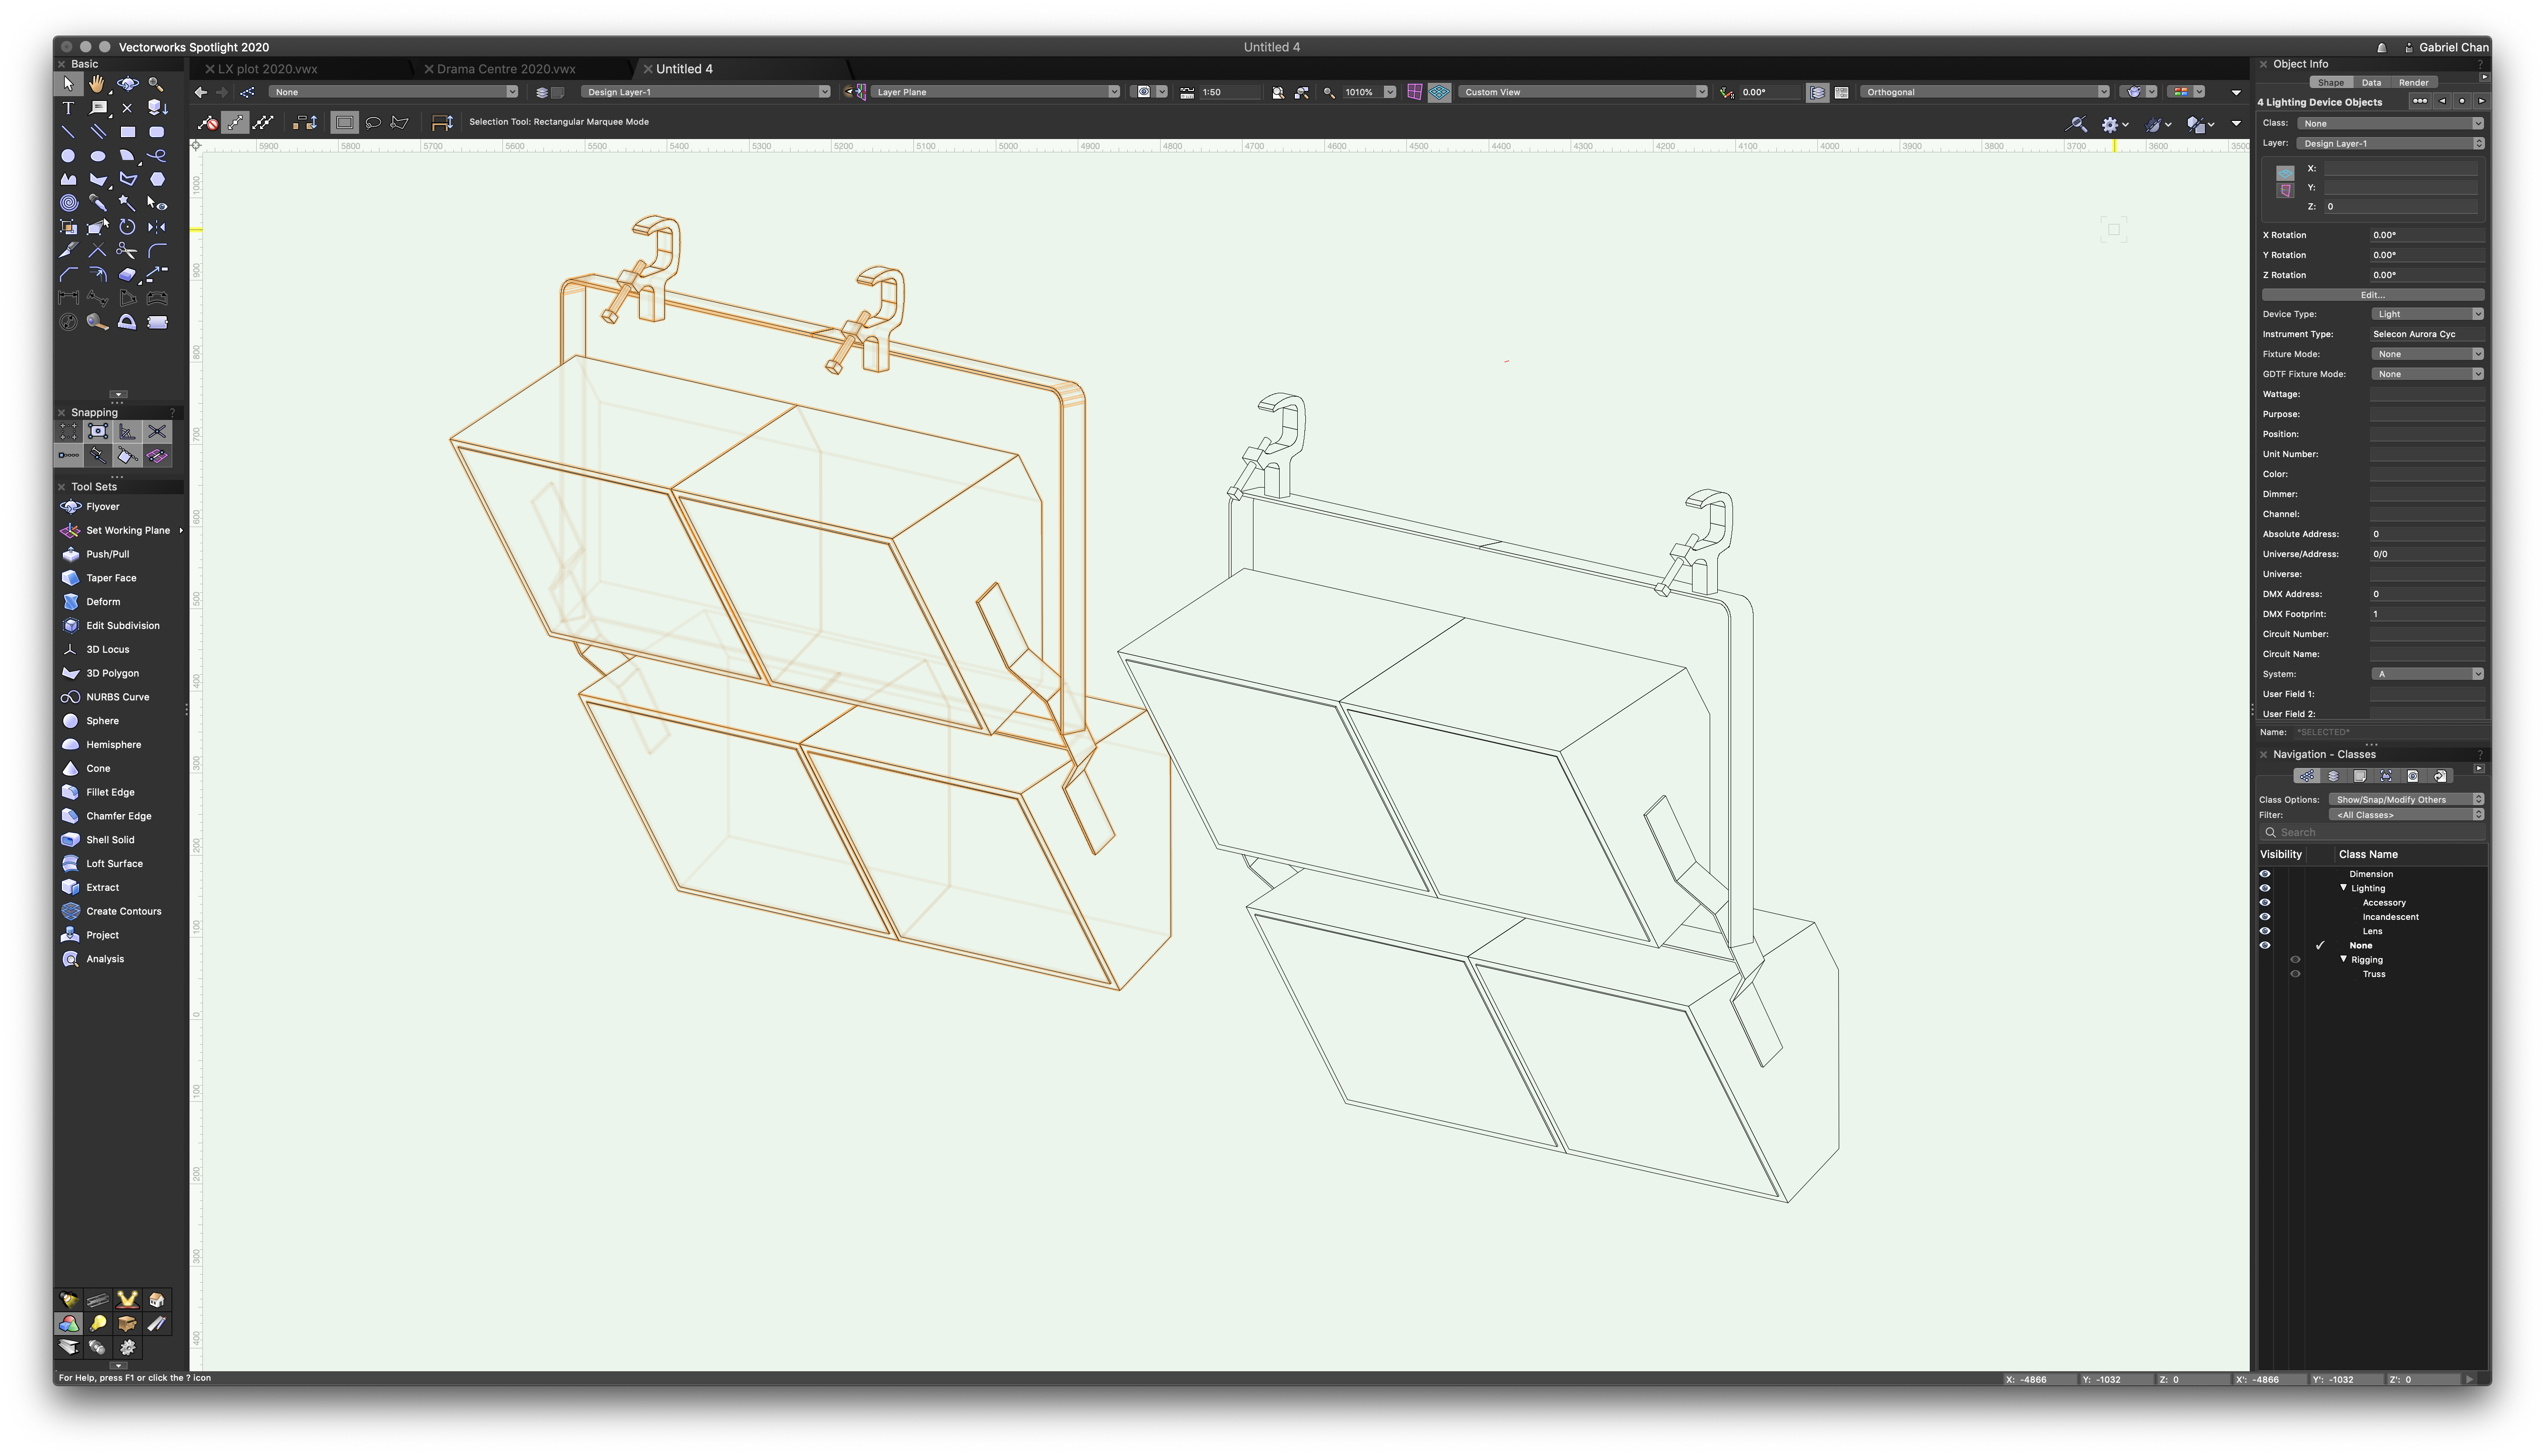
Trying to create a multi-circuit symbol. Working on Vectorworks 2020.
I have created lighting symbols for the individual cells. They all have a z height of 0. I then add 2 3D loci also with a height of zero at where the clamps would have attached onto the pipe.
So with the 6 objects selected, i.e. 4 individual cells + 2 3D loci, I proceed to create symbol.
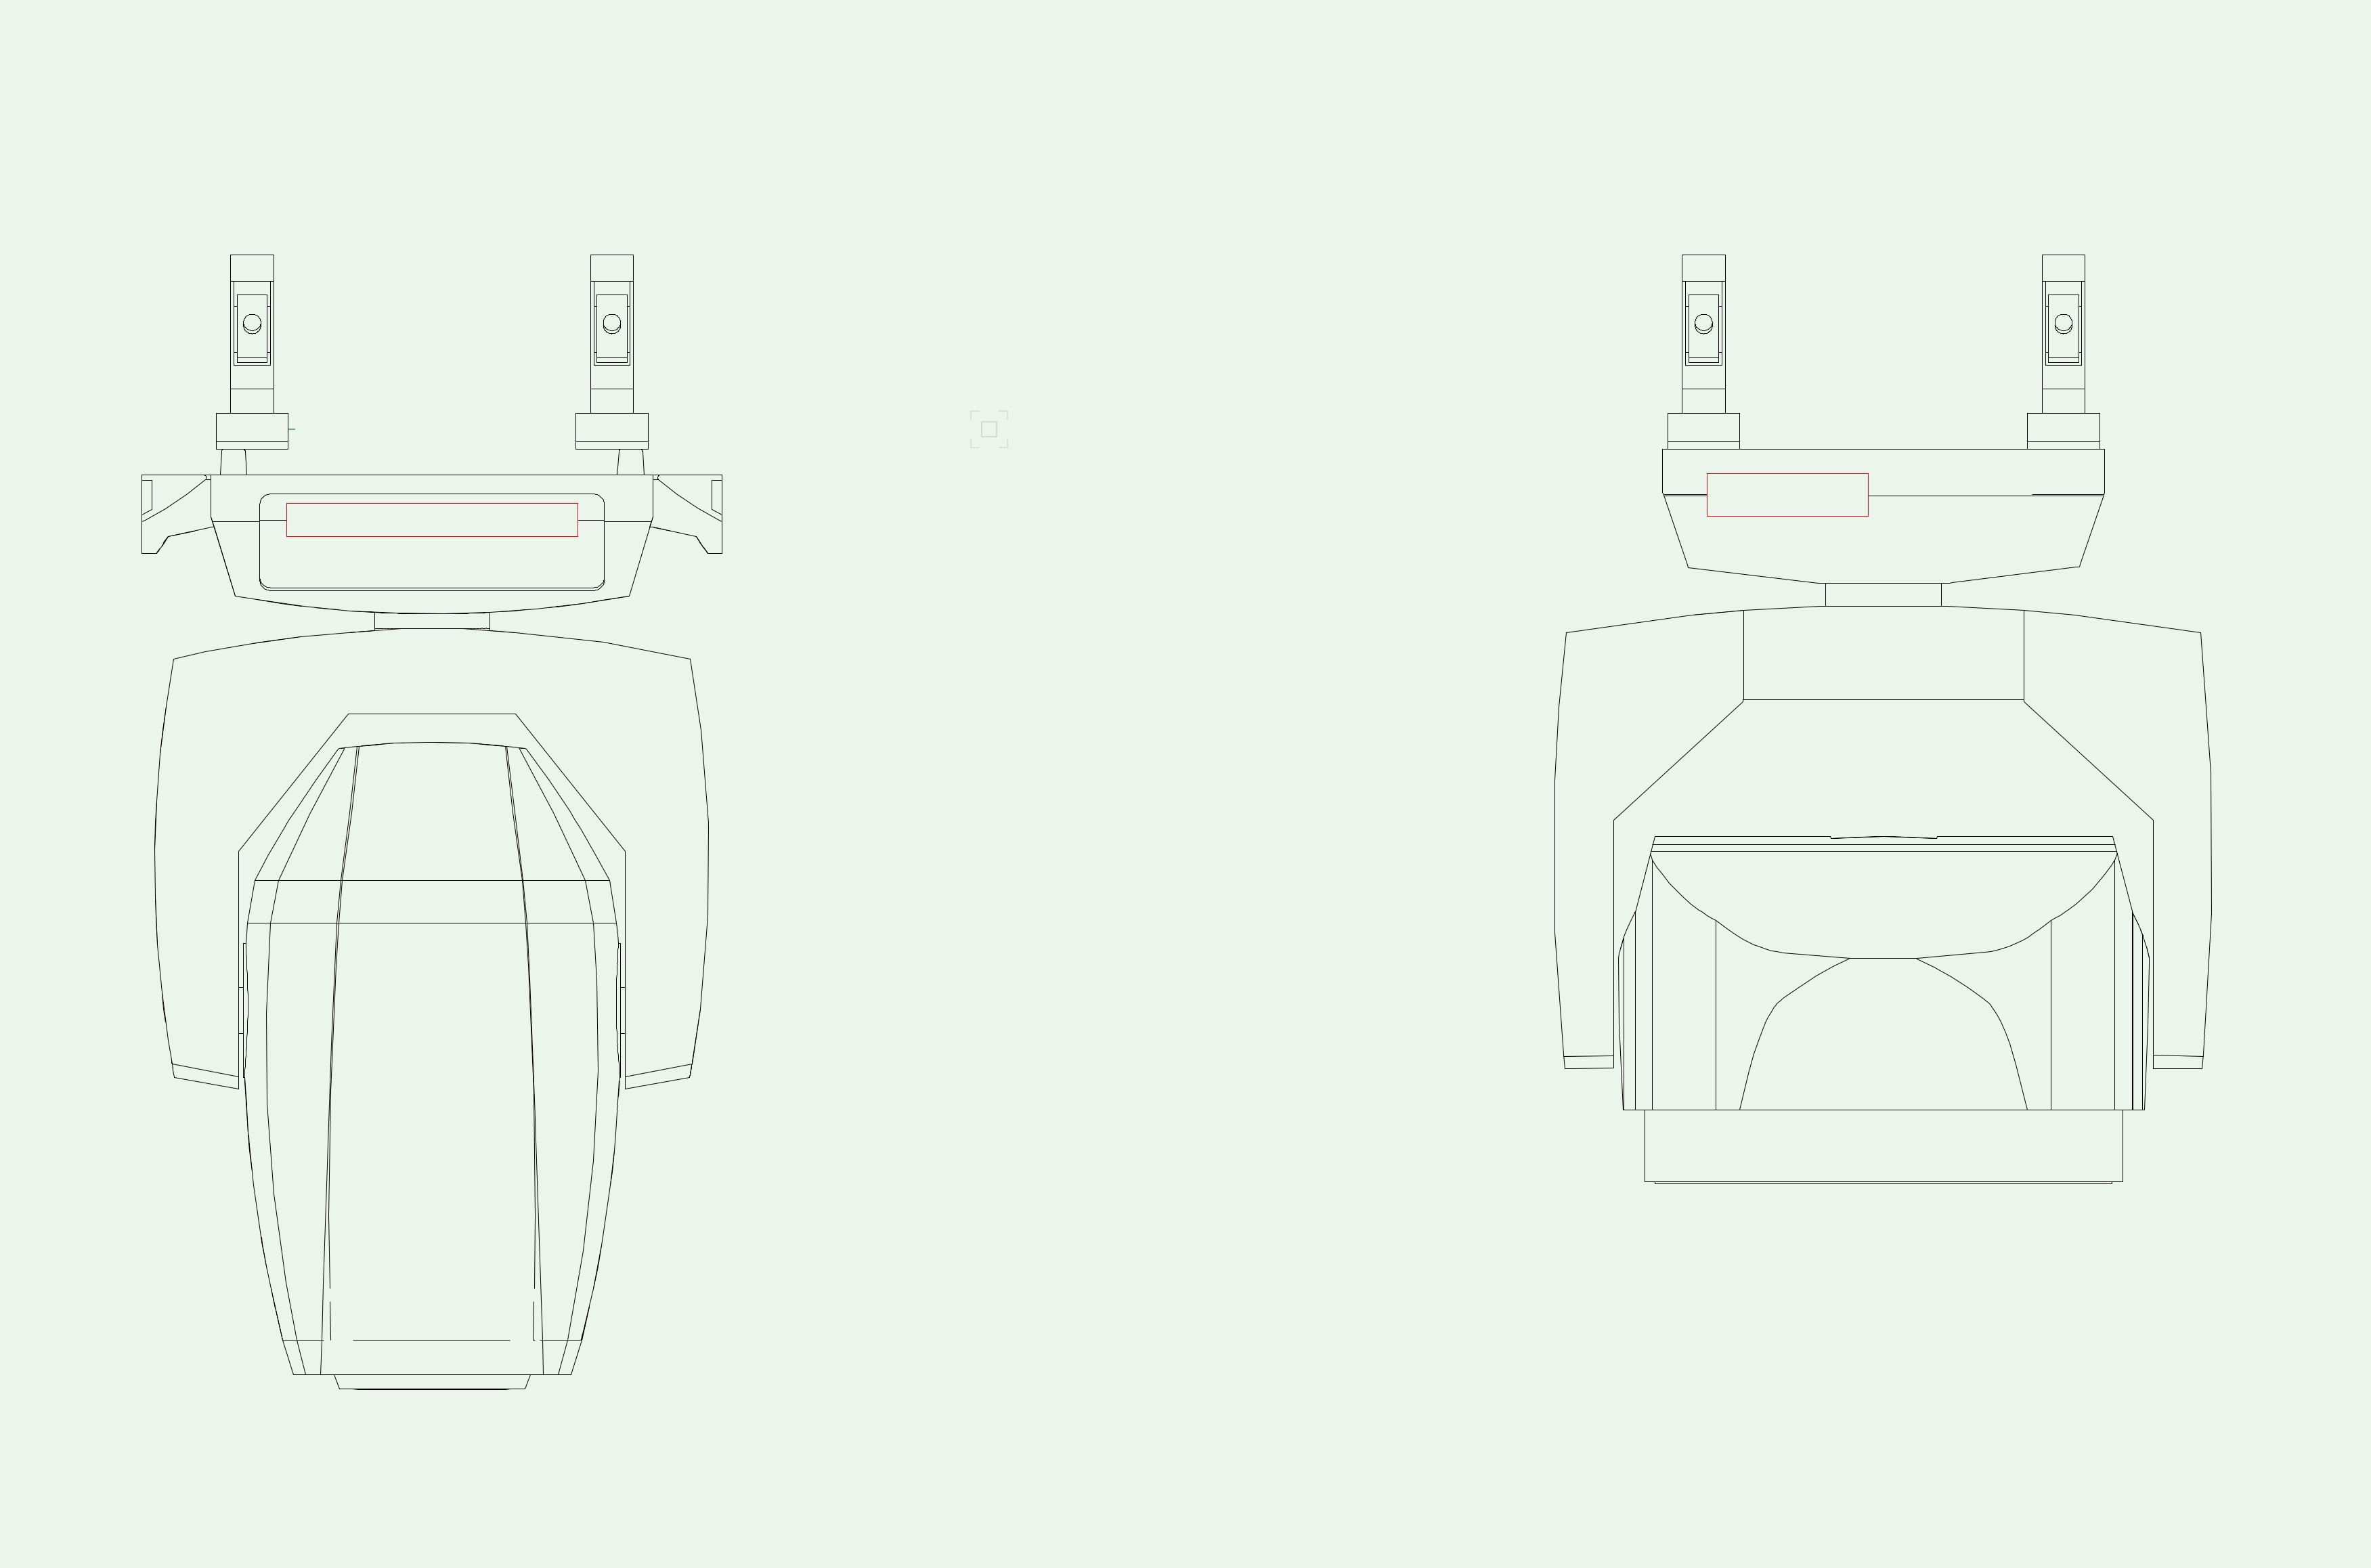
Thereafter, adding a light info record to this newly created symbol, I manage to insert the multi circuit symbol. However, examining the positions of the clamps, it seems they are not in the right position.
Is there a solution to rectify this, or is this a bug?
Gabriel
-
8 minutes ago, Sebastiaan said:
BTW for maintenance of old files I could imagine the need to edit you could try to edit the field in The recourse manager.
If you right click the lighting device in the recourse manager and click ‘attach record’, look up the Light info record, and then edit values. There you can edit the field.
Got it! Thank you!
-
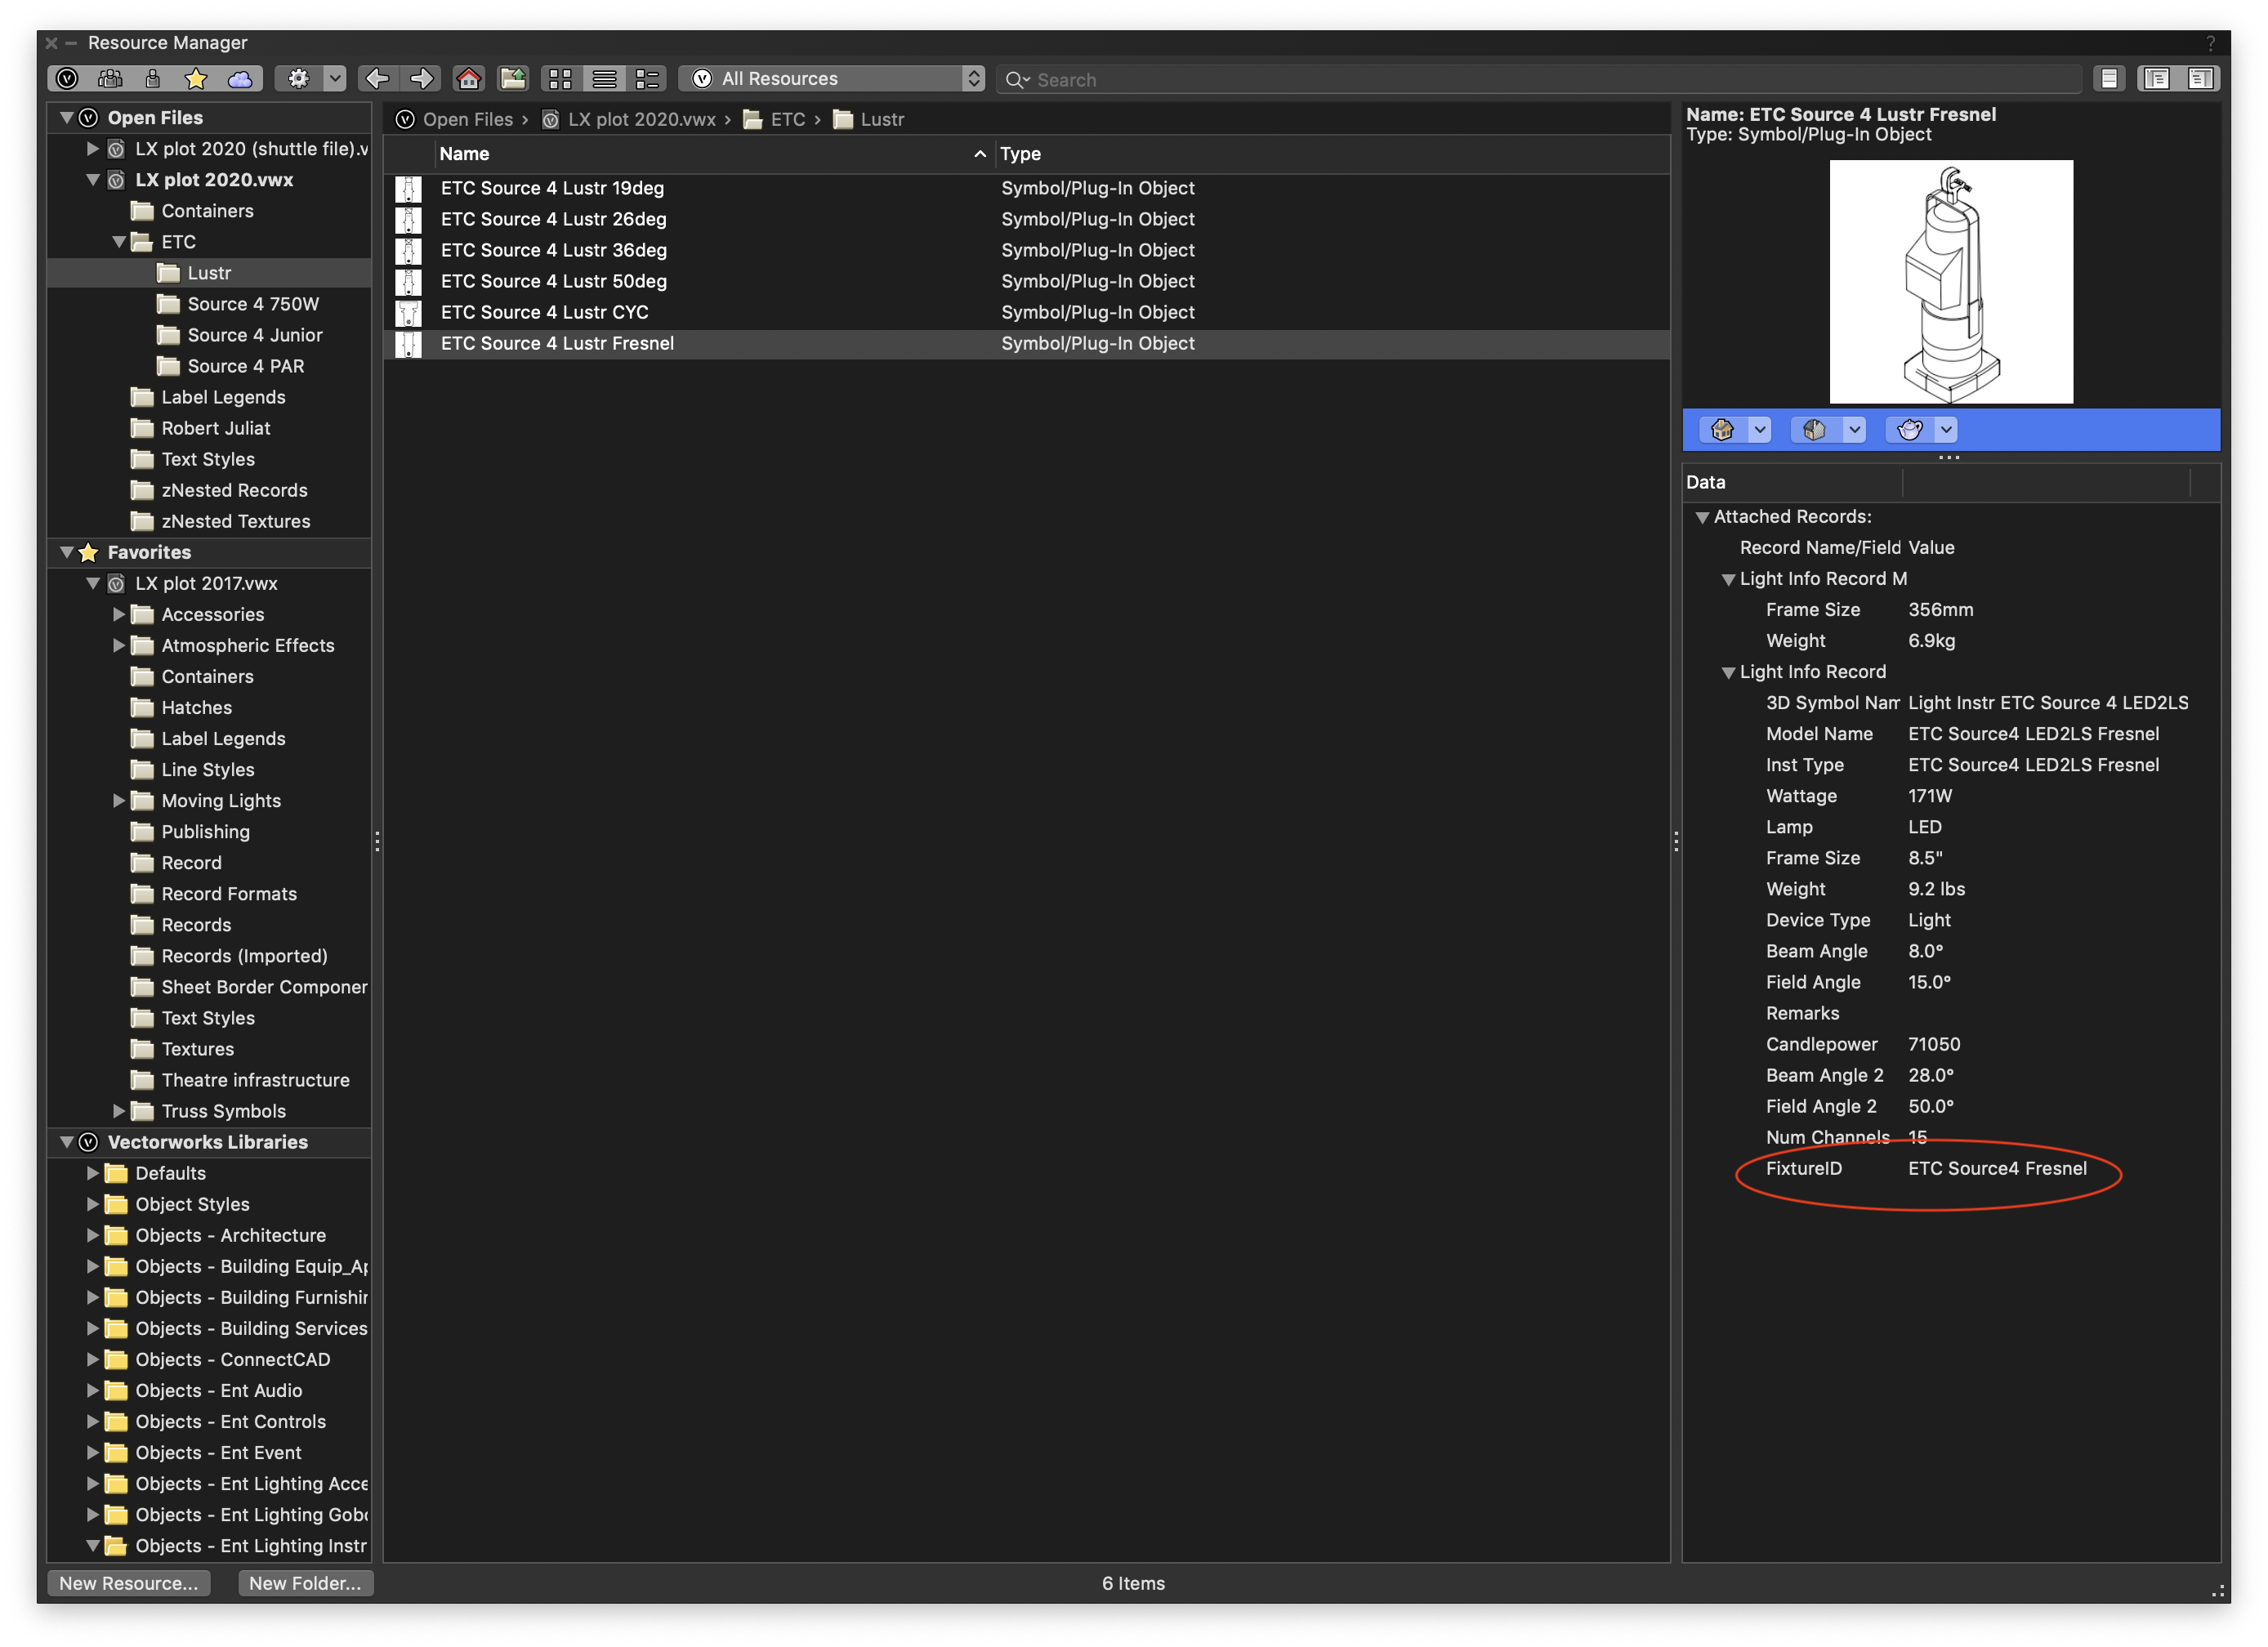
Looking at the resource manager, there's a FixtureID field that is not accessible in Spotlight Lighting Symbol Maintenance.
Does anyone know what this is used for and how it can be editable?
I'm in the process of converting my old files created in VWX2017 to 2020, and this thing came up.
Gabriel

-
Just hopped onto 2020 from 2017, and I have this same question myself!
-
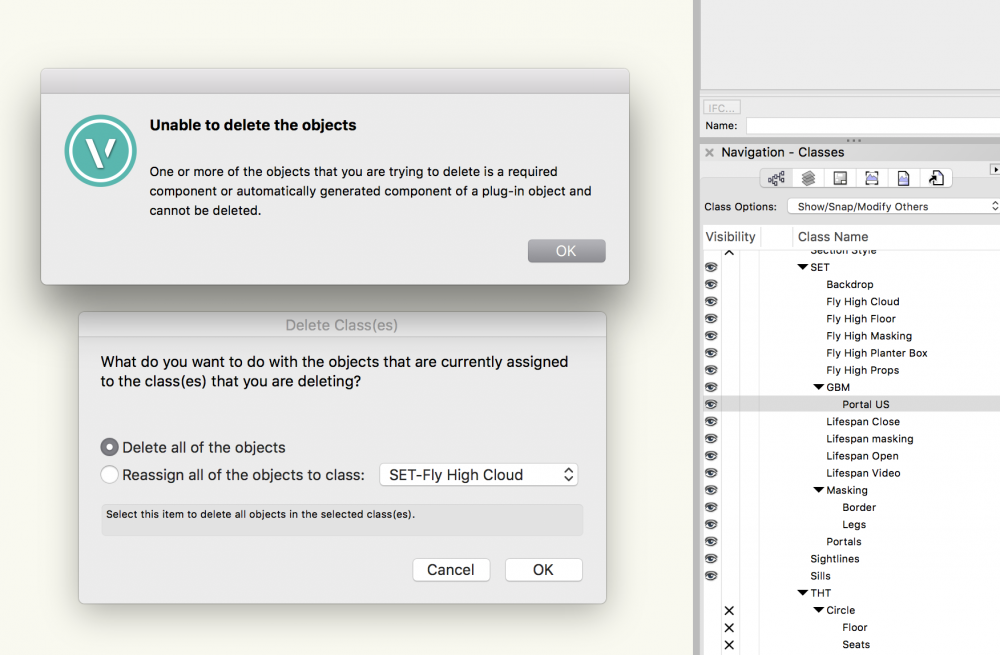
Trying to delete a class leads to this pop up window:
Unable to delete the objects.
One or more of the objects that you are trying to delete is a required component or automatically generated component of a plug-in object and cannot be deleted.
As shown in the first attachment.
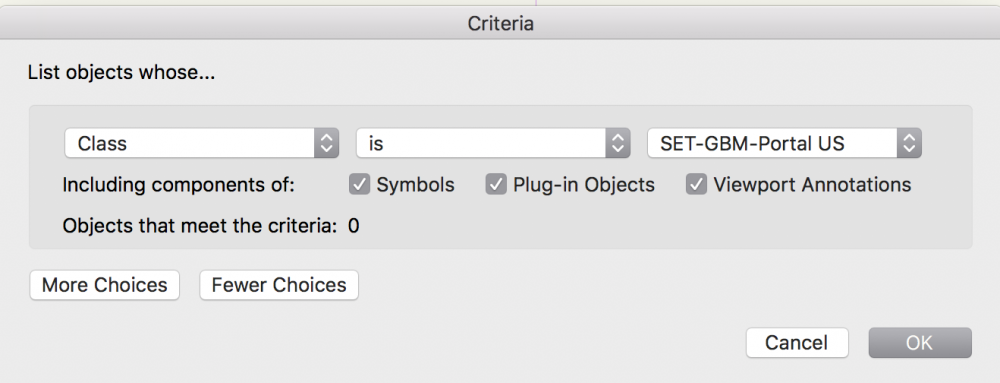
I did a custom selection search as seen in the next snapshot. No plug-in objects using that offending class however.
Am I missing something or is this a bug?
Happy Holidays everyone!
Gabriel
------
Vectorworks 2017 with Spotlight Module
MacOS High Sierra
iMac Retina 5K 27" 2017
-
On 12/20/2019 at 9:43 PM, Rob Books said:
Thanks Rob! Just as a follow up question, are fixtures made now GTDF compatible? Or are they only limited to Vectorworks 2020?
-
On 2/28/2019 at 10:54 PM, Rob Books said:
Here you go
Hi Rob,
Would you be able to repost this in Vectorworks 2017 file format?
Vectorworks Service Select is also not available in my country of residence.
Gabriel
-
On 11/18/2019 at 4:41 PM, Magnus Mikaelsen said:
I will try CMD+/? while having the fixture marked?
Try it without selecting any of the fixtures. That will update every single fixture.
Gabriel
-
2
-
-
Hi folks,
It's been a while since I was active on this forum. Happy to be back though.
I've been holding out on upgrading for a long long time. Still on the 2012 MBP retina, the very first batch.
Now that the 16inch MBP comes with an escape key and possibly a better typing experience, it removes all my red flags in the previous gen models that prevented me from upgrading.
So the question is, should we go for the i-9 8 cores processing at a lower individual core speed, or would we benefit more from the i-7 6 cores with a higher individual core speed? I suppose it's more of how Vectorworks utilises these cores.
My work mainly revolves around the VWX entertainment module and a fair bit of rendering. I use mainly hidden line renders for 3D.
Any thoughts?
Gabriel
-
Perhaps place those ancillary items on a separate class?
I vaguely remember being able to set limits of what Lighwright counts and just having those on a separate class should do the trick.
Gabriel


.jpg.c3071c11db939972691b122c9664f27e.jpg)
.jpg.a90606a0f8a7f439b6aa1917ba707108.jpg)
.jpg.0dc64588eebdd404033dd7e91b5f3ffd.jpg)
.jpg.dddad9a0497d1c93655d78189877af24.jpg)
.jpg.a3f756814b31a77ef82ddc31f6d3a146.jpg)
.jpg.dd87a6f0bc90dc842dcf5bd4b7d129c0.jpg)
.jpg.ecfc4c0c337744e35720417cdb7c4c99.jpg)
.jpg.96f1bd70cdea057cc2f6f734c0a18a03.jpg)


Creating a Class with hierarchal order automatically creates a duplicate class with non-hierarchal display
in Troubleshooting
Posted
Hey Pat,
I've tried restarting the software. Does not work. It was from an old drawing of a venue that I made in 2017 back then.
So after a bit of tinkering, I think it has something to do with the importing of DWG files.
Step 1 of Troubleshooting process:
Copied the Walls and pasted them into a new file. Apparently no class hierarchal problems.
Step 2:
Copied the DWG elements into the this new file. The class hierarchal problems then appear in this new file. My hunch is that it has something to do with the appending of prefixes to DWG layers when importing them into Vectorworks classes, but so far I have only tried copying the DWG elements from the old file. Also, possibly the fact that 2017 did not have the appending of prefixes during import (might be wrong - just a guess)?
I'll need to dig around for the original CAD file for importing as it was a long time ago. Will update if I make any progress.
Gabriel