scottmoore
-
Posts
673 -
Joined
-
Last visited
Content Type
Profiles
Forums
Events
Articles
Marionette
Store
Everything posted by scottmoore
-
I've done these with image props. It's best done in post, but if you just need to show a client the effect, an image prop will do it.
-
 I will suggest going back and looking at Andy Dunning's concept of the Design Layer Viewport. It seems like a silly, convoluted workaround at first but once you understand the process and the benefits, it's actually extremely cool and I use it all the time for anything that is raked or anything that is automated. You can place everything exactly where you want it in 3D space and still maintain accurate 2D models for you shop staff. The latter is a huge selling point. Once you rake a truss, what do you do for accurate shop drawings? This approach allows you, without any extra effort, to produce detailed plan views of every structure in your rig and it is basically laid out "flat on the floor" exactly the way the shop staff preps it. No silly wireframe nonsense. You cannot do that with a generically raked structure. Another benefit is that moving a truss structure on your plot in any direction (X, Y or Z) moves EVERYTHING associated with it regardless of which classes were turned on or off or how you selected all those items. Now truss, lights, softgoods, scenic elements, video elements all move together with a SINGLE click. You can't do that with a generically raked structure. Lastly, adding fixtures to an already raked truss is now no different than adding a fixture, or any other element for that matter, to a flat truss. Need to add a truss border after a meeting with the production designer? Easy as adding a soft good to any straight element. You can't do that either with a generically raked structure. I seriously recommend this approach.
 -
I agree with Josh. I have a set of classes in my template file simply for render lights. One of those classes is labeled "ambient" and I'll put a point source there. Sometimes multiple sources to reveal what I need to reveal. I set those lights to color by class so I can completely change the overall ambient experience. Regardless, I get to control all of that without relying on the generic VW ambient light.
-
I have seen plenty of quirky things like this. Often, the answer can be relaunching the file. Sometimes you have to replace the lighting fixtures. Sometimes refreshing the lighting fixtures (command+/) will do the trick. Question; did you happen to use final quality renderworks to render your scene PRIOR to focus all of your fixtures? There is a known bug that I refer to a "render cache" where occasionally the final quality render style will simply load a previously rendered image as opposed to tracking current updates to the drawing. The solution here, unfortunately, is to re-launch the file. A re-start of the application is usually not necessary. Very tedious indeed.
-
...and thank you for all the very helpful suggestions.
-
Actually, the Brograph team are subcontractors of mine and developed that lighting tool due to a large project we collaborated on in 2014.
-
I have been considering Cinema 4D with the Octane rendering engine simply because it will do what I need it to do. This is really disappointing though for the following reasons: - the expense of another major application platform. Of course, this is truly the crux of the biscuit as Maxon would rather us purchase another product than give us what we need in a single product. - the learning curve - my assumption is that I would create all the geometry in VW then export to C4D and add textures and lighting there. The issue occurs when you need to start revising a project. Then you have to determine how to go back to VW, make changes, then I suppose merge those changes into C4D and then make all the necessary updates to lighting and texturing. Very clunky. - I believe the upside is that Octane rendering will be faster than renderworks by a huge order of magnitude. Also, the end result will look better. But this is all extremely frustrating to me.
-
Sam, That is true, however, the real issue is whether or not Maxon will allow the necessary control over light objects. The functionality is there, VW users simply do not have access to it. To exacerbate the issue, that kind of control WAS available seven years ago prior to moving to the current rendering engine.
-
Odd duplicate fixture issue with Design Layer Viewports
scottmoore replied to scottmoore's topic in Entertainment
Indeed. I thought about reopening the drawing but my solution, at least in this case, was as quick. Really odd. Also strange but helpful was the fact that all three fixtures were pointing in slightly different directions. Were that not the case I suppose I would have been troubleshooting why I had a set of fixtures that were way too bright. -
I ran into an odd issue this morning. I have a Design Layer View Port of a rotated truss with some automated fixtures attached to it. Upon trying a test rendering I noticed some odd discrepancies in the appearance of the fixture lenses. Upon zooming in I discovered that there were duplicate fixtures in the DLVP. I checked to see if perhaps I had a duplicate DLVP and that was not the case. I went back to the Design Layer in question to see if there were any duplicate fixtures. There were not. I did not try Restoring Fixtures which I wish I would have. I instead simply deleted the DLVP, created a new one, raised it and rotated it and all is well. I do wish I had though to check my Visualization Pallet prior to deleting that DLVP. Has anyone run into this before? Thanks!
-
That looks fantastic! It is quite easy and WELL worth the effort. -Scott
-
Preach it Ms Claiborne!
- 9 replies
-
- 2
-

-
- spotlight
- renderworks
- (and 3 more)
-
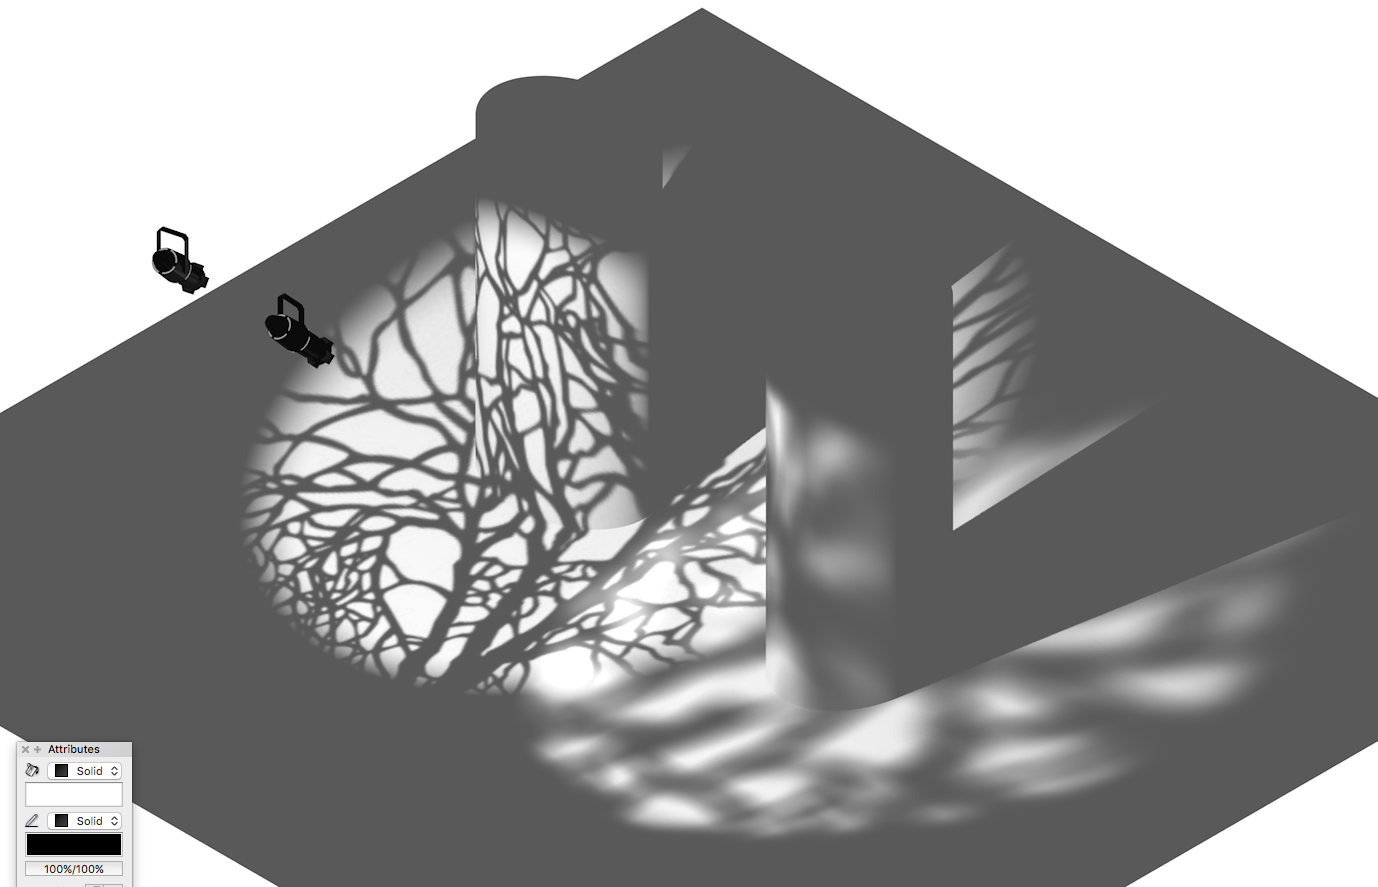
Josh is spot on with this. I HIGHLY recommend copying an existing gobo texture and learn how to edit it. It is quite simple. To that point I have created my own library of gobos simply because of the ring, the resolution and the fact that there is no control over the edge focus. Once you see how to do it, the process is very simple. I am attaching an image of both a hard and soft edge gobo in use.
-
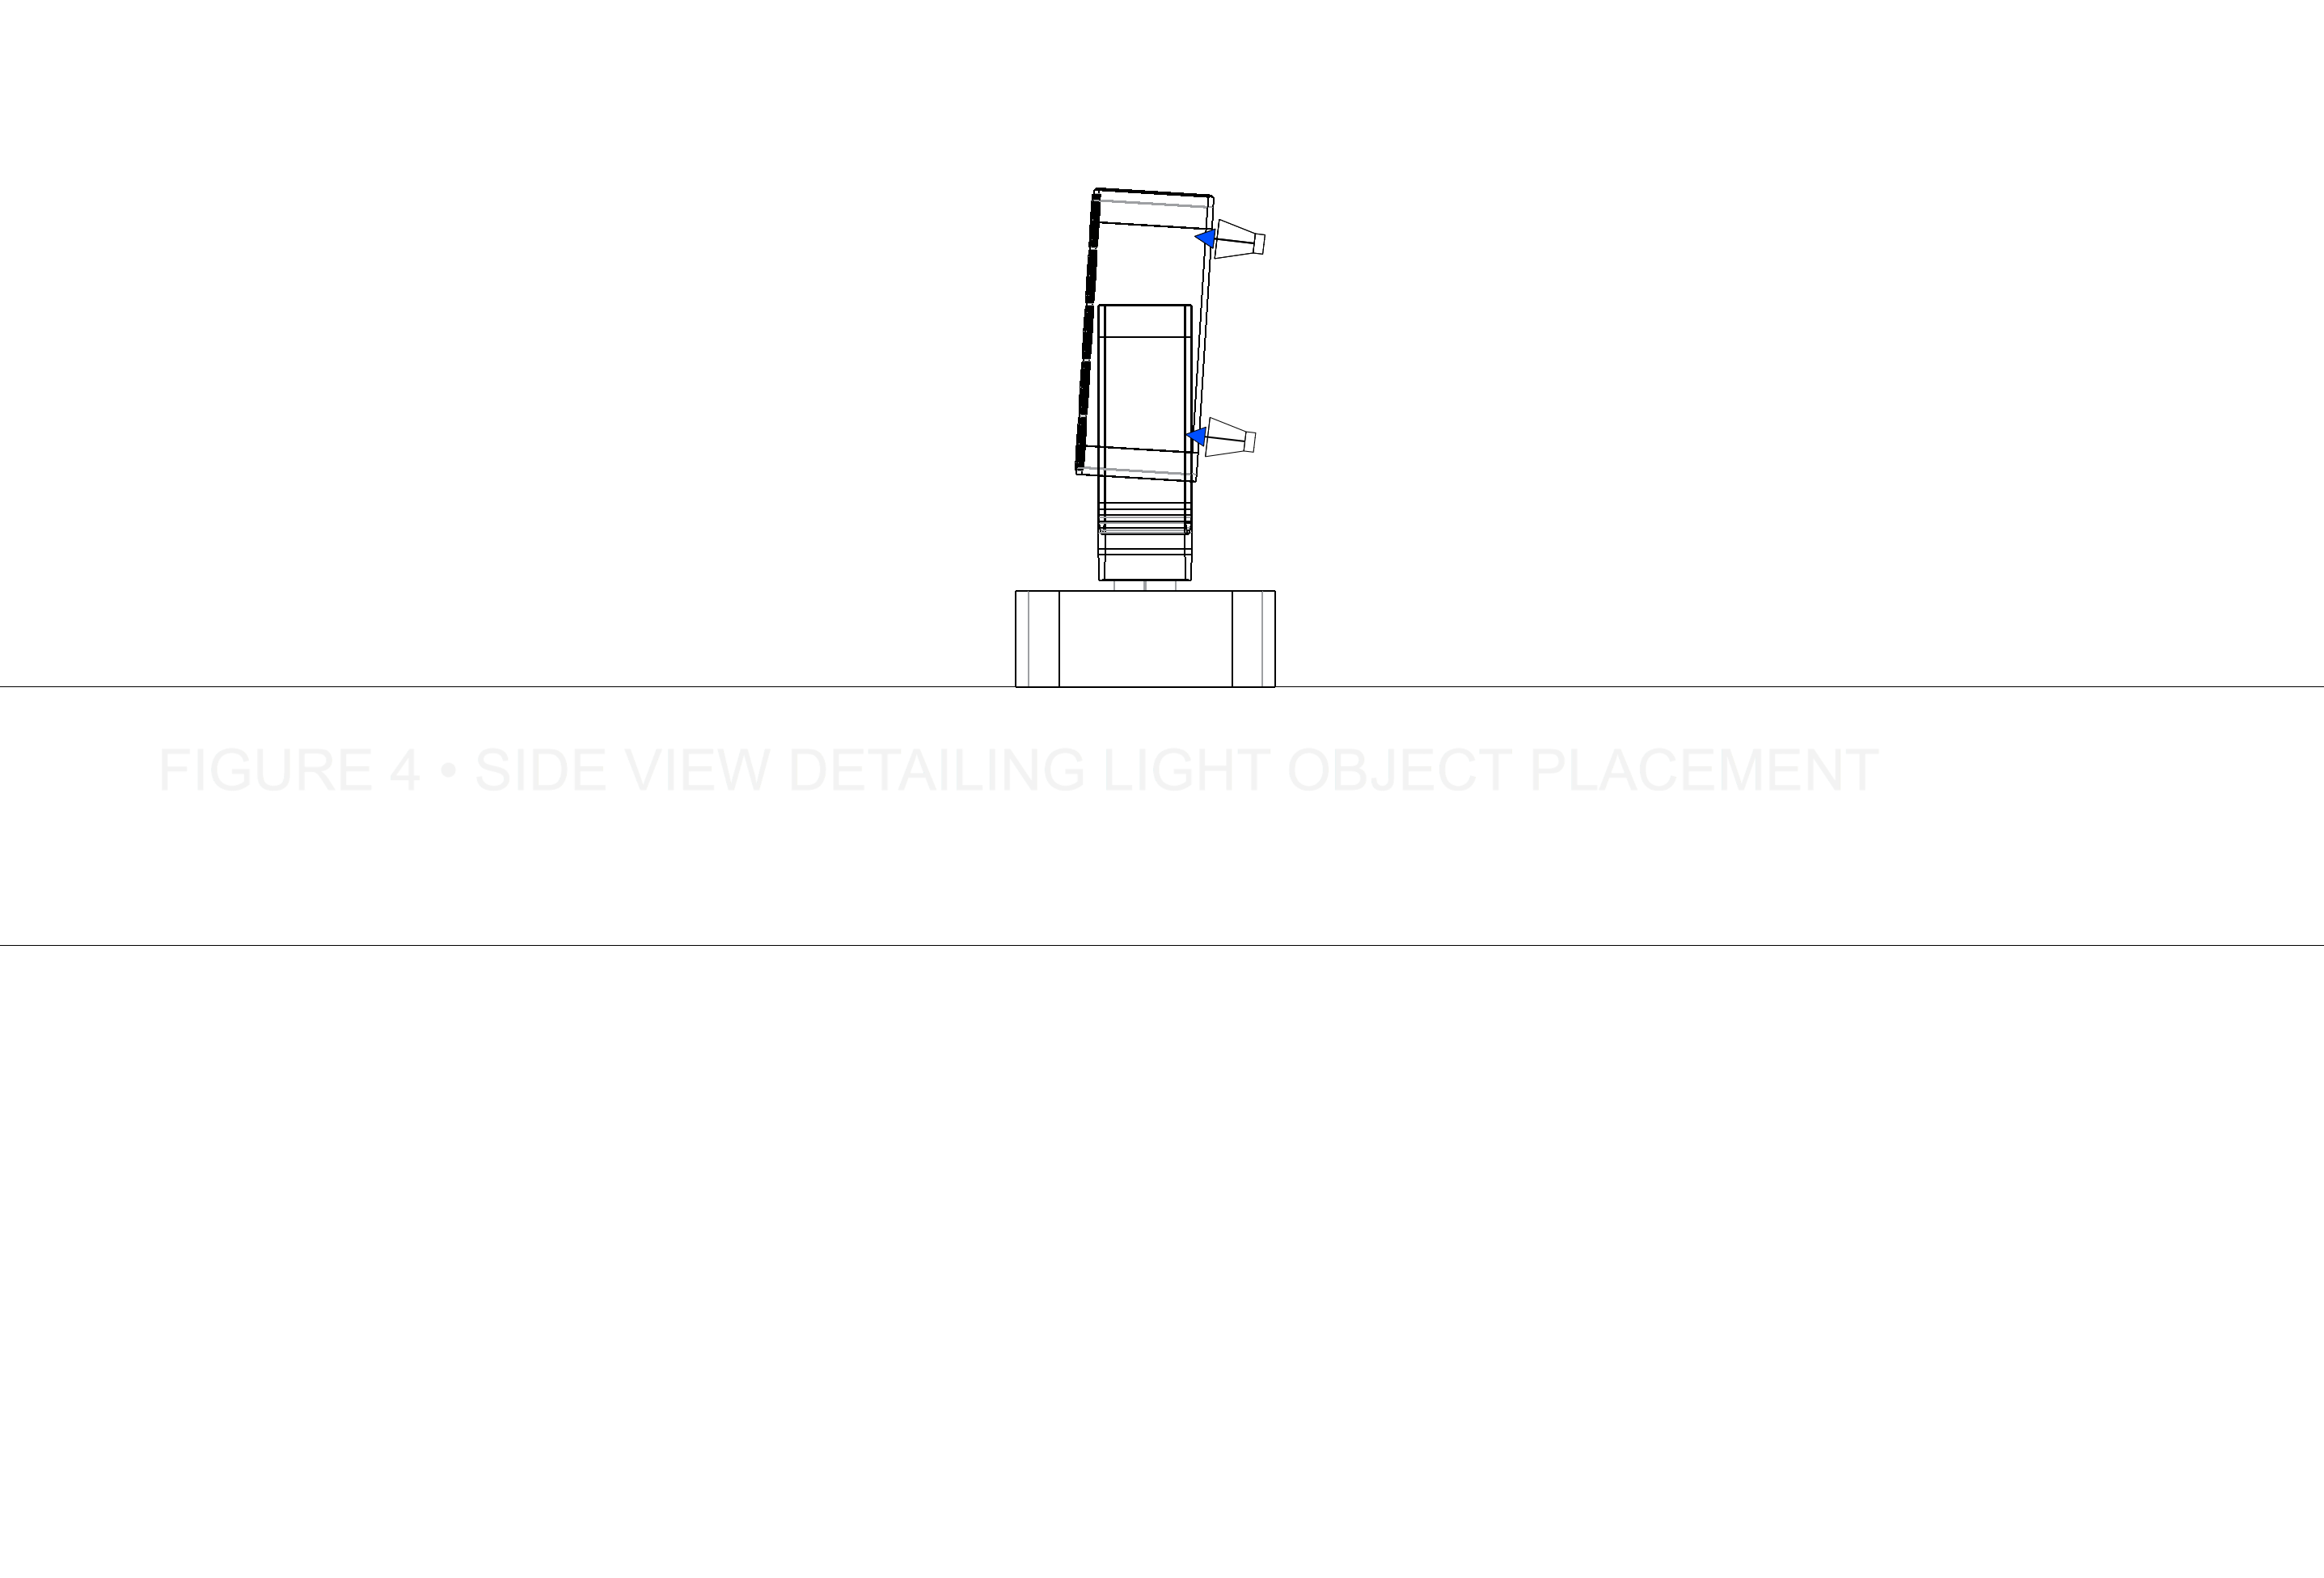
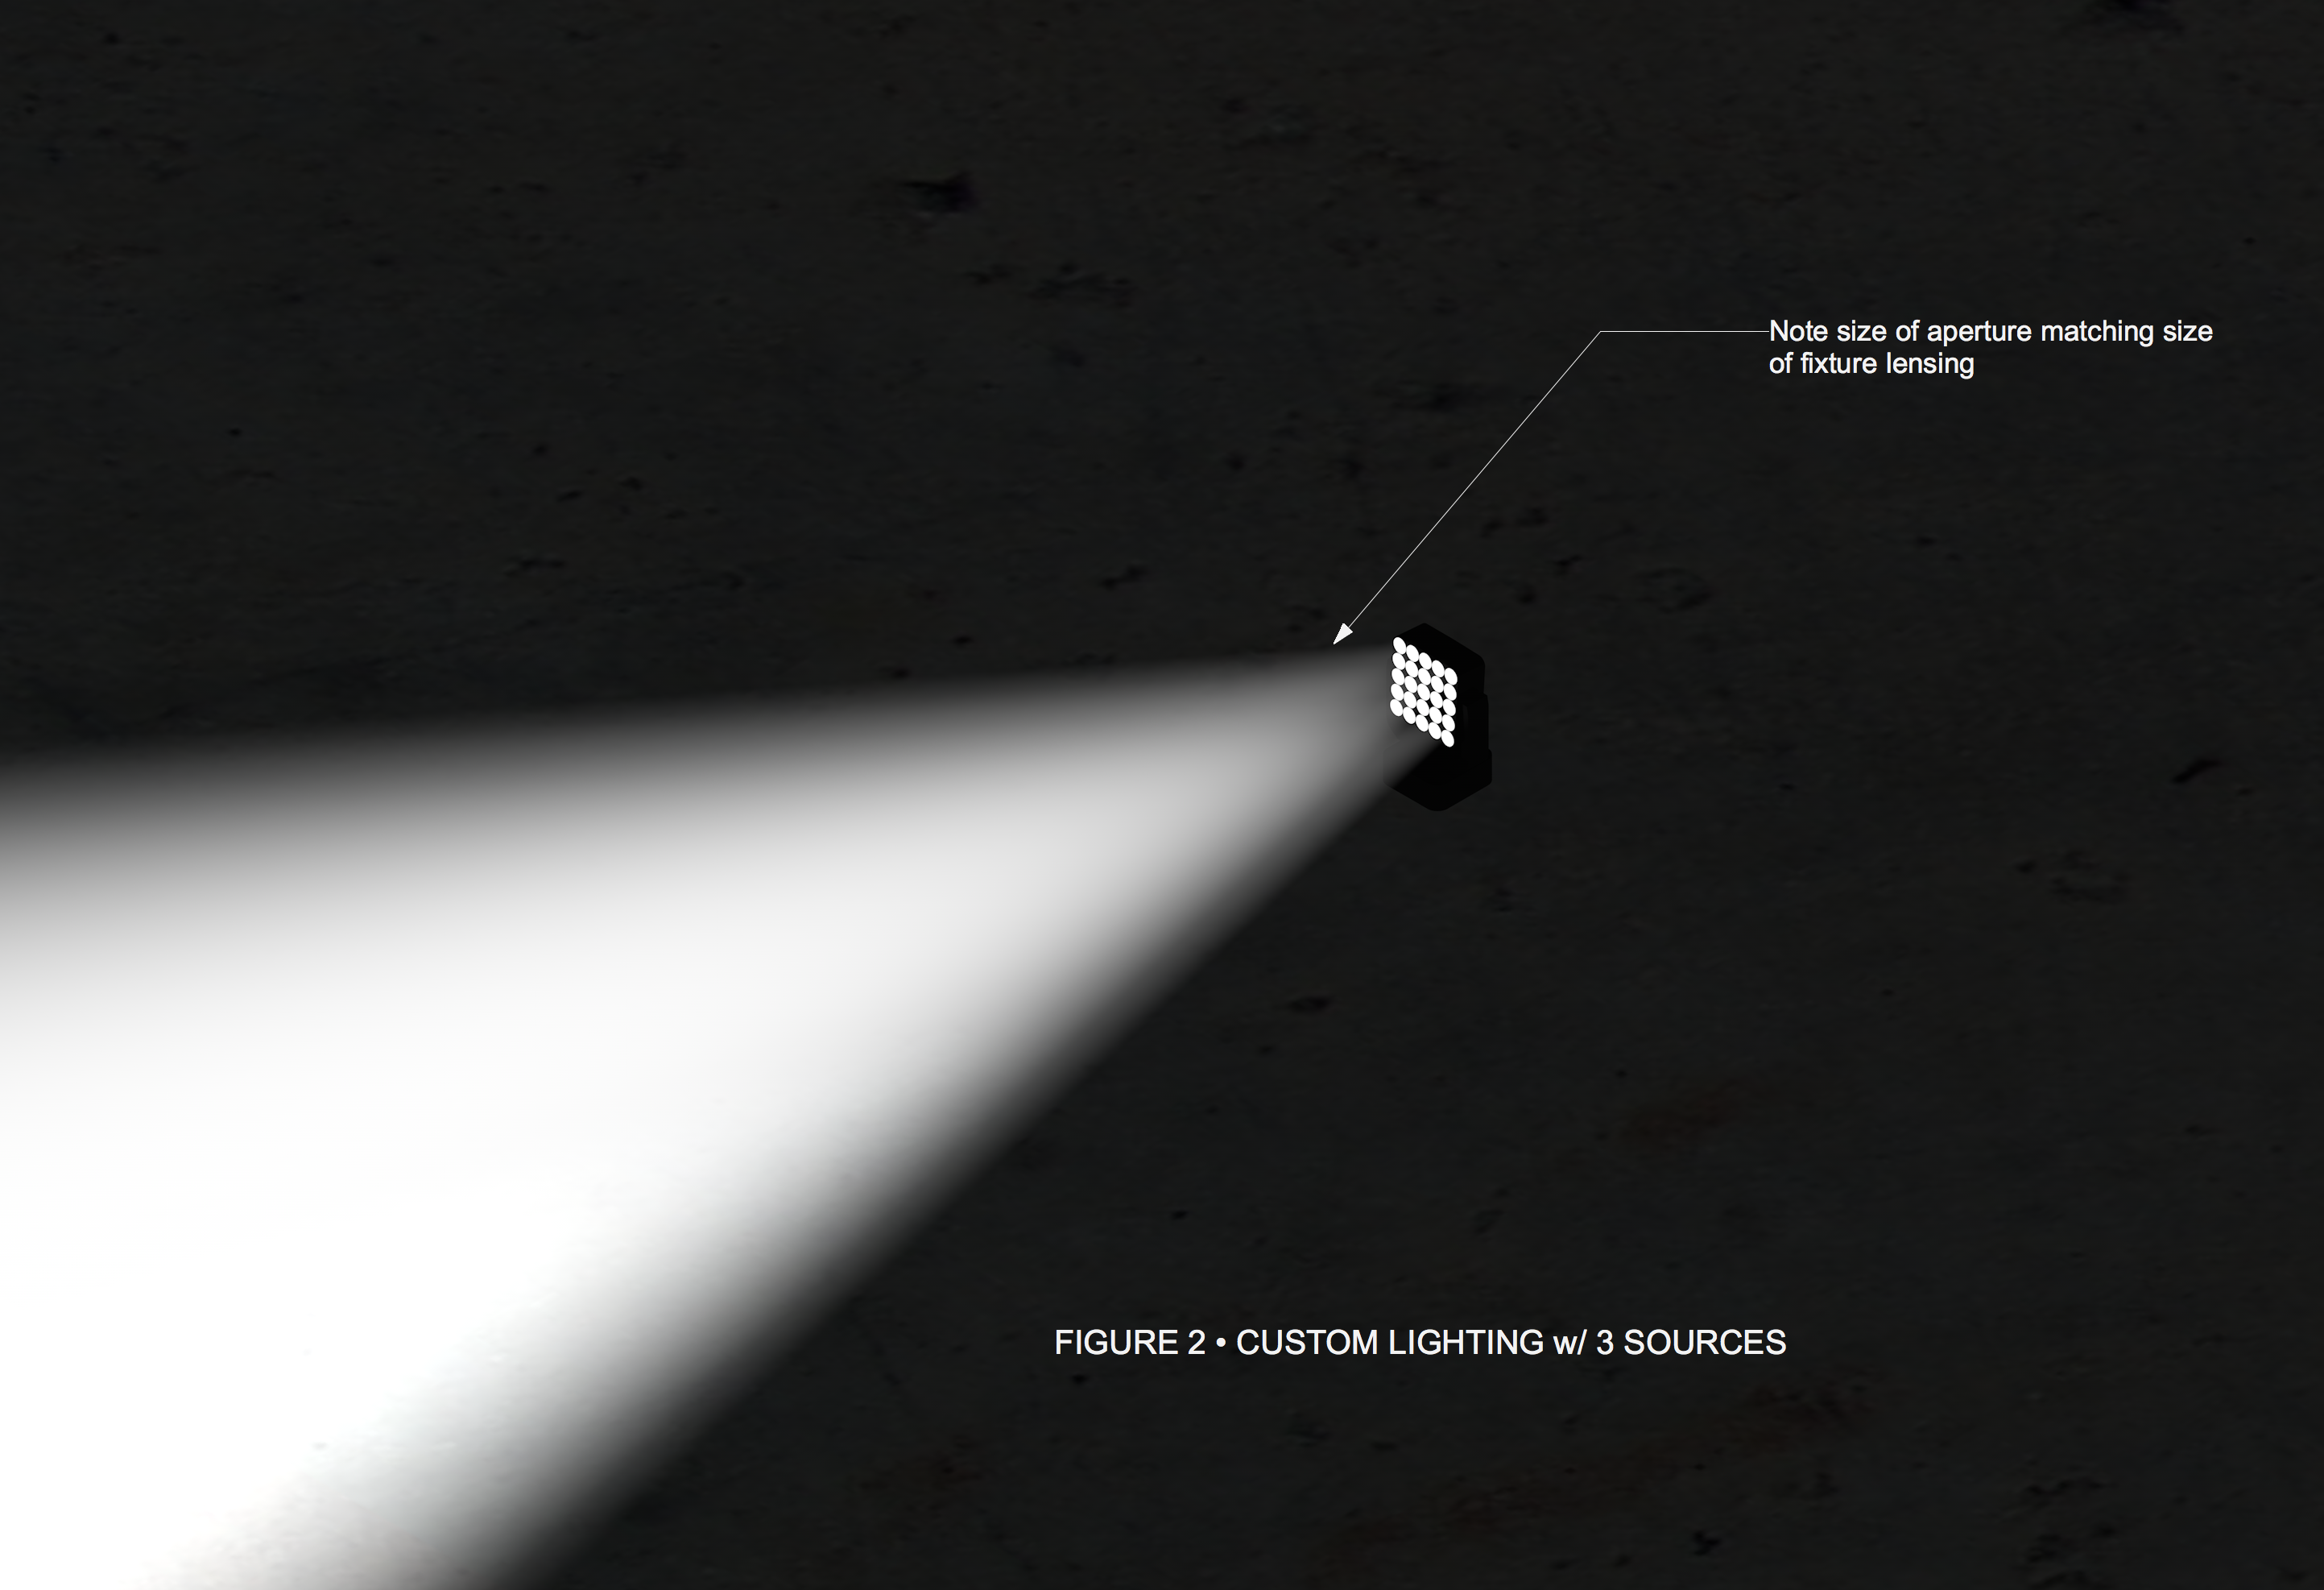
I thought it might be best to post a set of images to detail the issue posed by eanz. Attached are 5 figures that give you an idea of what I do as a workaround.


-
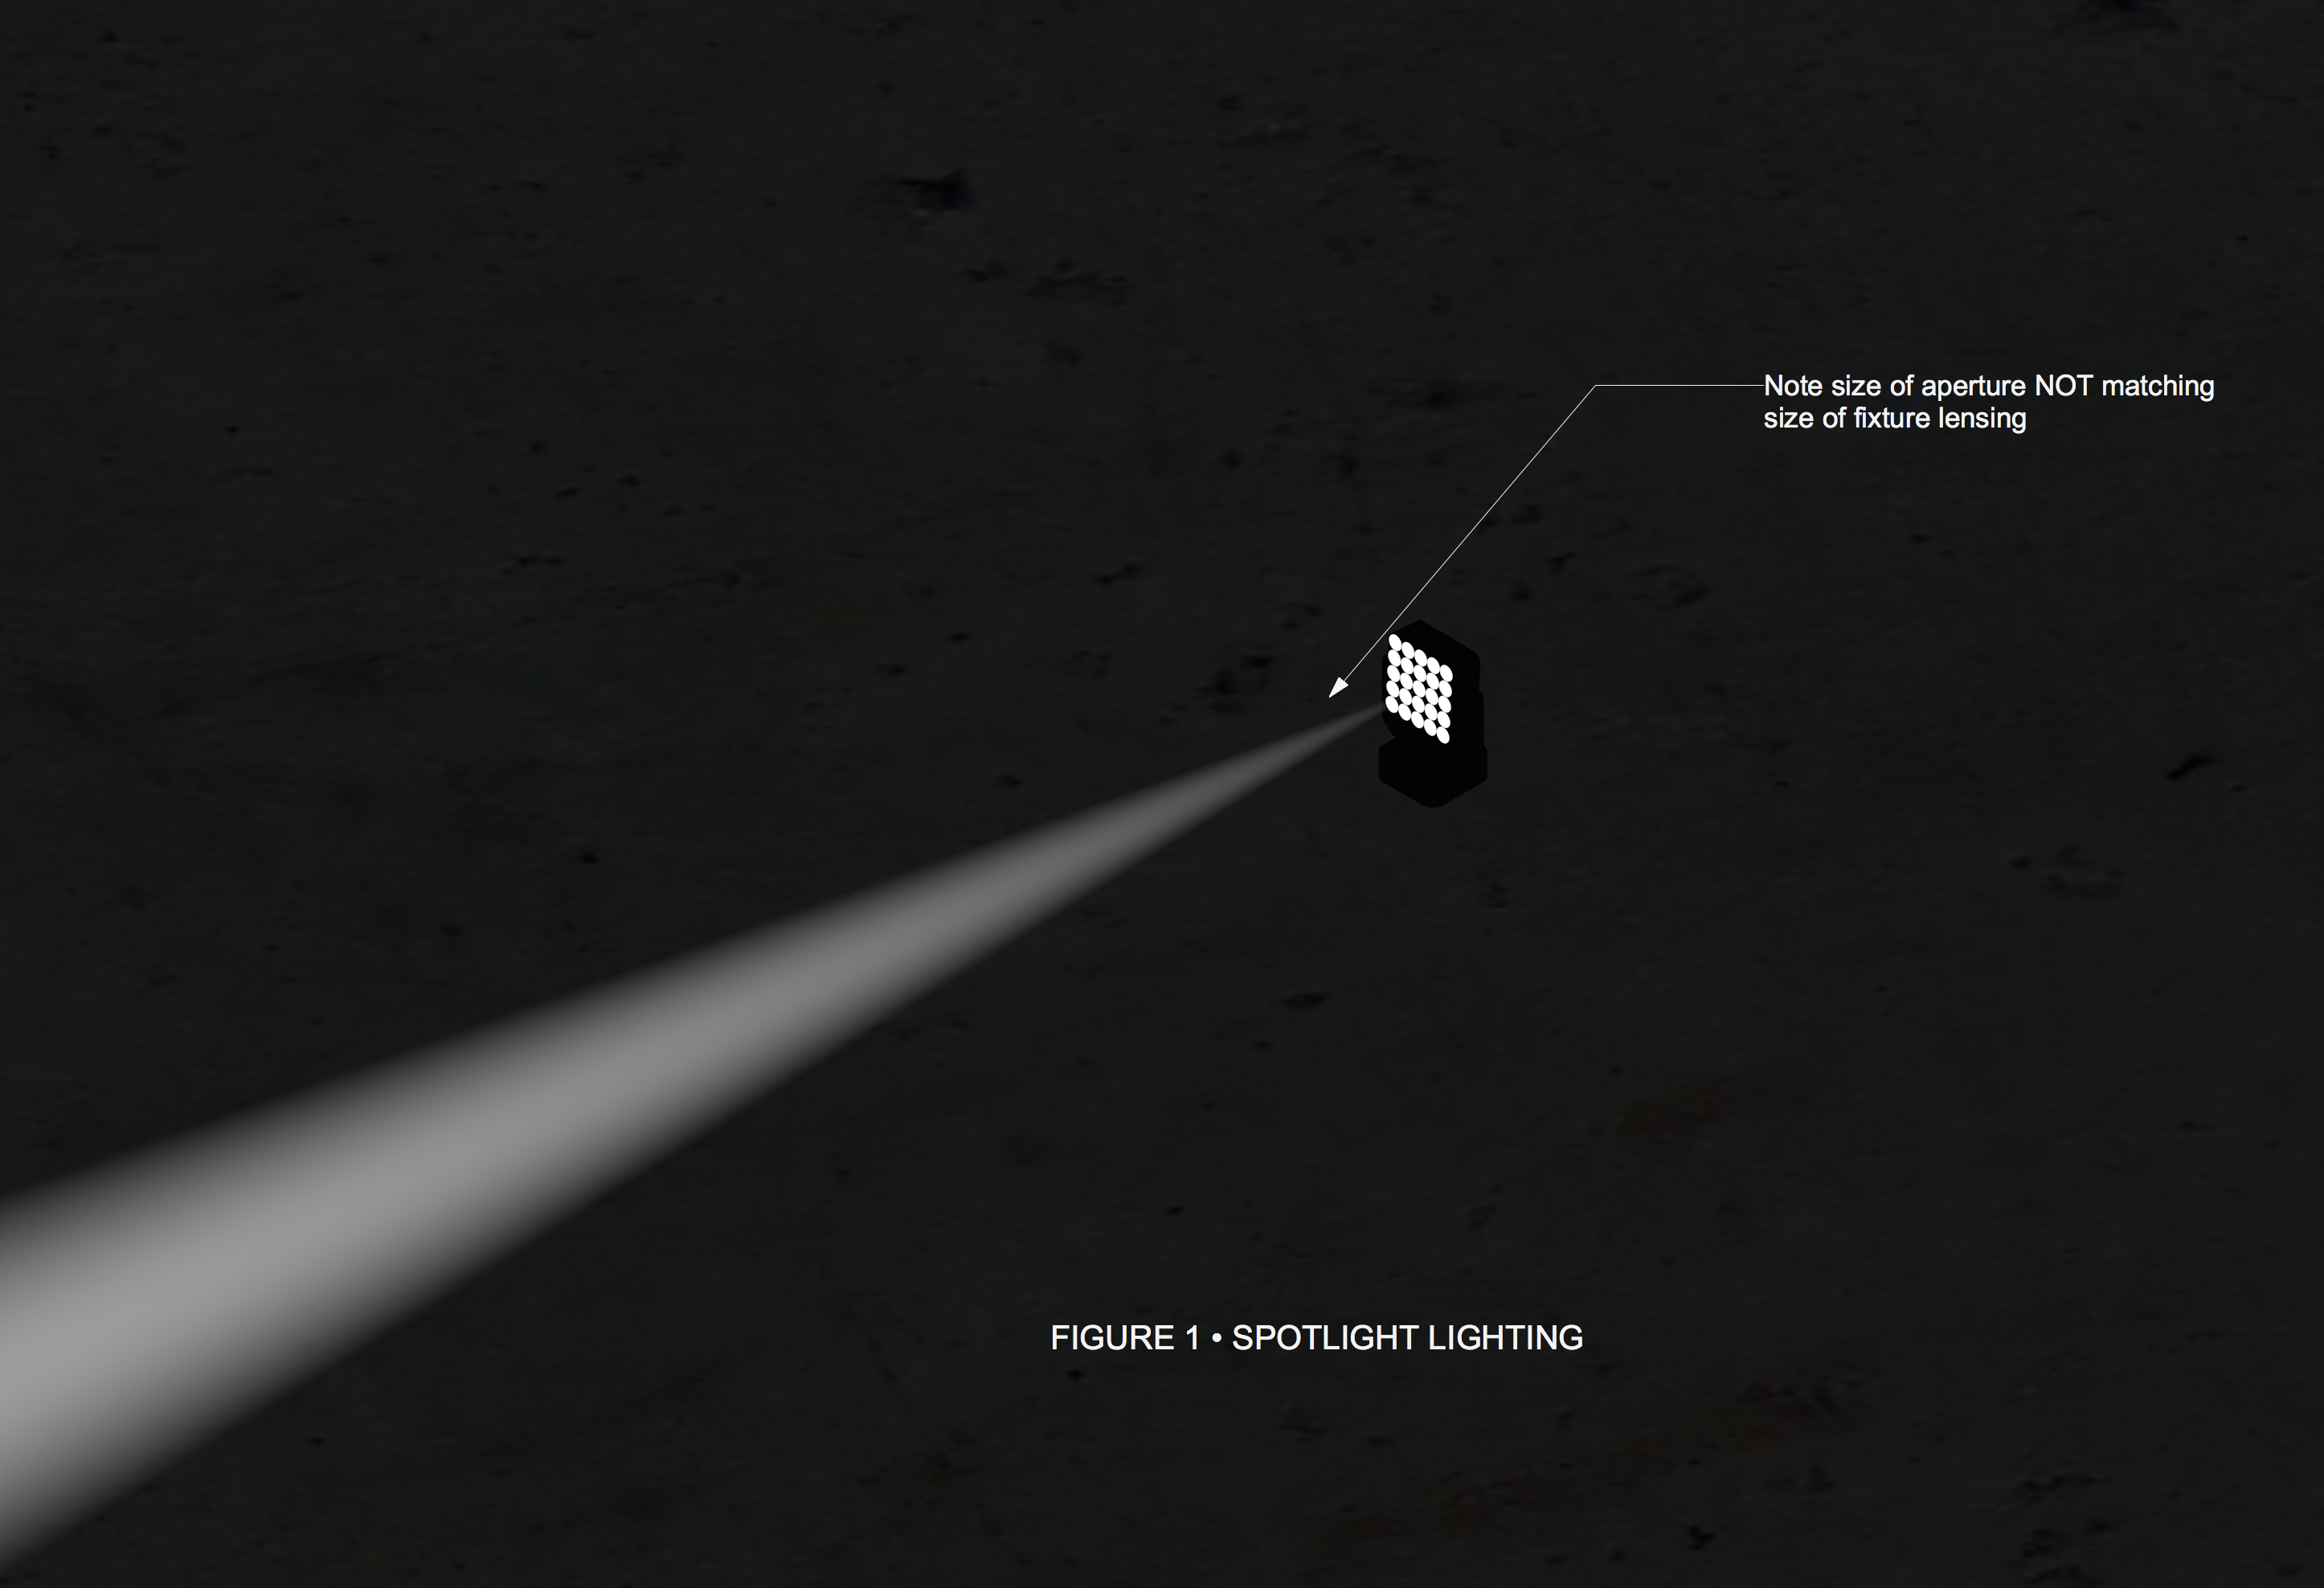
This is how we have created all of our in house symbols. Having the lens classed separately allows you to set your Spotlight preferences to allow for the lens to change color based on the color specified for the symbol. As to the OP, if you are producing still images for proposals you can completely ditch the Spotlight functionality and manually add multiple light sources to the symbol to approximate the desired look. It is critical that your light symbols use a texture for the body and lens that do no cast shadows so that you can place the light source INSIDE the symbol. Lighting instruments in the Spotlight library use this type of texture. Currently, Renderworks is EXTREMELY limited in how you can display volumetric "beams of light". There is truly no usable control of this property. The only way to make the beam originate at the size of the aperture from which it is emenating is to either move the light source further back into the light (depending on camera orientation I have actually placed light sources well behind lighting fixtures) or use multiple light sources. Also note that in it's current state, renderwork's lighting beams only originate from a pinpoint and the width of the beam determines the beam's apparent brightness. In other words, the beam starts off non-existent and then gets brighter as it gets wider which is precisely NOT how light behaves in the real world. I have been harping on this issue for years as we have lost all of that necessary volumetric control back in 2011 and have not had it since.
-
Vertical Callouts
scottmoore replied to Christiaan's question in Wishlist - Feature and Content Requests
+1 -
Tyler, Thank you for the response on the rendering. You made the comment that "the C4D rendering engine has come a long way in VW", however, I have thus far had no luck with approximating reality with any beam effects. If you have any tips, that would be greatly appreciated. I'll check your website. Thanks, Scott
-
Aha, well that does make sense. Thanks!!
-
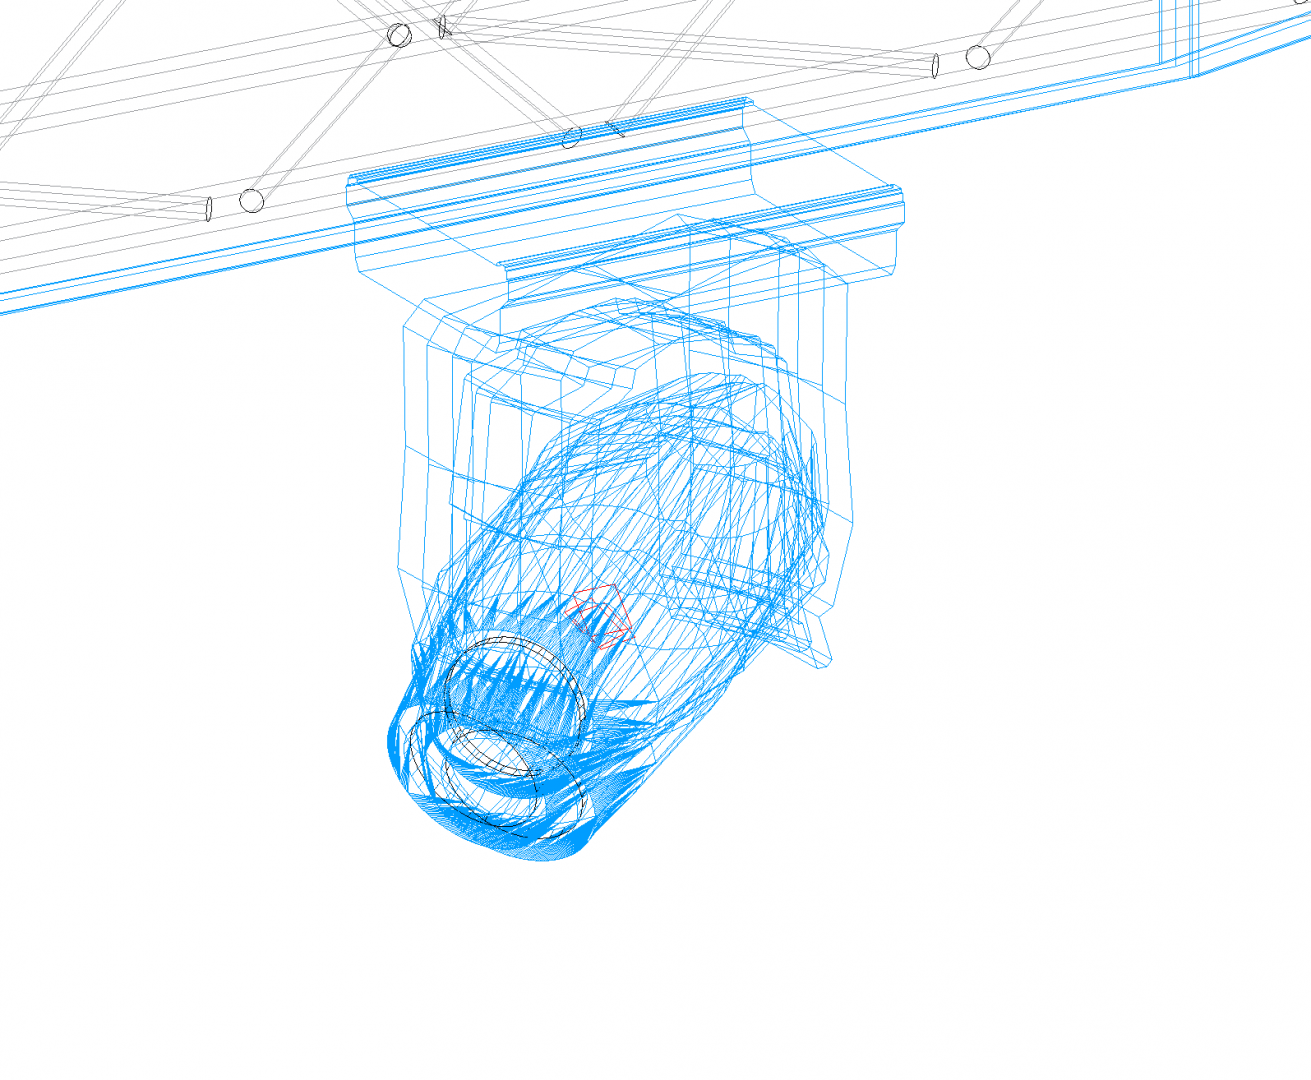
All of the above is correct, but I am still not entirely sure how the gobo geometry gets placed. I suppose there is a default distance from the actual light object as created by a subscript of some sort. If that is the case, my assumption is that the geometry is placed at a specific distance from the light source. In the instance mentioned in my opening post, the geometry was pretty far out. Curious as to why. Thanks.
-
That is good to know. I am leaning towards this as a presentation solution. In my case, I am finding that I am spending inordinate amounts of time focusing, adjusting levels, assessing gobo and color choices then testing those choices with minimal amounts of geometry. I then go back and make additional changes and test again. Then create a set of renders. Once that is done I have to start over with another scene and then run the process again. This can literally take days. Assigining universe and address information would be infintely quicker than what I am doing now.
- 9 replies
-
- 2
-
-
- spotlight
- renderworks
- (and 3 more)
-
I was an early adopter of Vision but have not used it for some time. Can anyone tell me what one can and cannot do when rendering an image in Vision now that VW and Vision are integrated? I don't recall what the feature is called, but you can export an image file with better quality images than what you would have with standard "operational" OPEN GL meaning the rendering you see when working in real time. Here is what I suppose I would really like to know: - Can I export from VW into Vision using all of my existing VW textures? - When exporting still images at higher quality, do those textures appear the way they would in final quality Rendtrworks? (i.e. reflections, bumps, transparencies) I am assuming not as I do not believe that was ever the case before, but perhaps there have been some changes with the integration?
-
I am curious as to what sets the physical placement of the "gobo geometry" in a lighting Instrument? I added a gobo to a very small fixture (GLP X4S) and the gobo geometry sits about 18" out in front of the lighting fixture. This is a custom symbol and not a VW Spotlight symbol. In creating symbols, I am not aware of any step or steps that are used to determine that location so I suppose my assumption is the geometry is placed automatically in a fixed location from the light source? Just curious.
-
Indeed!
-
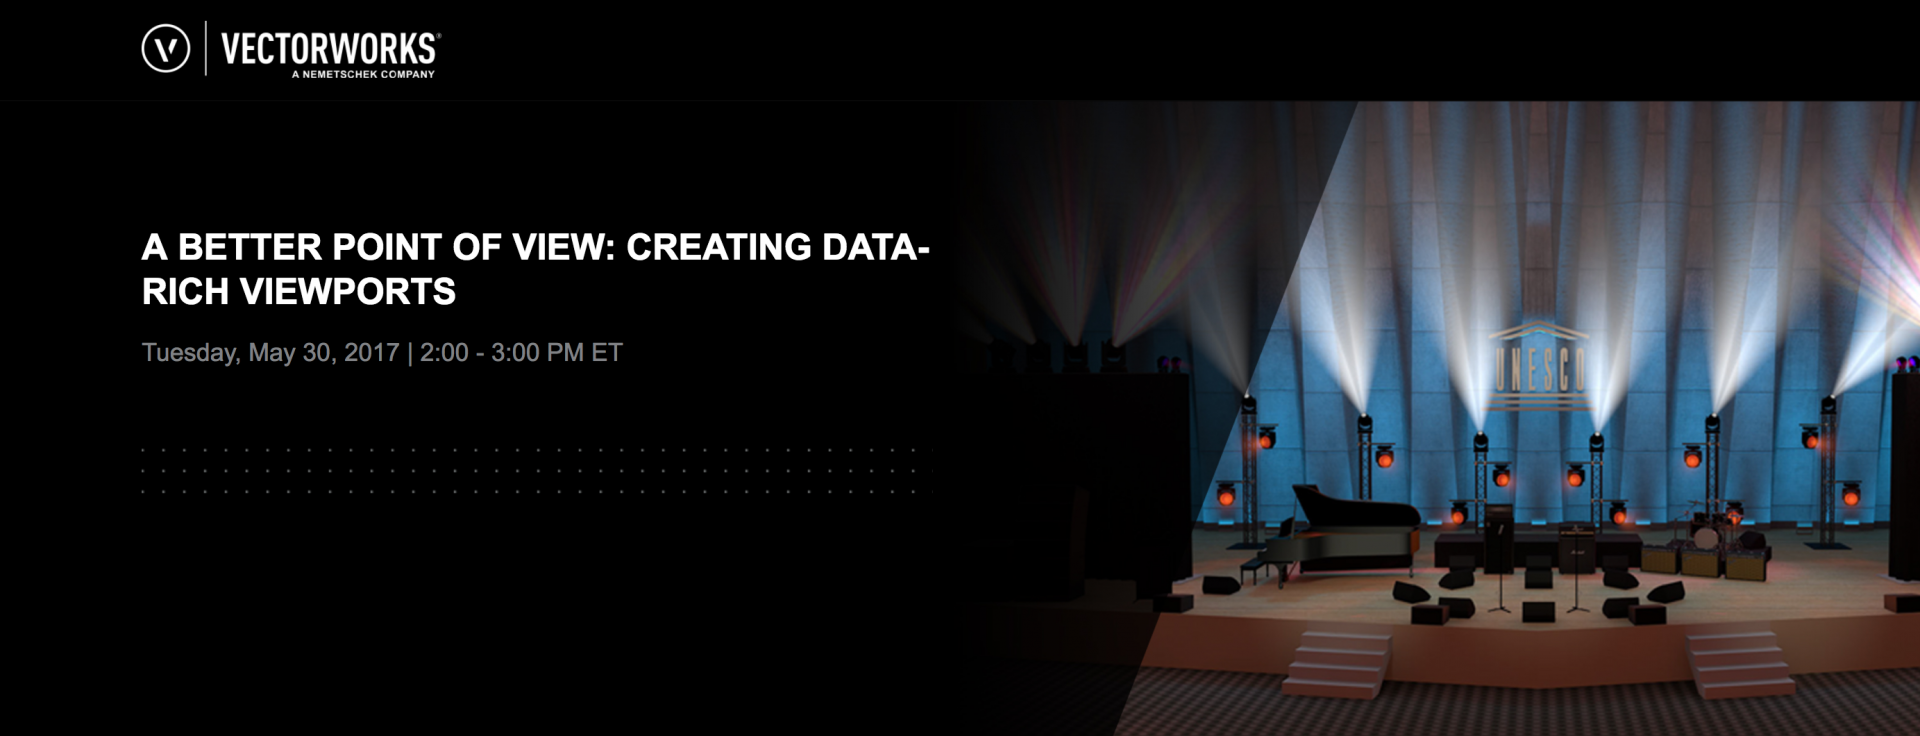
Just saw this email from VW. I am assuming this rendering has been tarted up a bit in a third party app? The origination is more or less the size of the fixture aperture and the beam itself does seem to follow the law of squares. This is still not quite as realistic as I would like to see, but far better than anything I have been able to get out of VW. If someone is getting this out of VW currently, I would love to see how.
-
Light appearance and gobo display across 3d surfaces
scottmoore replied to A+SMITH's topic in Entertainment
I know this is an older thread but wanted to point those with these issues to the wishlist thread on this particular topic, i.e. the lack of control we have to create realistic volumetric effects