scottmoore
-
Posts
673 -
Joined
-
Last visited
Content Type
Profiles
Forums
Events
Articles
Marionette
Store
Everything posted by scottmoore
-
Greetings. I've not spent much time with Braceworks truss symbols, but am collaborating on a project where this is what is used. Is there a way to easily replace a truss symbol in this workflow? There appears to be nothing in the OIP that accounts for this. I am guessing it has to do wth recalculation, but if there is not a way to do this, it is a huge time suck to have to manually replace trusses. Thanks!
-
I totally understand that and agree that it would be pretty unreasonable at this point.
-
A couple of things. Wesley, I too have run into the “all hell breaks loose if I did a final save in top/plan view” bug. I’ve never had it happen before but it but me hard on a project a couple of months ago. LX1, you should place all of your focus points on your “master drawing layer” or whatever layer you use for standard drawing. Do not place focus points on your DLVP layer. You should now be able to focus your instruments in the DLVP. The fixtures will mostly likely be below 0 but will still attempt to focus where they should. Once you are back in your standard drawing layer your viewport fixtures should point correctly at the focus position without an issue I will say that I have seen some oddities when using the rotate fixture options from the OIP. I’ve always felt that every fixture symbol should have a hanging version, a floor version and a yoked out version so as not to need to utilize the rotation feature. It also solves the problem of accurate 2D representations of yoked out fixtures. All my custom fixtures are made this way, but when I have to use Spotlight fixtures, I have run into some issues because of this.
-
Gobos in lit fog do work. Once you get that sorted you will have to drastically increase the light output of your fixture. They can be set to intensities much greater than 100%.
-
And, for lit fog to work, you need to create a background that enables it.
-
I’ve not really checked them in Vision. I used to be a Vision user in the early days of the product and I did use these or earlier versions of these symbols and I recall them working. Most of the textures are indeed images. Some utilize images with some amount of reflectivity to create gloss or lacquer appearances. A few are simply reflective “gloss” surfaces. I don’t believe Vision supports any kind of reflections but I would imagine they should work pretty well.
-

Using Spotlight Numbering - Selection Holds
scottmoore replied to jamesmoore1717's topic in Entertainment
Usually when this happens, it is because I forgot to double click on the last fixture and instead defaulted to the old “click on an empty space” process. Next time this happens try command Z and run the process again. -
Agreed on all the above. The thing about lighting and glow textures is that you simply have to dig in and experiment. Everything impacts everything else. Brightness, color, location, rendering styles, ambient light, number of reflections, camera effects, the texture onto which light is projecting, etc. I used to wonder why, in the credits of an animated movie, that they listed personnel for “lighting”. Typically a lot of personnel. I don’t wonder that anymore.
-
Good catch. I’ll update that.
-
Glad you like them!
-
Thanks! I’ve been using silhouettes for my renders or occasionally image props. Seems like anytime I’ve tried using 3D models of anything, the first thing a client says is a snarky comment about that! I’ve started a process of adding both a silhouette and a mannequin directly to specific symbols and then using classes to turn on or off the one you want. But then we are back “classing” which I know drives many people nuts. Myself included.
-
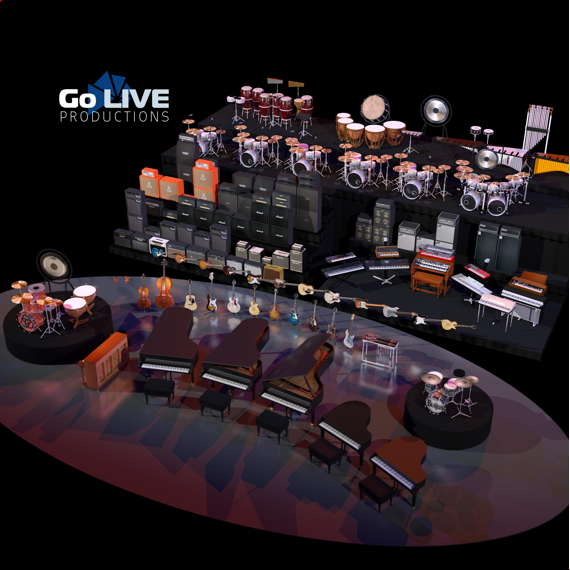
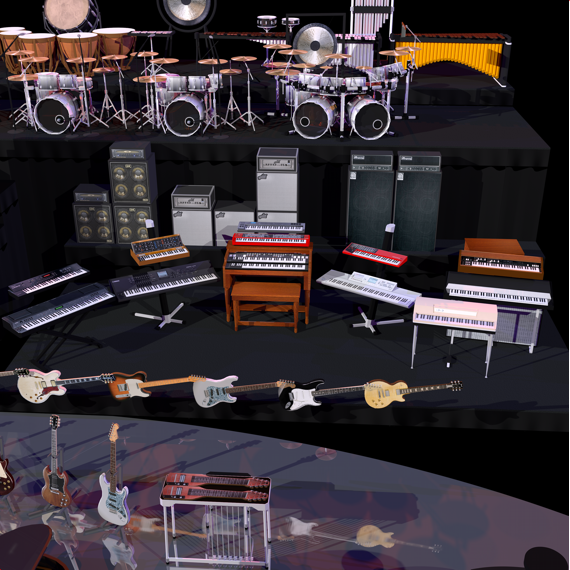
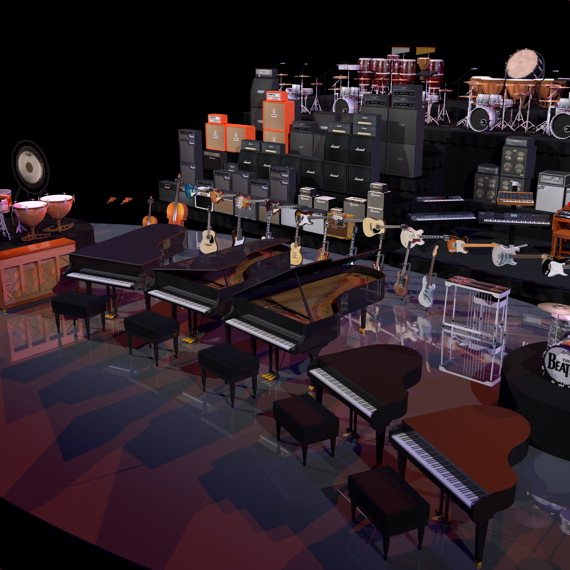
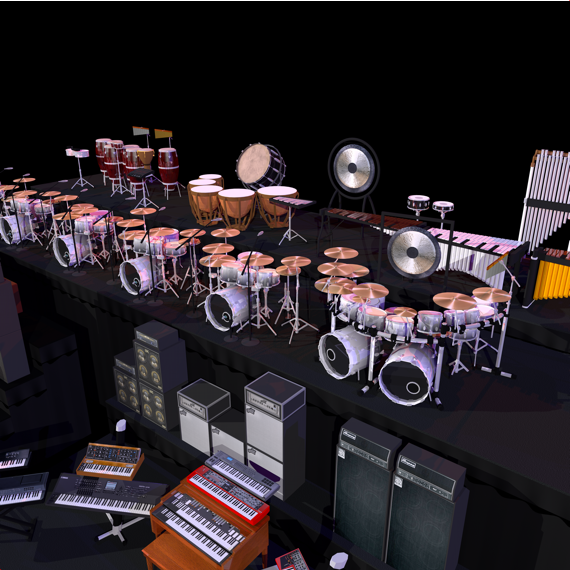
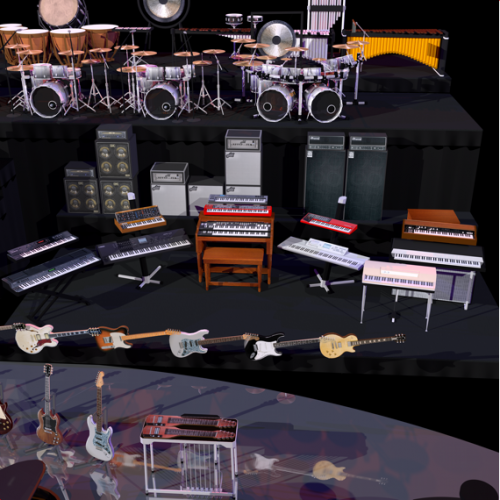
There seems to be a constant request for decent quality musical instrument symbols on this site. To the end I’ve made my library available for purchase. You can find it at: edgelightrgb.com These symbols are 2D/3D hybrids, all direct modeled in VW on the none class so there will be no unexpected classes inserted in your drawings. The symbols are designed with as few surfaces as possible to be efficient in their rendering times. Since they are hybrids, they are very useful for creating detailed stage plots. Enjoy.


-
Hey guys. Sorry for the delay. The backline symbols are now available for purchase. edgelightrgb.com Navigate to the VWX tab and you can download from versions 2015 through 2019. Let me know if you have any questions.
-
Actually both. I set my template file up with ten pre-made design layers specifically for DLVPs. Each design layer already has a viewport created on the primary design layer and classed accordingly. All I do is draw the structure, lights and what have you in the appropriate design layer, go back to my primary design layer, turn on the class and rotate into position. I often create additional VPs for sheet layers to accommodate printing. The goal is to always have a clean plan view print for the shop.
-
I use Design Layer viewports as, to me, I can utilize that seamlessly in my workflow.
-
Could it have anything to do with the default focus angle in Spotlight Preferences? Just spit-balling.
-
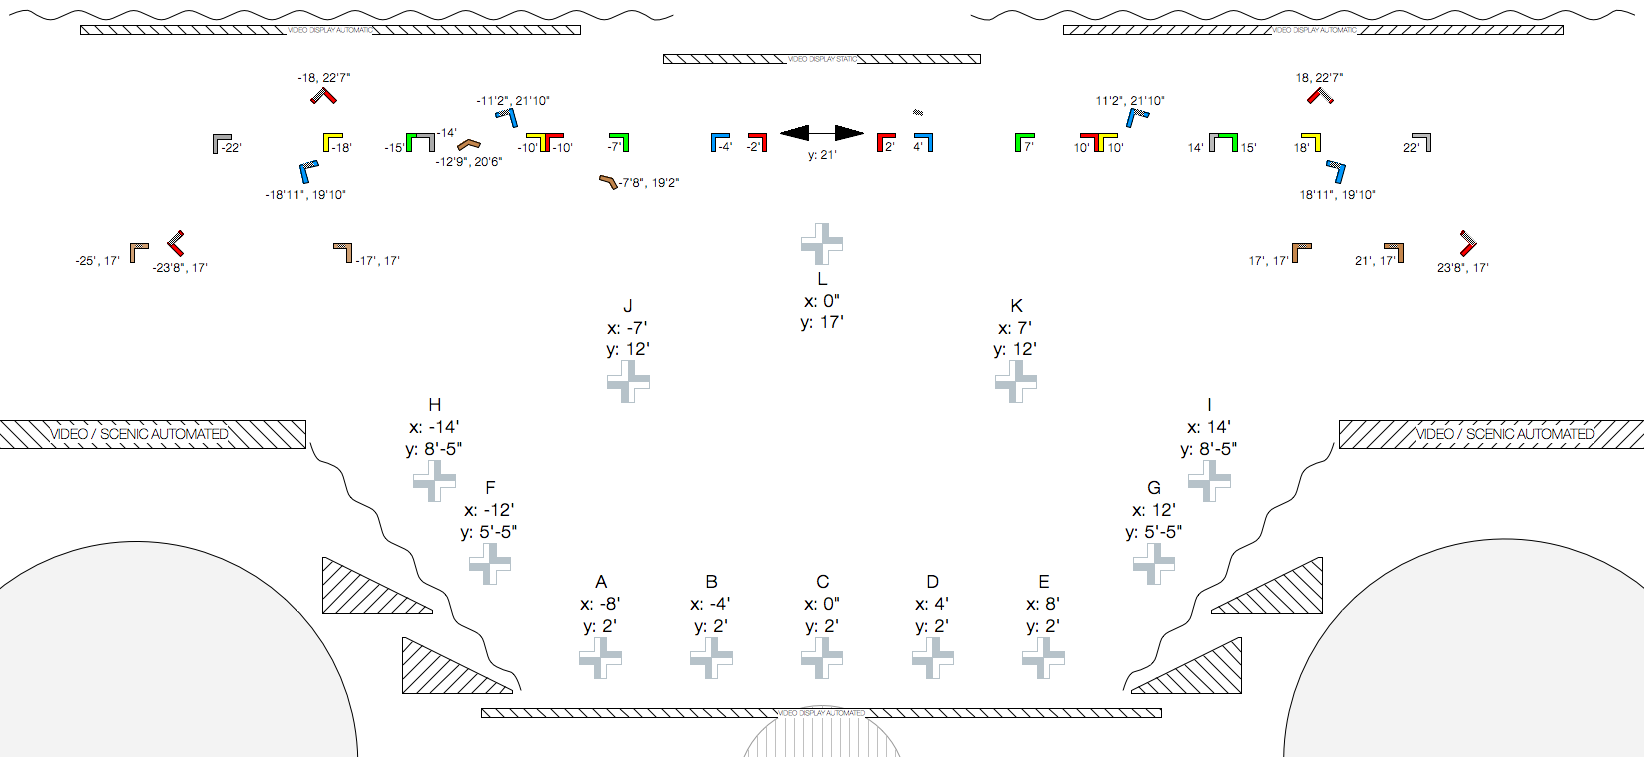
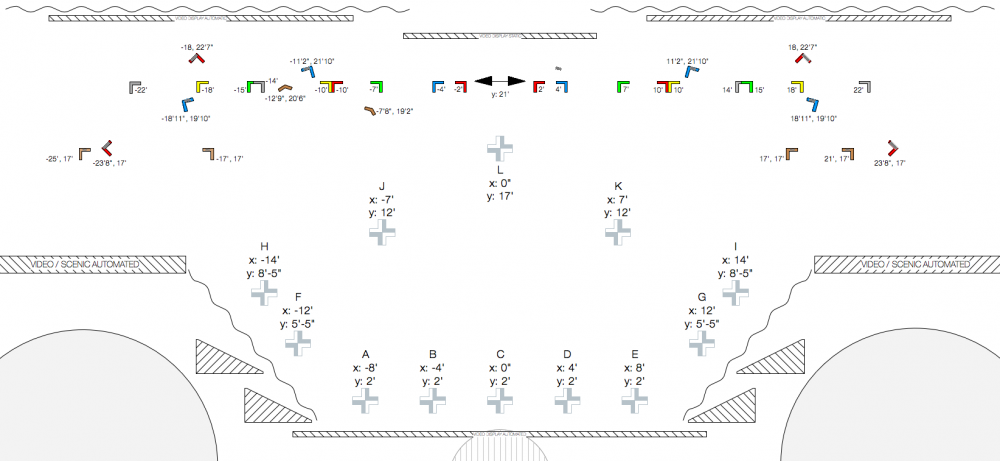
Pat, That is a fascinating concept and one I had certainly not considered because I am frankly not that clever. It will be worth looking into for the future. My solution for now is to print from the design layer which works fine. The prints look just the same as from the sheet layers and it removes almost all the complexity. The only caveat is that either I either have to go in and add the spike marks in the saved view Or create a new saved view once I've completed the layout. Kevin, I think the confusion comes form the fact that all of us know how we would normally go about rehearsing and spiking a show and this is nothing at all like that. We just cannot do that for this event. We have to start out with a set of spike marks that everyone uses. Attached is an image of all the current spike marks turned on. Each is on it's own class so I only turn on what is needed for each artist. This is basically an overlay of every artist's stage plot with me having to make a few executive decisions based on the space available. For example, instead of being 10' off of center stage left I might have to move a performer to spike mark E that is 8' off of center. By classing all of these individually, I can just turn on and off whatever I need per layout. In my case now, that either gets saved as a "saved view" or I go in and edit the save view with whatever classes I need to have visible. In the past I've just copied and pasted the spike marks from the master class into each artist's class. That works, but there is potential for moving things accidentally and it's just a bit tedious. This way it is pretty straight forward. Thanks for all your help!
-
Very cool. I will look into this. Thanks Pat.
-
That is a good question and probably the part I’ve not clarified. Unlike most shows, we are not setting spike marks per artist during their rehearsal as there frankly is not time and odds are, their lighting was already programmed before they got to rehearsal anyway. Normally there would be a color spike tape assigned per artist and all that but I cannot do that here. Instead, there is a generic set of spike marks that all artists use. Let’s say it’s like this for simplicity sake: A (-12’, 0’) B (-8’, 0’) C (-4’, 0’) D (0, 0) E (4’, 0’) F (8’, 0’) G (12’, 0’) Artist 1 is a lead singer at center, a guitarist SR and a bass SL. I turn on B, D and F Artist 2 is duo downstage so I turn on C and E. What I never want to do is physically move the spike marks so they all stay locked on their own classes. It’s just a question of which spike marks are turned on per artist. There is always a master sheet with ALL the spike marks that we use to physically layout the floors in both locations. (We get to do the performance location twice, so that is fun) We also use this to refrence which spike marks to turn on.
-
It’s never a question of moving a spike mark. It’s a question of turning one on or off. For instance, there is only one DSC spike mark, and then perhaps spike marks 4’ either side of that, 8’ either side of that etc. the idea being to minimize focus points for the programmers. Every artist is using some grouping of generic spike marks.
-
I suppose I should also mention, the reason all of this really matters is that artist rehearsals happen at a different time and location than production. Therefore the lighting / video team are programming in one location and rehearsals are happening elsewhere. Not at all ideal but it is necessary. That is why we try to get all the spike marks correct in advance so that the lighting guys can get all their necessary focuses done without ever seeing an artist. Should there absolutely have to be a change during artist rehearsals, that is where the stage managers have to update the file and then contact the programmers to tell them what change(s) were made. We discourage those kinds of changes as you might imagine. It would be great if those changes did not have to happen in two locations in the file.
-
Kevin, The issue is that all adjustments to the stage plot for each artist is done on the design layer. Therefore, I can turn on the appropriate classes for each spike mark on the design layer and all is well, The conundrum is, since the sheet layers are already part of the drawing, the spike marks were not enabled when the sheet layer was created, so the only way to get them to show up after the fact is turn the correct ones on in the drawing layer and then do the process again in the view port on the sheet layer. Unless I am missing something. And Pat, to your point, I may have made this far more complicated than it need be. Hopefully, everything will be completed by me before we ever get on site and the stage managers will never have to touch the file other than execution and none of this will matter. That is the plan. If there were any changes, my hope would be that they would go into the drawing layer, turn off spike mark C (which is located on the class: "spike mark-C") and turn on spike mark-D. That would be well within any of their skill sets. Copying and pasting spike marks from the master list (that would have originally been on the "spike marks" class) to a particular Artist's class, then wondering why it disappeared (because it came from a class that is now not on) and then remembering to turn on that class to see it, but then forgetting to assign the copy to the artist's class which then means it disappears later, becomes a big issue. The issue sounds a lot like "Scott, the file is not working right....." This is why I am thinking that printing directly from the drawing layer is probably the solution. Turn on the appropriate spike marks, move the set pieces around, assign some mixes, and done. Maybe. Thanks guys.
-
Pat, That is a helpful idea, but I don't think that is going to work. If it were just me working on the document it would be one thing, but at some point my stage managers are going to jump in and they are not necessarily as savvy in the ways of VW. I am pretty sure I am going to have to print from the design layer to keep this simple and that is probably the best idea anyway. It's what we did before we had viewports and horse driven carriages. The issue with the script as you determined it is that there are just a single set of generic spike marks that have to work for all artists. 14 artists in 2.5 hours on one stage, It's basically how fast can I get this artist off and the next on. I look at a master list of available spikes, compare that to the stage plot sent by the artist and then enable the ones that are most applicable. In the past i've copied and pasted them from the master sheet to each artist's class which solves the problem, but also leads to potential for mistakes when pasting. (paste in place is clearly indicated here) As to scripts, I think there are quite a few things that would be helpful with this type of document starting with a "find-replace" function for pretty much everything. I have a drum kit w/ riser symbol, keyboard with riser symbol, class, sheet layer, saved working view, and saved print view for every artist. Man, if I could replace "Artist 01" with "XYZ Band", that would save a TON of time. Having a tool that was specific to spike marks as opposed to a rigging tool would also be great. Andy Dunning and I were discussing that the other day. Your input is always quite valuable Pat and I appreciate it.
-
Greetings. I am working on stage plots for an awards show which is a bit of a complicated process. I have a template for this sort of thing which is pretty cool, but i came up with an idea to make it even cooler, ad now I've broken the whole thing. Here is the situation: - I have a class for each artist that is performing. - I have created a large number of spike marks using the rigging tool which makes laying them out extremely convenient - Have a sheet layer for each artist for export purposes. Here is the issue: To make the process really simple, every spike mark is on it's own class. That way, I can go to my design layer and basically "turn on" the appropriate spike marks by activating the requisite classes for any given artist. The problem is that I would then have to go to the sheet layer and do the same thing since those viewports are already created. I suppose the simple solution would be to forego viewports and print directly from the design layer. Anyone have any better ideas than that? Thanks!
-
Get one set correctly for each trim and point elevation and then copy and paste or duplicate as required. Not really what you are looking for, but much quicker than starting from scratch every time.