SeanOSkea
-
Posts
170 -
Joined
-
Last visited
Content Type
Profiles
Forums
Events
Articles
Marionette
Store
Everything posted by SeanOSkea
-
Extrude along a path controls
SeanOSkea replied to SeanOSkea's question in Wishlist - Feature and Content Requests
Wow that actually works. Thanks. Have we always been able to do that SketchUp style EAP? This does eliminate the need to edit the profile to move it around on the axis. Also I've never realized the path can be offset from the actual extrusion. That will take some of the frustration out of trying to re-select a 3D poly directly on a wall edge. I can trace the wall edge with the 3D poly tool, and them immediately move it up in the Z a foot, snap the profile to the top of the wall, check "Fix Profile" and go. This has the added benefit of eating the 3D poly at the same time. Thanks for pointing that out!. I'd still prefer to draw in T/P (esp if I'm tracing over images of millwork) and afix a locus point to the profile but this will at least take some frustration out of constantly needing to Edit Profile. -
Extrude along a path controls
SeanOSkea replied to SeanOSkea's question in Wishlist - Feature and Content Requests
@Kevin K But it still drives it down the center of the profile, right? That way you still have to offset the path (a pain) or edit the profile (also a pain). Are you saying there is a way to snap the profile to a part of the path to avoid the other options? I don't know why we can't just drop a locus on the profile the way you can offset a sweep axis by including an locus in the selection before you sweep. Kevin A, yes you're absolutely right, it runs down the center of the profile--fine if you're doing round pipe handrails or something but annoying for everything else. And like you, as a scenic designer, I'm doing all kinds of weird stuff with moulding so that is doesn't make sense to me to have it as a wall component. I usually just drive the 3D NURBS tool along the top edge of a wall or baseboard or whatever. I'll sometimes grab edges with the extract tool but at every vector it creates a separate line or curve so you have to ungroup them and compose them before you can use it as a path. I seem to have the most luck drawing profiles in T/P and just remembering which way the path was drawn (or show direction if I forget). If the path was drawn left to right the profile should face the right or X+ and the left if the path goes in the other direction. That cuts down on the number of sideways and backwards fails for me. And usually if I to Top/Plan in the edit profile workspace more often than not I'll be looking down at the profile centered on the path axis and don't have to hunt around for the right view. I never offset the path. Can't be asked. -
Extrude along a path controls
SeanOSkea posted a question in Wishlist - Feature and Content Requests
I've just extruded my (aprox) 1000th cornice along a path object. I've tried for years to figure out which plane to draw the profile in, which direction to draw the path, which way the profile needs to face, ect. But even if I get it right on the first try I still need to edit the profile first figure out which view to see it flat against the axis and then drag the top-back corner to the center. Can we please have some way of indicating what part of the profile should be aligned to the path? Control points in the OIP? Snap a locus? Something so we don't have to always edit every path extrusion? Or if I'm a loser and there is a way to do this that has eluded me for 15 years, I'd love to know! --Sean -
I posted the same issue a few weeks back and didn't get an answer. Hope you do. Sean
-
The Academic licence for Vectorworks is free for a year while you are a student. You might actually save some money by enrolling part time in a technical or community college. Some might offer course in Vectorworks. Possibly even online. While you are a student you can get the academic licence. Of course you'll have to pay the cost of the classes that you take but at a community college that will likely be far less than the cost of a retail version of VW. And if you complete the courses you'll have some credits and training to add to your resume too. Once you have learned you can upgrade to a professional licence when you have the skills to get paid for your work. Or as Evan suggests, get an employer to purchase it. Both Evan and I have VW tutorials on YouTube here are some links. -Sean https://www.youtube.com/user/evanbrooklyn/videos https://www.youtube.com/channel/UCxZ9RjFVOfJUVAm7L7UkPlw?view_as=subscriber https://www.youtube.com/channel/UCIkBQ-4evpWjPYg2TJVMsZw
-
Attribute Mapping Tool - Rotate Not on Center Snap
SeanOSkea replied to Tom Klaber's question in Wishlist - Feature and Content Requests
Yeah, this whole tool needs a rethink. Its really difficult to use. As it seams will never get a UV edit option, I'd like to see the Attribute mapping tool work without forcing Plane, Cylinder or spherical wrapping, as well. -
@Andrew Pollock @tshelton Or at least you can get a job with the marketing department making next year's promos 😉
-
@tshelton Nice. I like the solid color so you could set the background and the icon colors to whatever you want in the Interactive Appearance Settings. You could have black on white for people who want to keep the white workspace. Or teal on gray for the Maya look. Or dark blue on pale blue or whatever. Some icons would probably have to change--Deform, Shell, Clip, Tape? And probably a lot in the tools sets. Spotlight, (and Landscape I bet) a lot of the Dim/Notes. And I don't know what you do with all the orange and purple furniture symbols. But for the most of the basic and View/Mode buttons I think this is clean and handsome.
-
Pre-select -highlight color change
SeanOSkea replied to SeanOSkea's question in Wishlist - Feature and Content Requests
@tshelton Well, that's actually what it is now if you look close. There are two different shades of orange by default but they are so close its hard to tell the difference. But of course that's the pre-highlight and the highlight. We need three clear visual states. If hover pre-select was the pulse then colorblind people could tell the difference too. -
Really? Ok. But lets assign it to C and Alt/opt C for zoom (another one I never use. Love my scroll wheel) I think we can just reach up and open the menu when we need the cloud services (Alt C). I'd prefer the keys but I'd take a widget. That's another one the marketing people get right in the commercials. Watch and when they edit paths or polylines suddenly this magic little axis widget appears out of nowhere!

-
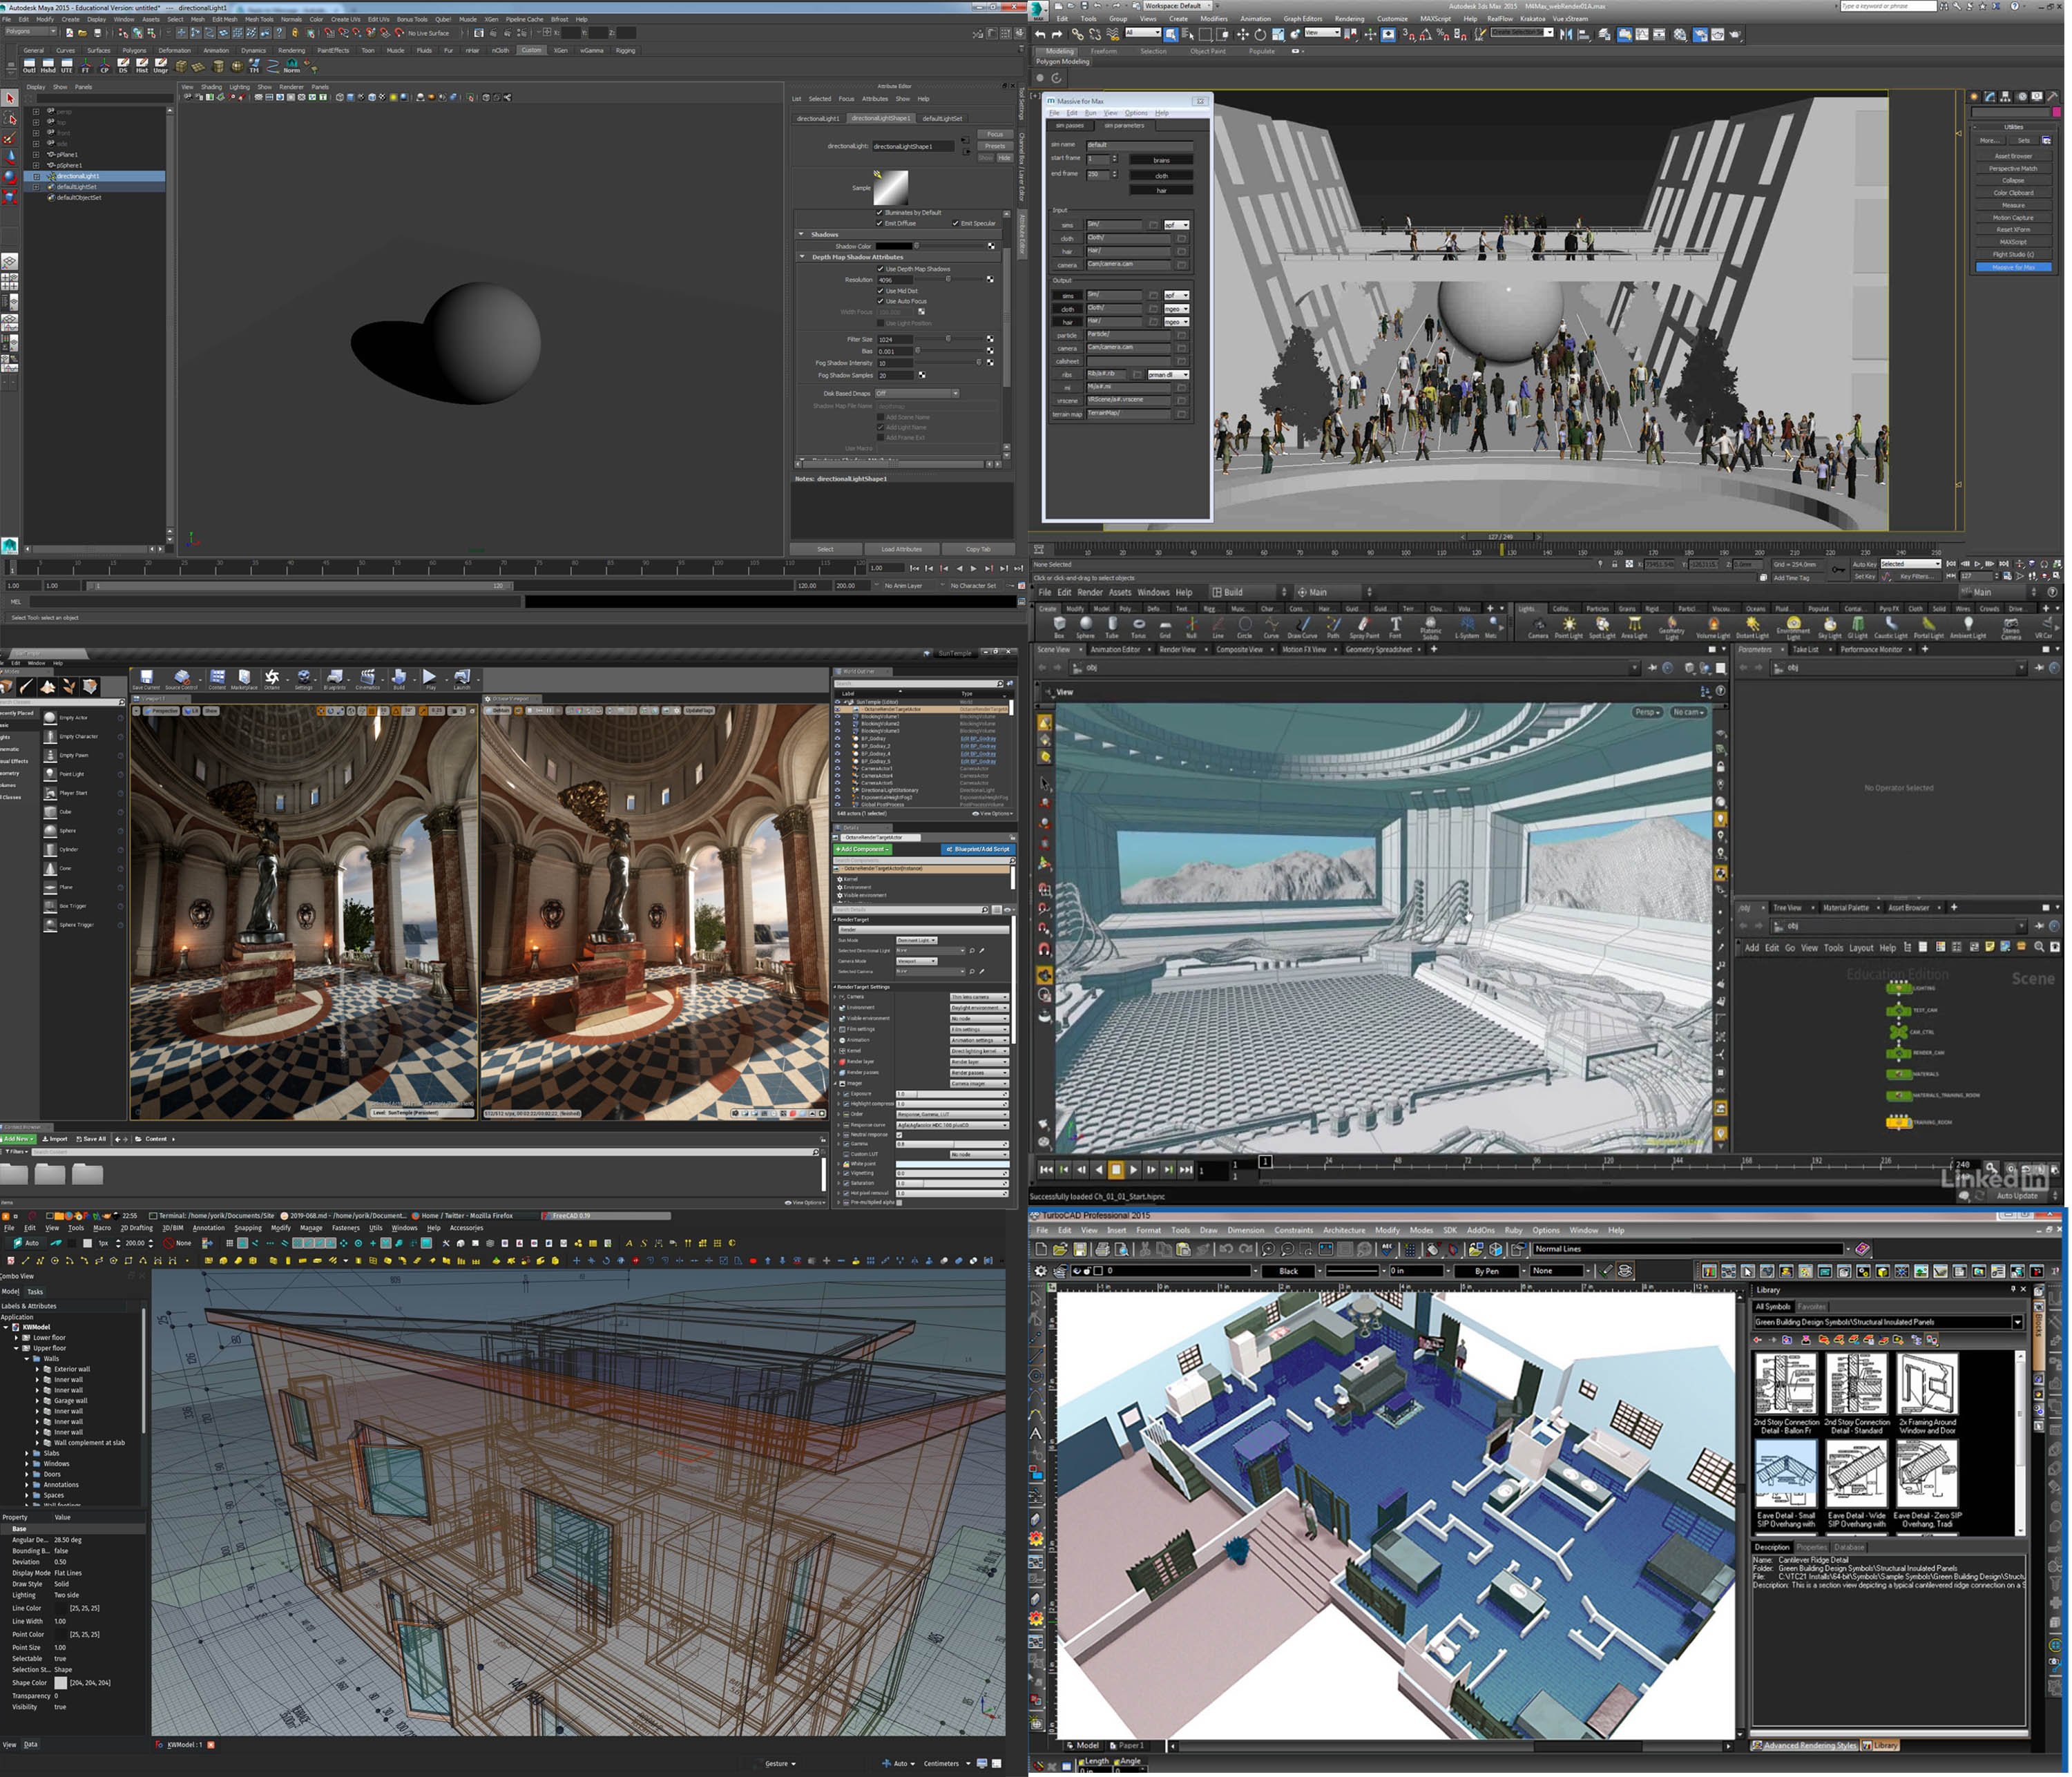
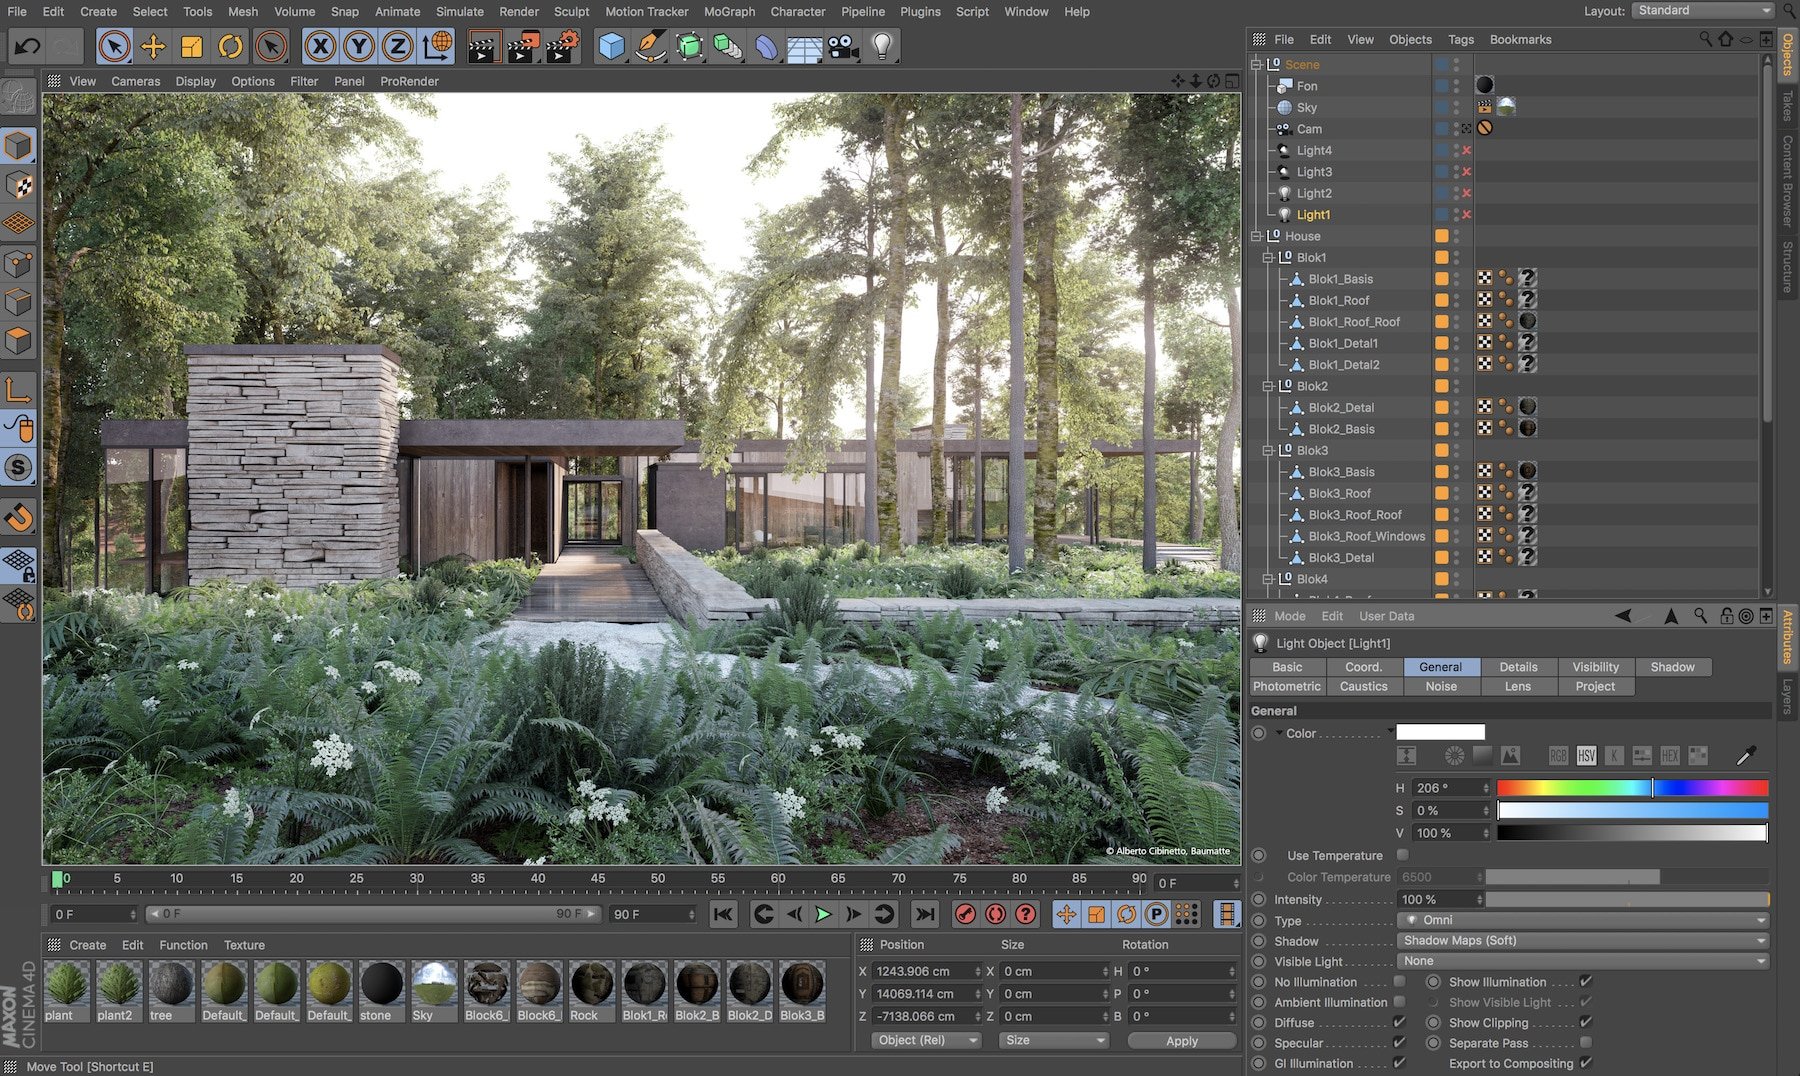
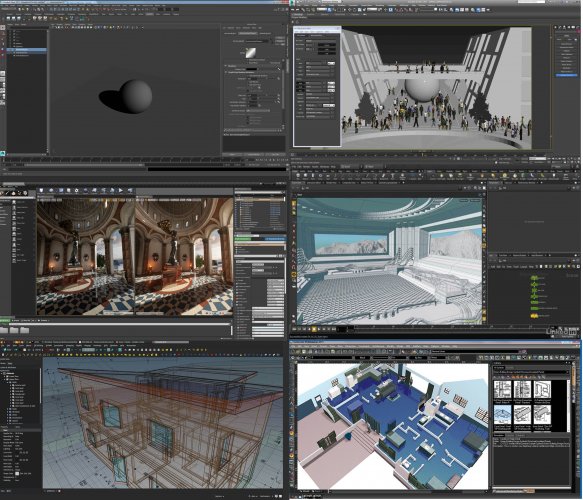
But its not just Blender, they are catching up to what the industry (except for AutoCAD, Solidworks, Revit and SketchUp) have been doing for years. Here is Maya, 3DS, Unreal, Houdini, and at the bottom even FreeCAD and TurboCAD. But most importantly, there's Cinema 4D that Nemetcheck actually owns. Its had a clean, clear, dark, logical GUI for a decade. Nemetcheck has been yanking stuff out of C4D for years to put into VW. How 'bout boosting the GUI? And don't forget those big beautiful axis locks right at the top center of the screen! 😉

-
@tshelton Yes, and Blender has my beloved, long wished for axis lock. Hit X,Y, or Z and lock the transform to that axis. Shift+X,Y or Z and exclude the axis you selected. Click a button in the interface and make the locks relative to a rotated objects local axis! Y is free, Does anyone use the "Zoom loupe"? And we can come up with a better place for the select tool. Space bar maybe and make pan MMB?
-
@Kevin McAllister No doubt, but why deploy something that was only half finished? I don't know the mac/win breakdown for VW and I know it started as a Mac program but why have half? (40%?) of the users squinting at the icons? And that's assuming all Mac users will want switch to dark mode. Even here in this thread there are examples of how dark mode isn't fully thought through. Again the issue wasn't the icons. Here is the top comment on the VW Architect 2020 Promo video on YouTube... (Notice I have my YouTube in dark mode 😉

-
I think this may have been and attempt to "upgrade the UI." I've been watching and posting in the new features request topic thread for years. We've been talking about the need for a GUI upgrade for a long time. Esp as the new release videos come out and we all get excited by how cool the marketing dept makes it look in the commercial and then we get the new version....! And we open it....! And... its... the same. BUT! I don't ever recall anybody complaining about the icons. I want to see upgrades to operation windows so you don't have to hunt around with the HUD help to figure out what you're supposed to do. "oh! I'm supposed to click on the word in the list until the thing I want comes up!" More cursor tip commands (this has been getting better) maybe pie menus? What about smart pop ups that don't just appear right in the middle of the screen on top of what you're working on but are "selected object sensitive" and put themselves somewhere else on the screen? The stuff of Si-fi I know, but how cool would that be? And my all time #1 request universal XYZ/local locks! But I can imagine it would be a lot of work to go back and fix all those old windows and palettes. But this is not the first thread with people complaining about the icons. Hopefully they will get the message and just give us an option to revert. Or use the old icons in a custom work-space like we can add back in legacy tools. At least until there is an actual serious overhaul of the GUI.
-
100% agree. Then I open my Auto CAD and I get a nice flashback to 1995. Revit looks like you're drawing in a little window inside an Excell sheet. I think the recent versions of Maya and Blender have the right balance. No nonsense, clear, high contrast, easy on the eyes. I wish they'd go in that direction. But don't fix what ain't broke. Last year I would have said, "I got 99 problems with Vectorworks but the icons ain't one." Now I have 100 problems.
-
Wall lines and Display Extents above cut plane
SeanOSkea replied to SeanOSkea's topic in General Discussion
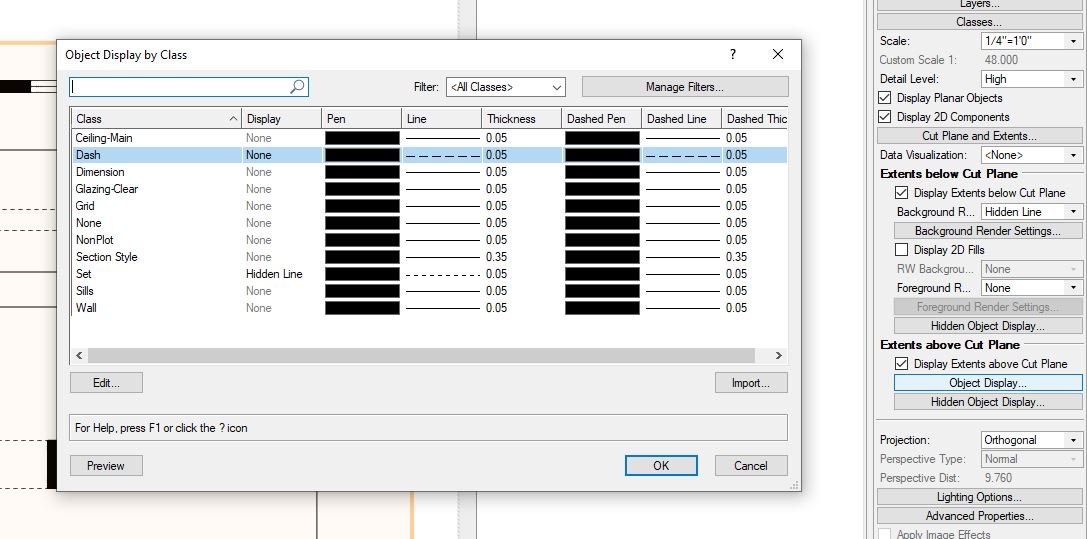
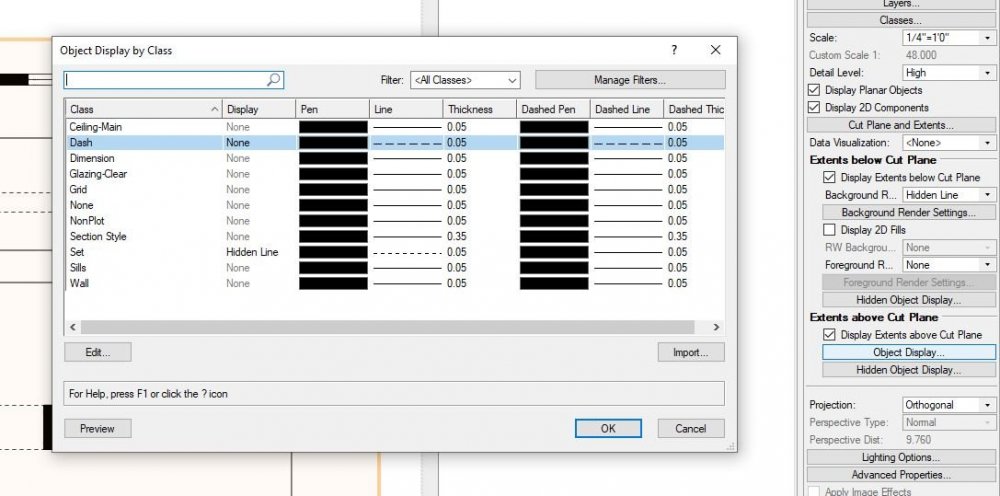
Answering my own question again. Here's what I did. I deselected "Display 2D Components" from the OI. That made the door object disappear. Then I applied the same settings for the class with the wall and door as I did for the others and I got my dashed archway. BUT, What if I want a shutter in there? I went back to the design layer and added a door to the archway. The door is invisible unless I re-check "Display 2D components" I get the door symbol but the dashed wall lines disappear again. So I deselected Display 2d again. Back to the DL and checked "Show 3D open" in the 3D settings. Update the viewport and I've got the wall dash again and the open door but no arc swing. Lots of tick boxes and settings to fiddle with. I got close to what I wanted but is there and easier way? -
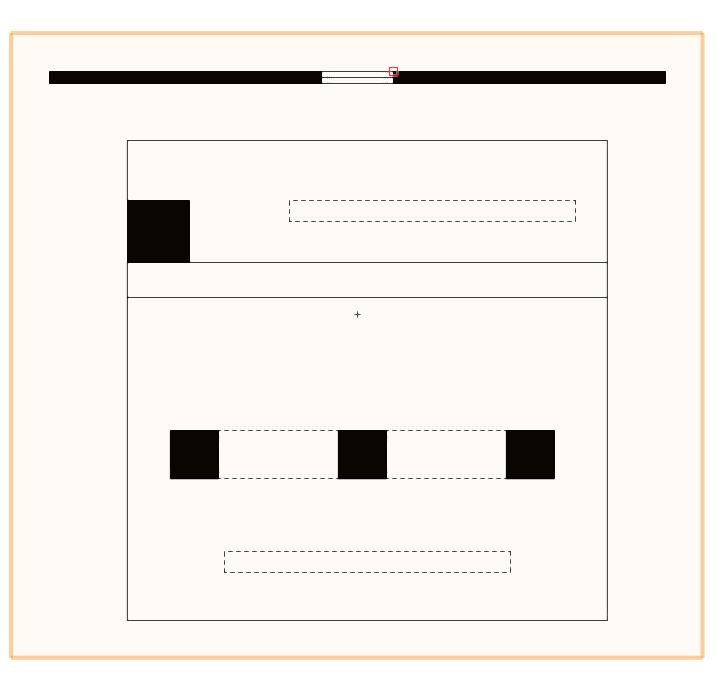
Ok I'm stuck. I'm trying to get dashed wall lines to draw in a viewport with Display Extents above Cut plane active. So In the Door settings I'm selected a class with a dash style and checked "show wall lines" I get a nice dashed line in TOP/PLAN in the Design layer (fig 1). I have various objects at different heights in the she model--some completely below the cutting plane, some above, some passing through. I've used the clip cube to generate a horizontal section viewport. In the setting I have checked "Display Extents above cut plane" and in the object Display by Class window I've set the "Above" to hidden line and set it to a fine dash. All good. Update the viewport and it looks exactly like what I want--solid no fill for objects below, default black fill for objects cut through and fine dash for the objects overhead. Except! I can't seem to get any settings that show the dashed lines in the Hidden line viewport. The wall dash only seems to appear in Top/Plan on the design layer. Is there some setting somewhere that can allow this to show in the viewport?
-
Pre-select -highlight color change
SeanOSkea replied to SeanOSkea's question in Wishlist - Feature and Content Requests
@Jeremy Best Well your video is really interesting. How do you get both colors at the same time to make the brown(?) on hover over selected object? That's kind of what I'm looking for. I like the clear difference between selected, pre-select and hover on selected. -
Pre-select -highlight color change
SeanOSkea replied to SeanOSkea's question in Wishlist - Feature and Content Requests
@Jeremy Best Yeah but I think I could live with that. 3rd color is a good idea too but I'd prefer the highlight pulse in that situation rather than a 3rd color. It would be helpful for colorblind folks too. So: if not selected then attribute line color no highlight If pre-select (hover): pulse pink (or whatever) If Selected: turns static orange If Pre-select (hover) of selected object: pulse or pink (or both) Or even if it is the "less good" scenario that you're worried about I still think the important thing is selected/not selected. The pre-select is handy but leads to a lot of confusion. Even for me whose been at this for 15 years. The only time I really de-select is when I'm removing something out of a marques select or I miss-clicked. And in that case the pre select seems less important because you'll know immediately if you got the right object because it would turn pink as soon as you clicked on it. If you missed just click again to add it back because your cursor is right there. -
Set Line Thickness menu Item.
SeanOSkea replied to pksander's question in Wishlist - Feature and Content Requests
Not sure if you're asking me or Pksander. I typically use three or four. A couple even dashes and a section dash. Its not about how many its about the number of steps. However many versions back you could just click on line type and select from the drop down like you still can with weight. We got more line variety c14(?) but now we need to Click on pen style, select Line type, then select the line type drop down menu and then find your line or if a new document import the line type. So 4 or 5 steps when it used to be 1. -
Set Line Thickness menu Item.
SeanOSkea replied to pksander's question in Wishlist - Feature and Content Requests
Not so much line thickness for me as dash style. Used to be one or two clicks, now its a whole process. -
Also, don't forget in a dark theater you're not going to see air lighting where there isn't any light. It may be that the fog is there in your scene you're just not seeing it.
-
@tshelton I think Fabrica is right. If you're already planing on doing some PS work it will be so much faster and easier to add it in by hand. Make a layer, draw a cone shape with the polygon lasso tool, paint in a few strokes the color of your light. Gaussian Blur and use the eraser to touch up. Sometimes I'll drop in a subtle lens flare (Filter> Render> Lens Flair). I never use any of the post process effects in VW as they get added at the very end of the render. So much more speed and control in PS. I'm using Renderworks less and less. A regular render at any decent kind of DPI takes hours. Add in caustics, displacement, fog etc and the times can double.
-
Pre-select -highlight color change
SeanOSkea replied to SeanOSkea's question in Wishlist - Feature and Content Requests
Ok I guess its slightly more than just a change in the Interactive Appearance settings. I went in and set "Object Highlighting - Pre-Selection - Active Layer" to magenta. But the Pre-select color, in this case magenta, stays there even after you have selected the object as long as the cursor stays over the object so just changing the color doesn't solve the problem. The color seems linked to cursor position not selection status. What needs to happen is a selected object's highlight is orange no mater where the cursor is. So if I have 2 rectangles on the screen and one is selected it should be highlighted in orange. If I hover my cursor over the other rectangle it should highlight in magenta (or whatever) but as soon as I Shift-Click the magenta should change to orange to indicate that the 2nd rectangle has been added to the selection. So both rects are orange no matter where the cursor is. As it is, you have to physically move the cursor off the objects to check they are both selected. I've played around with the Highlighting settings on the Interactive Tab and can't seem to find a combination that does what I'm hoping for here. ' This may seem like a silly thing for experienced users but it is a major point of frustration and confusion for beginners. I see it each time I start a new class.