All Activity
- Past hour
-

Cabinet Tool - heights grayed out
Jeremiah Russell replied to Jeremiah Russell's topic in Architecture
They should get rid of that. When editing I can't add any additional elements to the cabinet unless I reselect that icon. seems like a lot of steps for such a simple tool. -

Cabinet Tool - heights grayed out
Jeremiah Russell replied to Jeremiah Russell's topic in Architecture
Man, do I feel like an idiot. Thank you! - Today
-
I believe that countries other than the U.S. (and it’s territories) do not use the IBC (or IRC), at least according to the ICC. ICC Overview of the International Building Code So, no there is not one ‘international’ building code — despite the name.
-
@Ross Harris I understand what you are saying, but at the end of the day are you still not held to IRC (International Residential Code) compliance? What I am merely suggesting is some sort of plug-in that would enable the understanding/ knowledge of taking manufacturer specifications, alongside that of the Engineer's recommendations, and adding those values/data into the working model for having the ability to create LOAD CALCs.
-
This definitely feels like a bug, you should go ahead and file one at the following link. Include a link to this thread when you are filing the bug report. https://www.vectorworks.net/support/bugsubmit — or send an email to bugsubmit@vectorworks.net Note that you might not get acknowledgment of Vw receiving the bug report.
-
Interaction of Viewport Camera DPI and Sheet Layer DPI
philgilbert replied to philgilbert's topic in General Discussion
Brilliant! Thanks so much. PG -
coletidwell92 joined the community
-

Interaction of Viewport Camera DPI and Sheet Layer DPI
Andy Broomell replied to philgilbert's topic in General Discussion
The camera's DPI settings do nothing. The only two things that affect output resolution (# of pixels) are the size of the viewport (the literal width and height on the page) and the sheet layer Raster Rendering DPI. That's it 🙂 -
Is there any way to not have it appear in the 1st mode? As I don't want to translate in that mode. Also, it doesn't always work in that way, as seen in this video. It seems a flag/boolean value gets set once entering the 4th mode for the first time, which then makes the "gizmo" appear in the first mode. Same error 2.mov
-
Working in Spotlight, I have a Renderworks Camera feeding a Viewport on a Sheet Layer. The Sheet Layer is set to A4 size at 96dpi while the Camera is set to a 1.5 Aspect Ratio for Film Size of 8"x10" at 96dpi. The Viewport is scaled at 1/4"=1' which fits it nicely onto the page and there is no crop on the viewport. My question is...how do the two DPI settings interact? If I want to raise the DPI of the output to 300dpi, do I only have to adjust the Sheet Layer DPI in this instance or do both Sheet Layer and Camera need to be set to 300dpi? Thanks, Phil
-
Mac OS Sonoma 14.4.1 makes VW2024 unusable
bguthrie replied to astephens's question in Troubleshooting
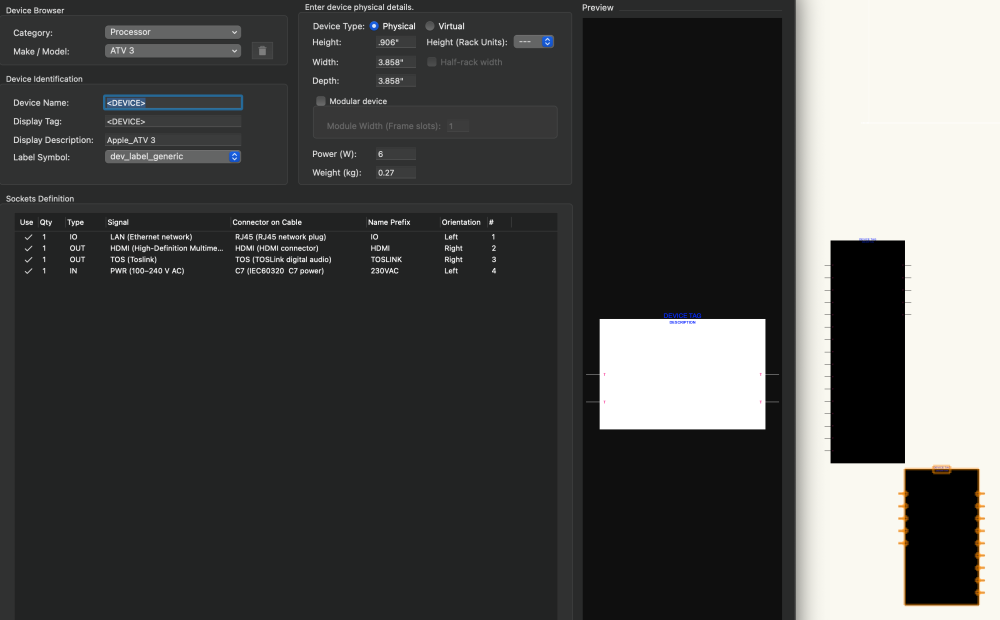
I am also running an M3 Max MacBook with two UHD monitors (3 screens total). Everything has been working fine for days... but just now (after a week of normal use) all new devices generated start black with all I/O labeled 'T', regardless of settings. Sometimes devices preview white, but execute black. -
Mac OS Sonoma 14.4.1 makes VW2024 unusable
zoomer replied to astephens's question in Troubleshooting
I had that once for VW and Bricscad too. But that was with 14.4.0. and not seen it in 14.4.1 again so far. I use a M1 Mini desktop with a single Monitor. On a Macbook with multi monitor setup or clamshell mode it may be more likely to experience such problems. For Macbooks, for similar issues, it was recommended to just close and reopen the lid. When I lost my VW Menu, I realized that there is still the Apple and VW main entry on the left. And when I clicked on the VW Menu, my whole VW Menu came back .... -
bguthrie joined the community
-
Mac OS Sonoma 14.4.1 makes VW2024 unusable
Leon You replied to astephens's question in Troubleshooting
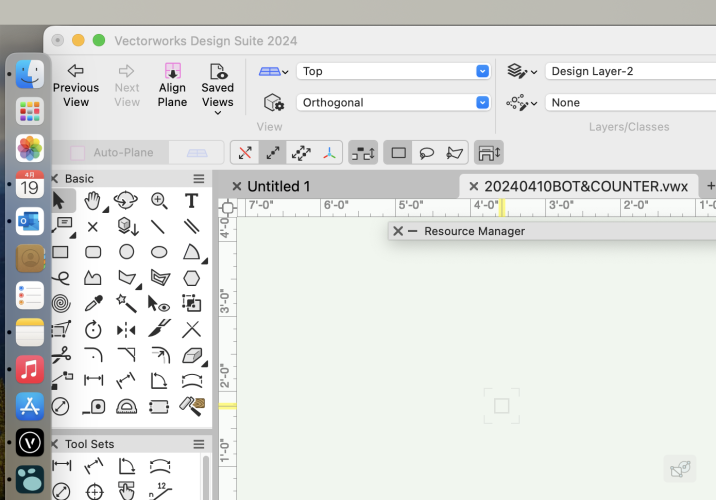
I updated to MacOS 14.4.1 and then lost the main menu of my Vectorworks update 4.1 (Build 750359). This also makes my Vectorworks unusable. My computer is a Mac Book Pro 2019 Intel chip laptop. Anyone has the same issue? -
They made a couple of changes to icons in VW2024. One of them was moving away from the .png file format and instead going to .svg format. This is great because .svg format is actually a vector graphic, so the icon will scale appropriately between standard density and high density displays. They also added dark mode to WIndows systems, which is what is causing your red X issue. If you want to continue using the .png method, you will need four separate files per icon: Icon.png (26x20 pixels at 72 dpi) Icon @2x.png (52x40 pixels at 72 dpi) Icon_dark.png (26x20 pixels at 72 dpi with colors set for dark mode) Icon_dark @2x.png (52x40 pixels at 72 dpi with colors set for dark mode) VW will determine the pixel density of the display and will choose which icon to display. Even though it shouldn't really matter since you're specifying the exact pixel sizes, Mac requires that you must have a dpi of 72 for your icons otherwise they will error out. I've never had a problem on Windows, but if you will have some Mac users, it's best to plan for it. The key here is having icons with the _dark suffix, that is what VW will use when you have dark mode engaged. I'm betting that if you were to switch to light mode, your icon would work properly. Now, if you want to embrace the future and use the .svg format, you only need two icons: Icon.svg Icon_dark.svg Since the icons are scalable vector graphics (that's where the svg comes from), VW will automatically scale the icon to match the display dpi. But something to consider is that those icons will not work on versions of Vectorworks before 2024, so if backwards compatibility is important to you, you might want to stick with the .png method. That said, if you're developing plug-ins in VW2024, they wouldn't be compatible with earlier versions anyway so it would probably be best to embrace the newer and better format. In terms of how to create the icons, here's a couple of rough work flows you could try. .png method: I use the .png method since backwards compatibility is important to me and some users of my plug-ins. I'll generally draft up the icon in Vectorworks (since it's the drawing tool I'm most comfortable with anyway), then make sure everything has a pretty thick line weight. I'll then zoom out until the icon is roughly the size it will be in the workspace. I take a snip of the screen using the Windows snipping tool, and paste it into Photoshop. In Photoshop, I'll delete the background behind the icon using the magic wand tool, and then use the crop tool with the settings set to 52x40 pixels at 72 dpi. If the output is to my liking, I'll save this as the @x2.png file and then scale that again for the standard 26x20 icon. The real trick is managing any kind of aliasing that happens when the image is "de-rezed", hence why I tend to use really thick line weights. .svg method: Once again, I'll draft out my icon in Vectorworks. From there, I will export it as an .eps file using the File-Export-Export EPSF option. This will give me a vector graphic that I can manipulate in Adobe Illustrator. I'll import the .eps file in Illustrator, and make sure that I set my artboard to be 26x20 pixels. I'll manipulate the icon so it fits within the artboard, then export it as .svg. I'll then make adjustments to color for the dark mode options (such as inverting black to white) and export the _dark.svg file. I recognize that both of my methods require the use of Adobe software. You could try using something like Inkscape instead of Illustrator, which is free, but also does not accept .eps files for import. In this case, you could try exporting from VW as a .dxf file, which Inkscape will accept.


