


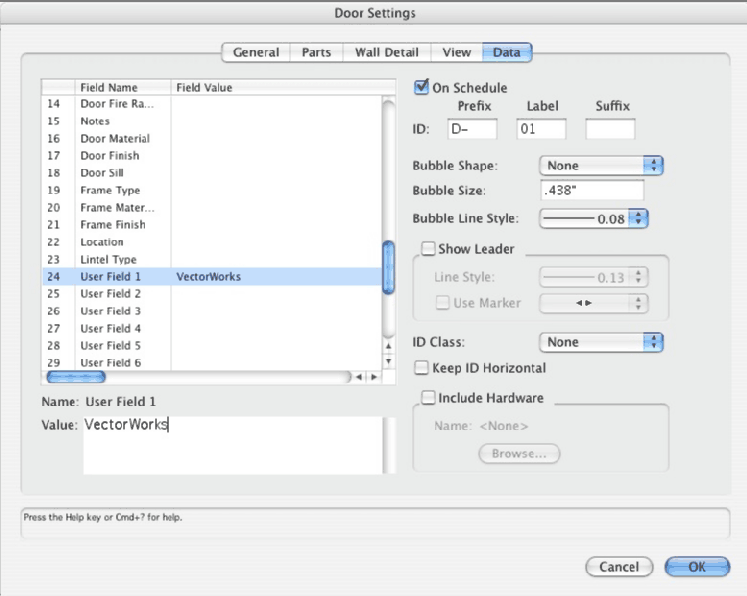
Once the schedule has been created and you have entered the appropriate information into the User Field(s) in the Door or Window Settings dialog box, open the Door or Window Schedule worksheet.
The schedule can be opened by double-clicking it or selecting the Schedule in the Resource Browser and then choosing Open from the Resources menu. (If a window or door schedule does not yet exist, select Reports > Create Report to create the Window or Door Schedule worksheet.
Next, from the worksheet, menu, select Database Headers.
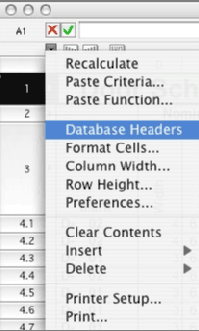
This opens a new row with a diamond at the left edge.
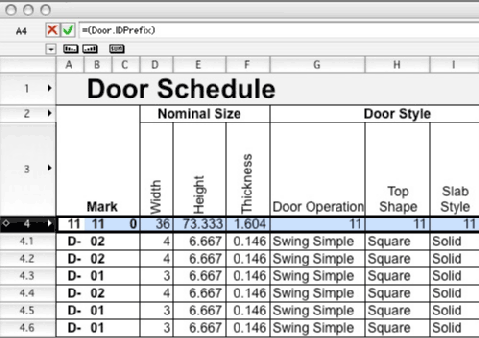
Select the database header cell that is associated with the column where you want to insert the user-defined field information. Once the cell is selected, enter the formula "=(Door.UserFld1)” or “=(Window.UserFld1)” in the Formula bar and click the green check mark.
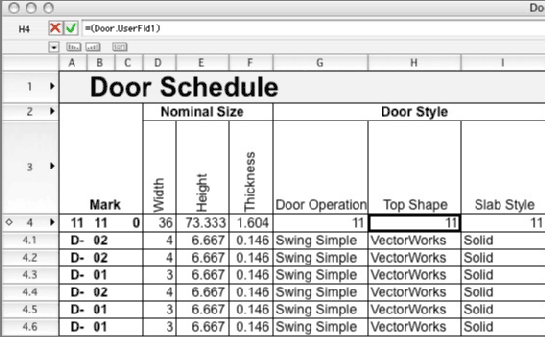
Note: do not enter quotation marks. When the worksheet is recalculated, any new data entered in User Field 1 line will display. To add any additional user fields to the schedule, change the number for each user field formula in your schedule.
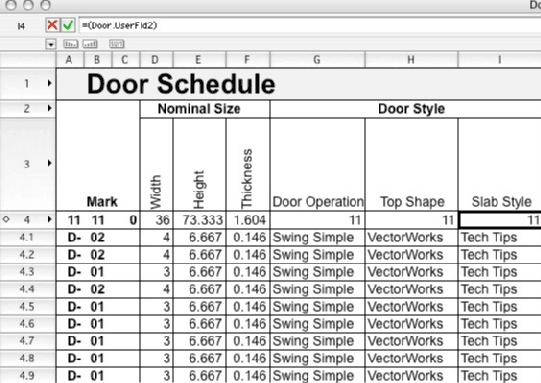
When you are finished, deselect the Database Headers option, and then change the name of the column by selecting the cell and entering a new name in the Formula bar.
Edited by JimW
Report Article
There are no comments to display.
Join the conversation
You can post now and register later. If you have an account, sign in now to post with your account.
Note: Your post will require moderator approval before it will be visible.