

There are a few things you need to know in order to properly configure the Jands Vista CONSOLE for it to work properly with ESP Vision. If you are using the offline editor, see other post that addresses the offline editor.
This discussion is valid for the following configurations:
Jands Vista console to Vision 3 MAC
Jands Vista console to Vision 2.3 PC
CONFIGURE THE NETWORK:
Both the console and Vision computer need to be setup in the Artnet range of 2.0.0.x, where x is any number between 2 and 255 (1 is reserved). As an example:
Jands Vista:
IP Address: 2.0.0.10
Subnet Mask: 255.255.255.0
ESP Vision machine:
IP Address: 2.0.0.20
Subnet Mask: 255.255.255.0
Disable all firewalls and security software on the Vision computer.
VERIFY NETWORK:
Let's verify that the Vision computer can "see" the console.
This section describes how to test the network on the MAC side of the equation:
Open the Finder, find and double-click on the Network Utilities on the Vision MAC, as shown here. 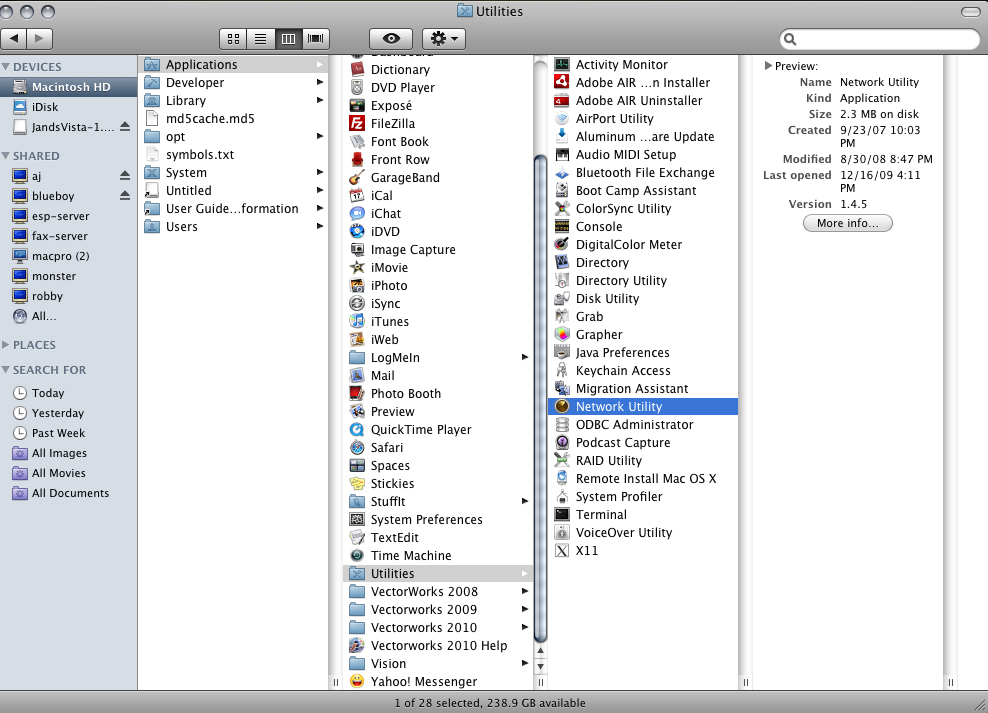
Select the Ping tab, and enter the IP address of the Jands Vista Console: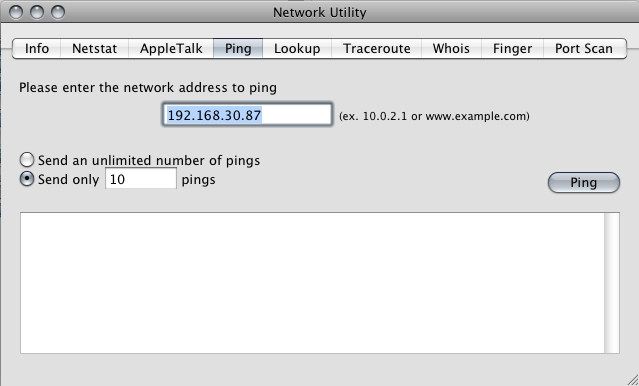
If the Vision MAC can find the console on the network, you will get responses to your Ping request, such as those shown here: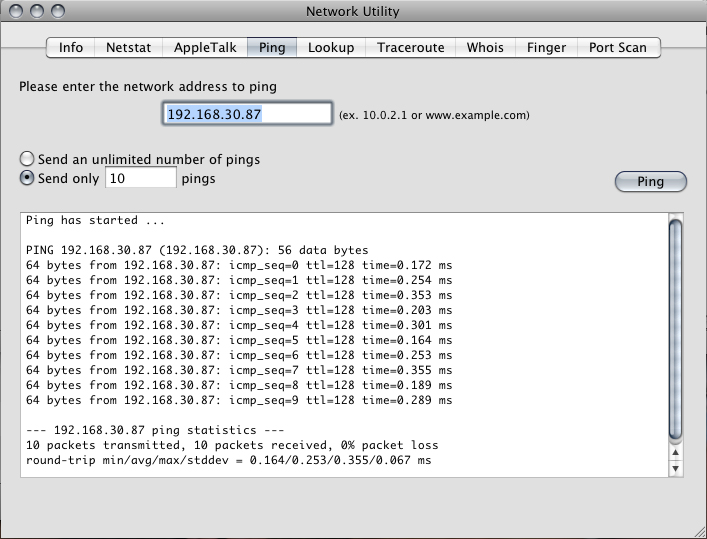
If the connection is not valid, you will get a response such as the one displayed here.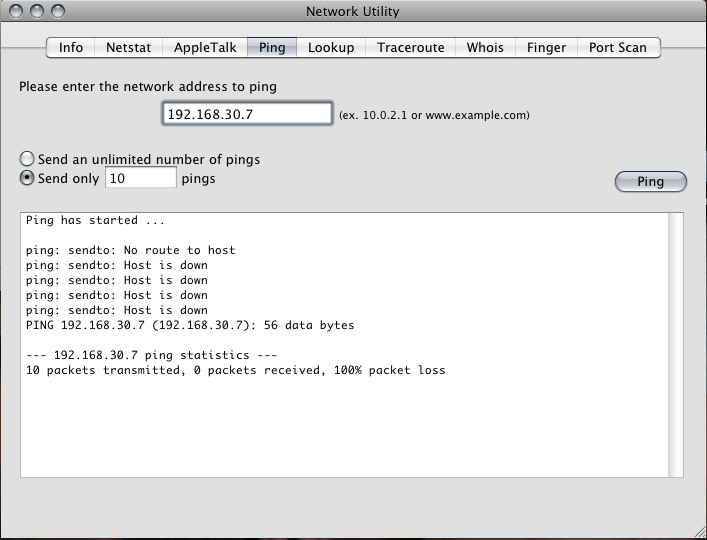
If you get this second response, the console and Vision computer are NOT communicating with each other. Check that the Ethernet cables are properly plugged into the computers and/or hub. Also, consider that you may have a bad cable. Once you are sure the physical connection is good, go back up to CONFIGURE THE NETWORK above, and verify your settings, then retest. Remember, firewalls will block this connection, and Vision and Vista cannot communicate without a valid network environment.
To turn off the MAC firewall, open the System Preferences: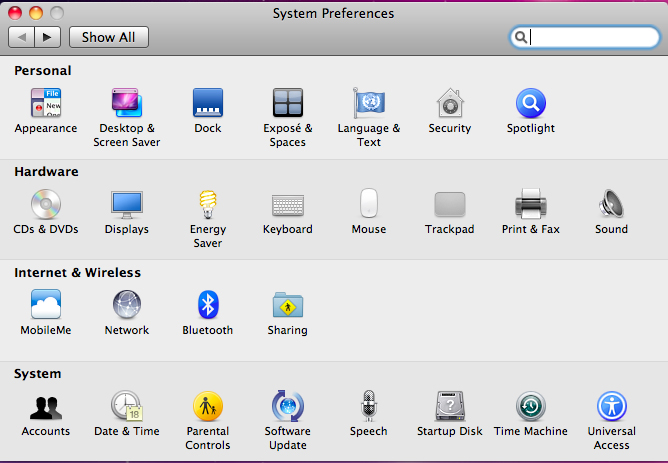
Double click on the Security icon, and select the Firewall tab.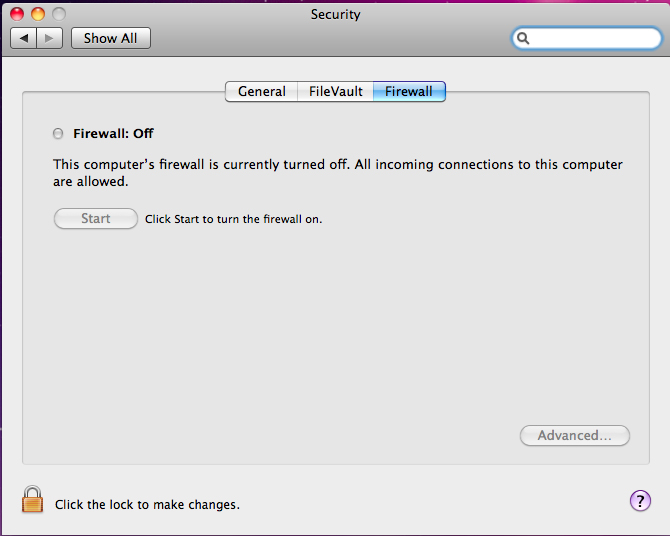
Make sure that the firewall is OFF.
Once you get a valid response on the Vision MAC, we are assured of proper two-way communication between the machines. If one of your machines is a PC, continue to the next step. Otherwise, you are ready to move forward to VERIFY VISTA SOFTWARE VERSIONsection below.
This section describes how to test the network on the PC side of the equation, if necessary:
Click on the Start button in the lower left, and select the Run option: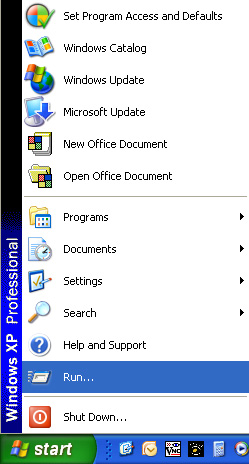
In the Run dialog, type cmd in the Open line and click the OK button: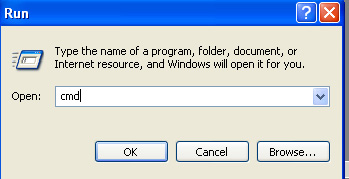
A black DOS command window will open, allowing you to issue a Ping command. Type ping, followed by a space and the IP address of the Jands Vista Console: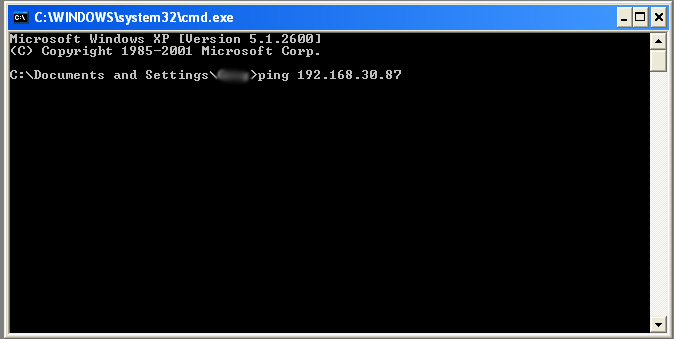
If a valid connection exists, the response will appear as follows: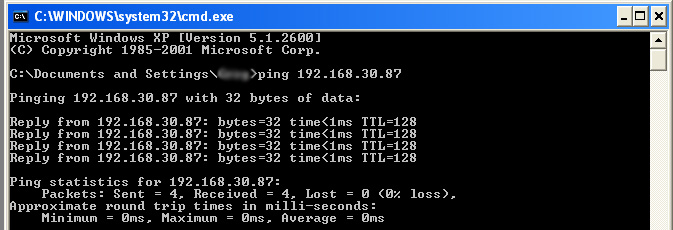
If the connection is NOT available, the response will show that the request timed out, as shown here: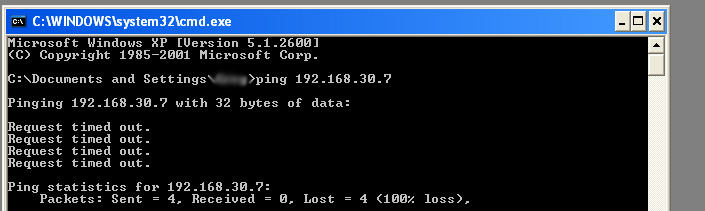
If you get this second response, the two computers are NOT communicating with each other. Check that the Ethernet cables are properly plugged into the computers and/or hub. Also, consider that you may have a bad cable. Once you are sure the physical connection is good, go back up to CONFIGURE THE NETWORK above, and verify your settings, then retest. Remember, firewalls will block this connection, and Vision and Vista cannot communicate without a valid network environment.
If you receive the "request timed out" message, check your firewall settings.
If you are using Windows XP, be sure that the Windows XP firewall is disabled. (See http://support.microsoft.com/kb/283673 for instructions).
If you are Using Windows Vista or Windows 7, be sure that User Account Control (UAC) is turned off. (See http://www.howtogeek.com/howto/windows- ... ga-sw-vista/ for instructions.)
CONFIGURE JANDS VISTA Console
Step 1: After launching the Jands Vista console, click on the patch tab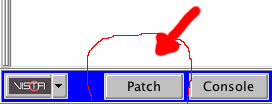
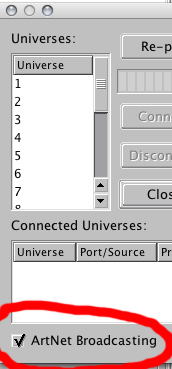
Step 2: Click on the Connect Universes tab. 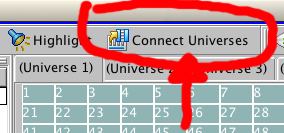
Step 3: In the dialog box that opens up, you need to first disconnect any connected universes. To do so, select each Connected Universe one at a time, and click the Disconnect button. Do this for all Connected Universes listed.
Step 4: After doing so, check in the lower left corner of this box to see if the ArtNet Broadcasting is greyed out. If this box is greyed out, continue to Step 5. If the box is NOT greyed out, go directly to Step 8.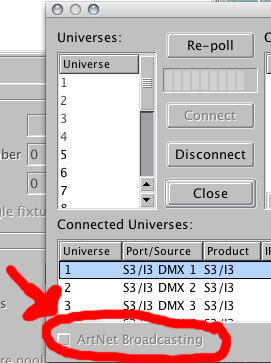
Step 5: Click on the Vista button in the lower left corner of the offline editer. Select User Preferences. 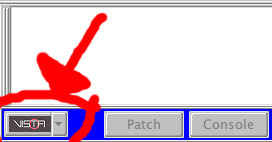
Step 6: Click on the network tab, find the Broadcast Artnet property, and switch that from off to on. Click Close
Step 7: Go back to the Connect Universes dialog box.
Step 8: Check the box next to ArtNet Broadcasting
Now, you should be able to patch your show (or load an existing show), and you should be good to go. If you are running Vision 2.3 PC, be sure to select Artnet as your DMX provider. At the moment, Artnet is the only DMX Provider for Vision 3 MAC, so you don't have to select anything.
Edited by JimW
Report Article
There are no comments to display.
Join the conversation
You can post now and register later. If you have an account, sign in now to post with your account.
Note: Your post will require moderator approval before it will be visible.